Running with Chisels Vol. 9
Marquetry tips
Browse by Category:
Welcome
Our corner of the internet dedicated to decorated furniture
#saynotonakedfurniture
#dressyourfurniture
rwc archive
tools
classes
Vol 9. | Jan. 31, 2024
Welcome to 2024 – when marquetry will continue its takeover of the naked furniture space. We are now well over 300 intrepid readers strong. Thanks for coming along for the ride!
From Jan. 14: I learned a truth today. It doesn’t matter how narrow an impenetrable storm is if you can’t get through it.
We are in a hotel in Buffalo waiting for a lake effect snow storm to clear so that we can drive on to the bridge to Canada to stay with family for the next month. I think I got within 2 miles of making it, about 10:30 this morning. Sadly, 6 hours later I am still two or three miles from the border, though much warmer and better fed. We were lucky to get out of the weather early – the storm is still raging out there, and I feel very sorry (as well as appreciative) for the emergency workers out doing their jobs. For those who follow American Football, this is the storm that postponed the Buffalo Bills game. We drove past the stadium at 10 am. It had just started snowing, and I was optimistic, which turned out to be an error.
Let’s talk optimism. I believe that if you don’t think you can do something, you are likely correct. If you believe that you can, you are also correct. That is true with exactly the same skill level. Attitude alone cannot conquer Mt Everest, but a cautiously optimistic approach – a “how can I get this done”, rather than “I’m not sure this will work “makes all the difference. Try it, study the results, identify the weakness or flaw, and figure out how to beat it. That is my mantra, and it works. And the more it works, the more comfortable you will be with the approach.
I have commented on this approach in class and I recently was asked how many projects I have lost to this approach. I do not believe that I have ever completely lost a panel. A few turned into something other than what I had originally planned, for sure. I have also lost panels by sanding through them (hate that!), by having them not lay flat in the press (rarely), by having them stick to the melamine backer by using too much glue, and other crazy reasons. When you make enough things, there are losses. I mourn each one and try to learn from it. It’s when I make the same mistake a second time that my temper gets short. I do believe though that if I didn’t push myself into situations where I don’t know how to do something, my work would stagnate. I personally have a high tolerance for uncertainty, and not everyone does. If yours is lower, take smaller bites, but please – for the sake of your future self – push against your limits. And then spread your hard-earned knowledge so that the next person’s uncertainty starts a little further along. That is what this newsletter is about – us all getting smarter together.
Postscript on the snow – within a few miles, the next day, the amount on the snow was much less. A few miles further the roads were clear. There was no snow on the ground 20 miles further on. Details make all the difference!
In this edition of Running with Chisels:
- Ask Dave: Do you use fillers between pieces?
- Around the Shop: Plans and Philosophy for 2024
- Tech(nique) Topic: Laying in a Narrow Line in your marquetry
Ask Dave: Do you use fillers between pieces?
CK writes: That collaboration piece is incredible; great job. I have a question, do you use a dark filler in the gaps between the pieces? This is especially evident on the lighter flowers and I think it has a nice effect in highlighting the individual petals. Or is this just the glue you use?
A:
You bring forward an excellent question, because with double bevel there should be no gaps for glue to live in. There are three possible answers, depending on what you are keying on. I will give you all three and hopefully they are of some use to you.

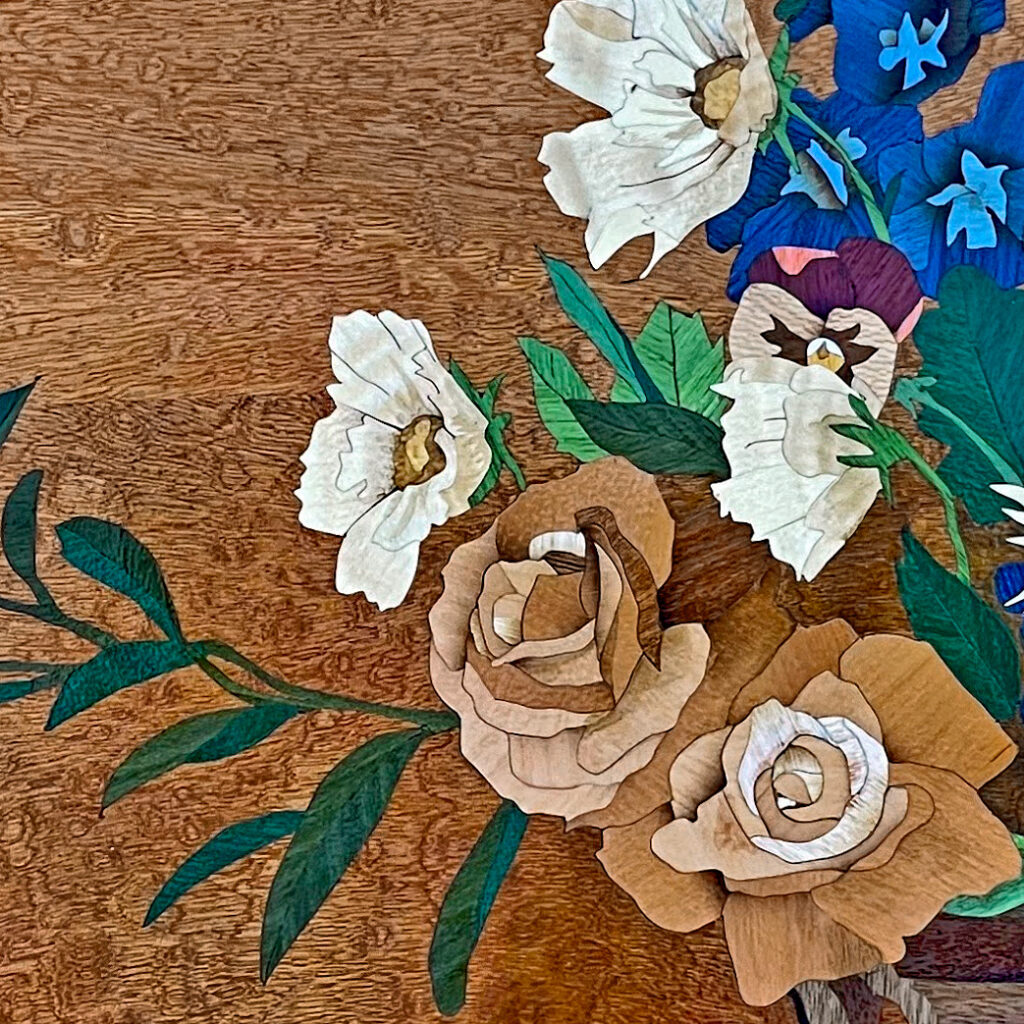
1) The flowers were assembled one at a time, then inserted into the background panel from back to front. When making the sub-assemblies I use fish glue (hide glue) to stick the edges of the pieces together, as I cut each petal/piece of veneer. This stiffens the assembly, and allows me to continue to add more small pieces reliably. When I don’t glue them together the packet gets floppy, which makes cutting more difficult than it already is. I think that I can see the edges defined by that glue, though it cannot be felt, and it really shouldn’t be there at all, since the pieces fit together perfectly. But I can see it, even though it’s “not there”. I decided I liked it, in this case, so it was OK.
2) In some cases, there is sand shading along one edge to help define it. I sand shaded the strips of veneer that I cut the petals out of, then positioned the cut to incorporate the shading. I made this technique up since I didn’t want to have to deal with the curvature and shrinkage when sand shading after cutting. Thinking about it, this is how you make Federal fans. I just haven’t heard of it being applied in double bevel marquetry.
3) The third possibility is this: I use transfer paper to mark my cut lines. Those lines are on the surface of the veneer and are sanded off after glue-up. However, I am 100% sure that some of the lines from the transfer paper end up on the cut edge, so are marginally below the surface of the veneer, so are not sanded off. If this is true I’m not happy with the source of the lines but I still like the result, since many of the flowers are quite monochromatic, and some slight definition of the edges is good.
Around the Shop: Plans and Philosophy for 2024
Most years I begin by writing a list of the things that I hope to accomplish in the upcoming year. I find that it’s good for a laugh, at least. By forcing myself to write this list I realize how many more ideas and commitments that I have vs the time available. I then try to set an order so that I get the commitments done, and at least one thing that I’d like. Looking at the list I just wrote for 2024, I get to make one thing for fun, or I defer my much-needed shop reorganization for another year. Sigh. I really want the shop redo, since it will make teaching classes in the space more efficient, so at this point that is the plan.
The “fun” cabinet that I am planning to build is for the SAPFM conference in June (so a commitment). I was asked to talk on a subject of my choice, so I will discuss issues specific to veneer and marquetry when building a jewelry armoire (for my wife). There is a space in our bedroom that is a good size and the light is good but indirect. Now the minor issue of designing and building it awaits. I’ve got almost six months – what could possibly go wrong?
Tech(nique) Topic: Laying in a thin line in your marquetry
It is possible when using double bevel marquetry to create a line that is thinner than the wood will allow if cut on it’s own. How do we do this?
Here is an example of that:
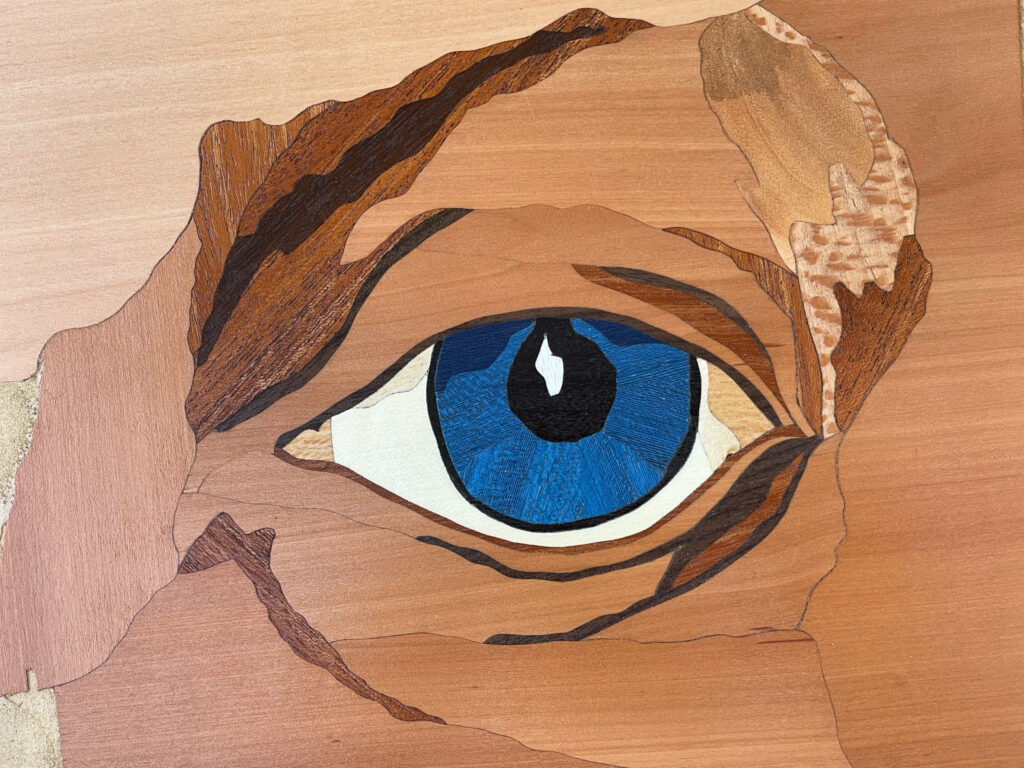
The thin line under the eye is less than 1 mm wide, and some of it is short grain. That would not survive as a separate piece so we don’t cut it that way.
Outlined below is a step by step outline for orienting the piece, laminating it with blue tape and edge glue to a larger piece for strength during the cutting process, and then moving forward with the next additive piece. Note: these instructions are best viewed on desktop or tablet.
We are making petal A, which consists of petal pieces A1 and A2, and a narrow orange stem in between.
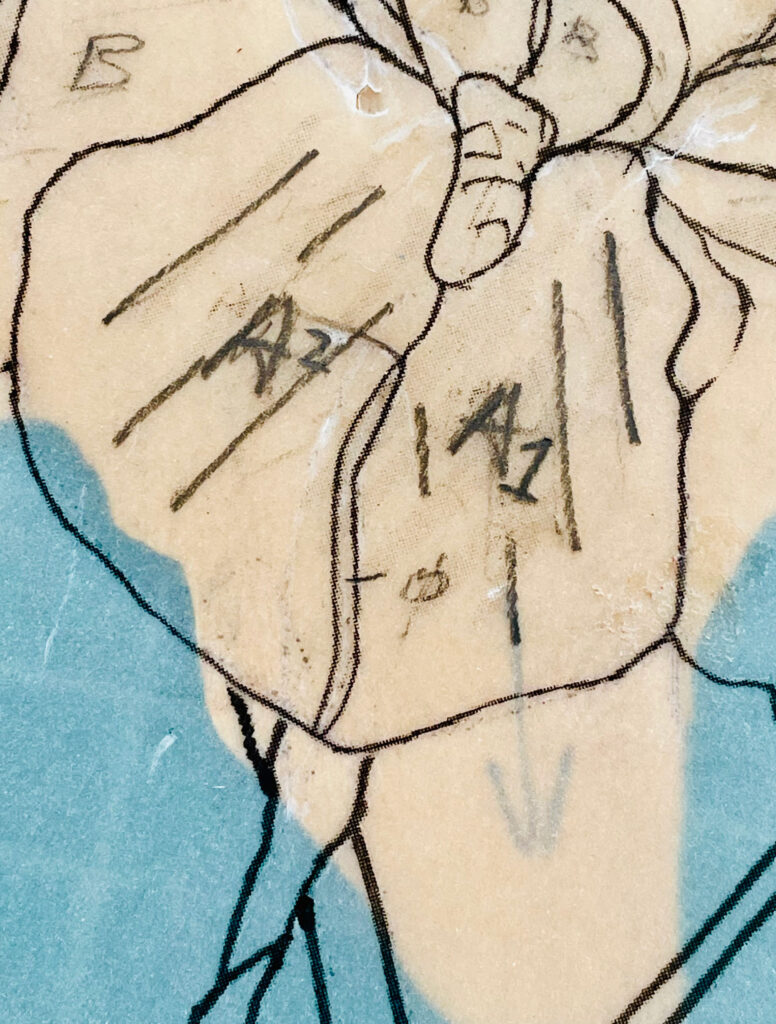
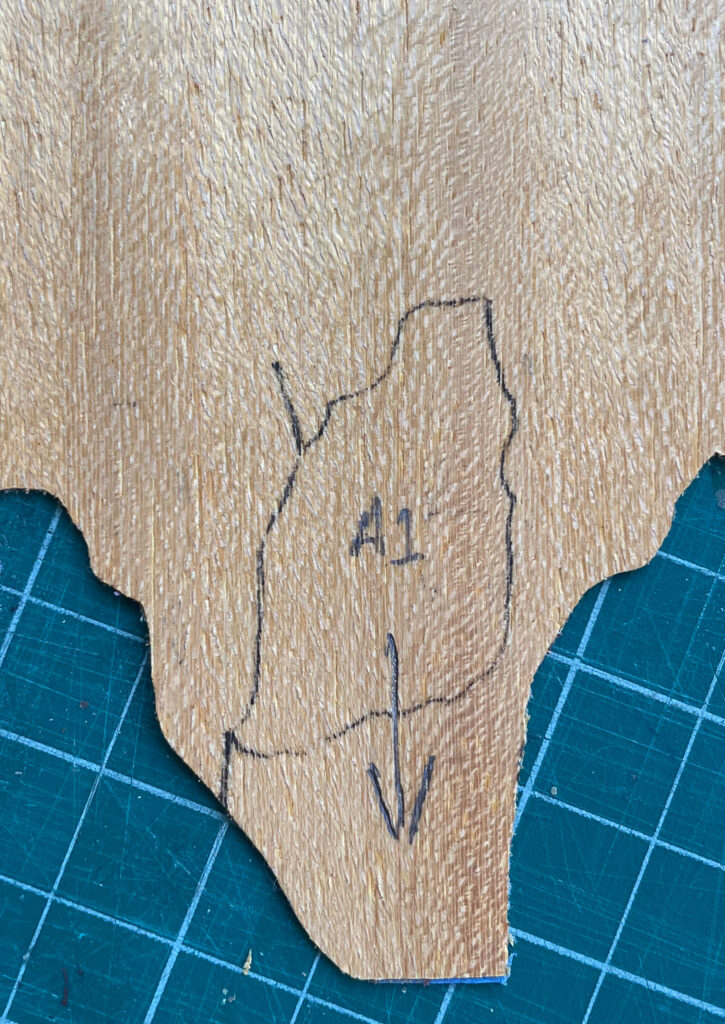
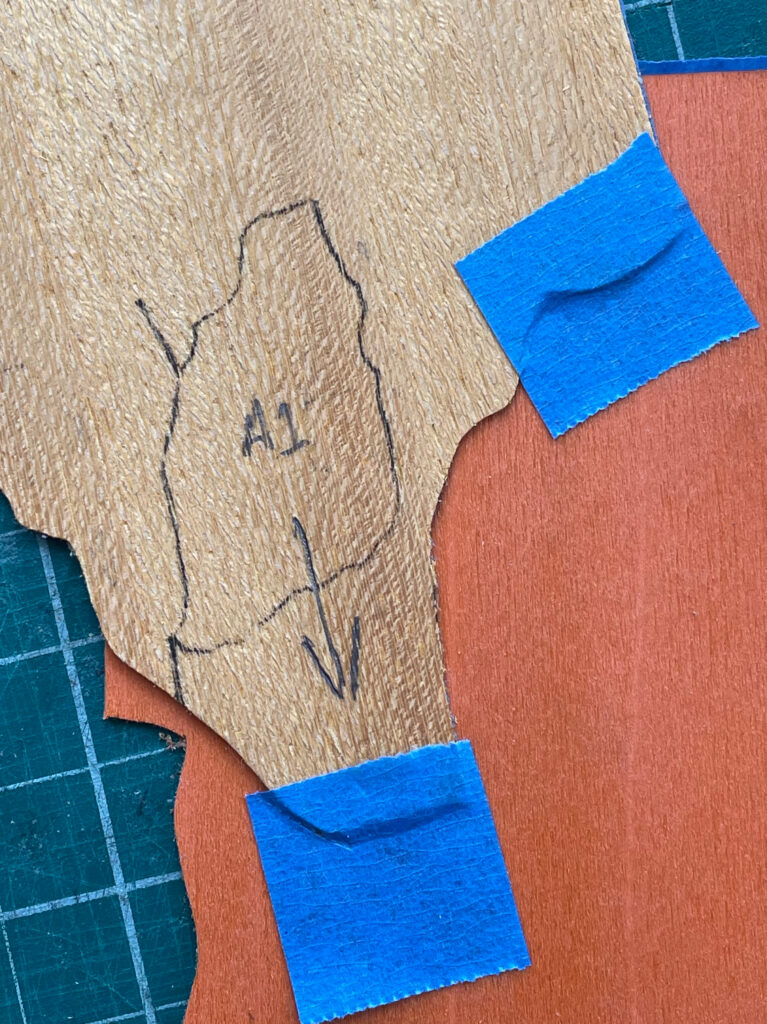
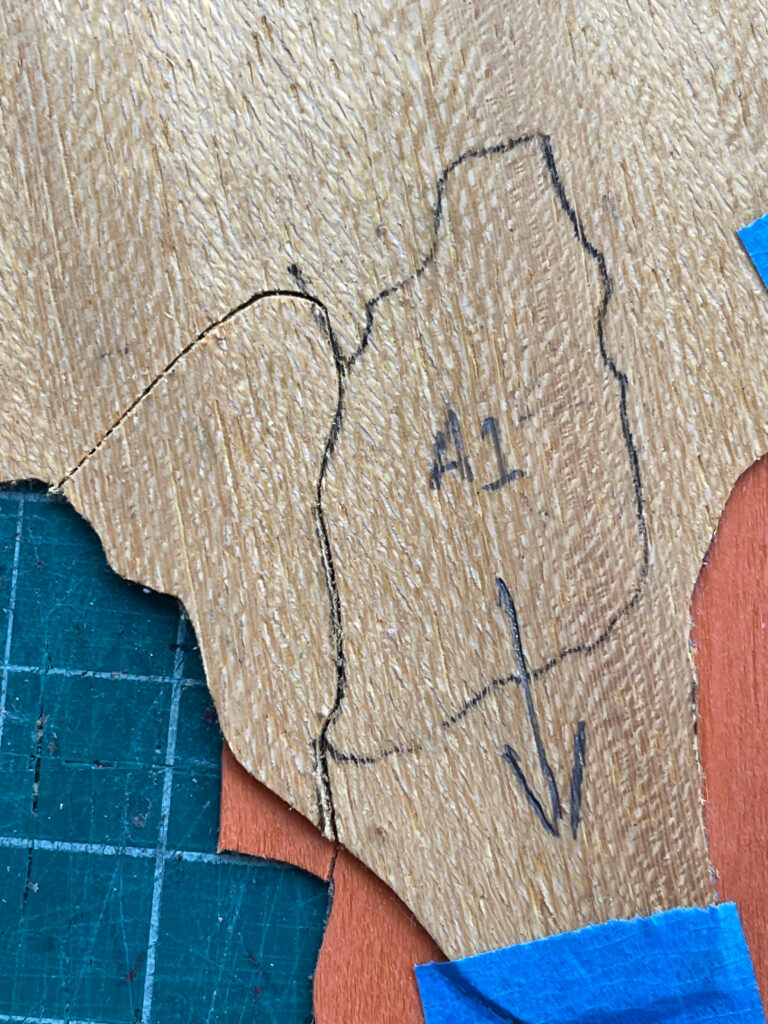
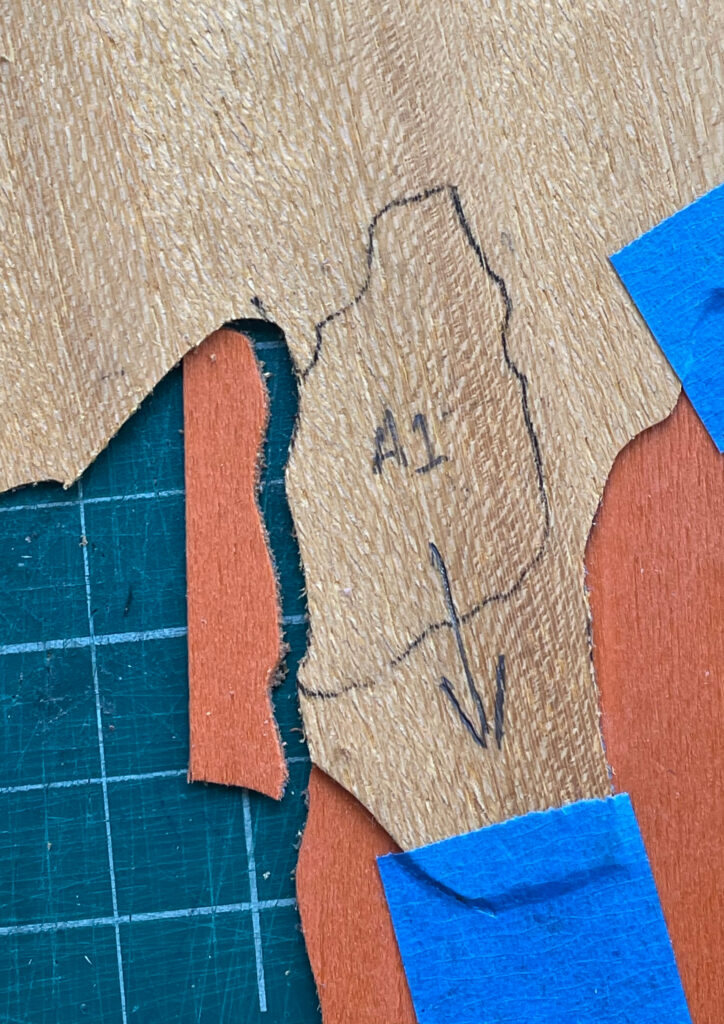
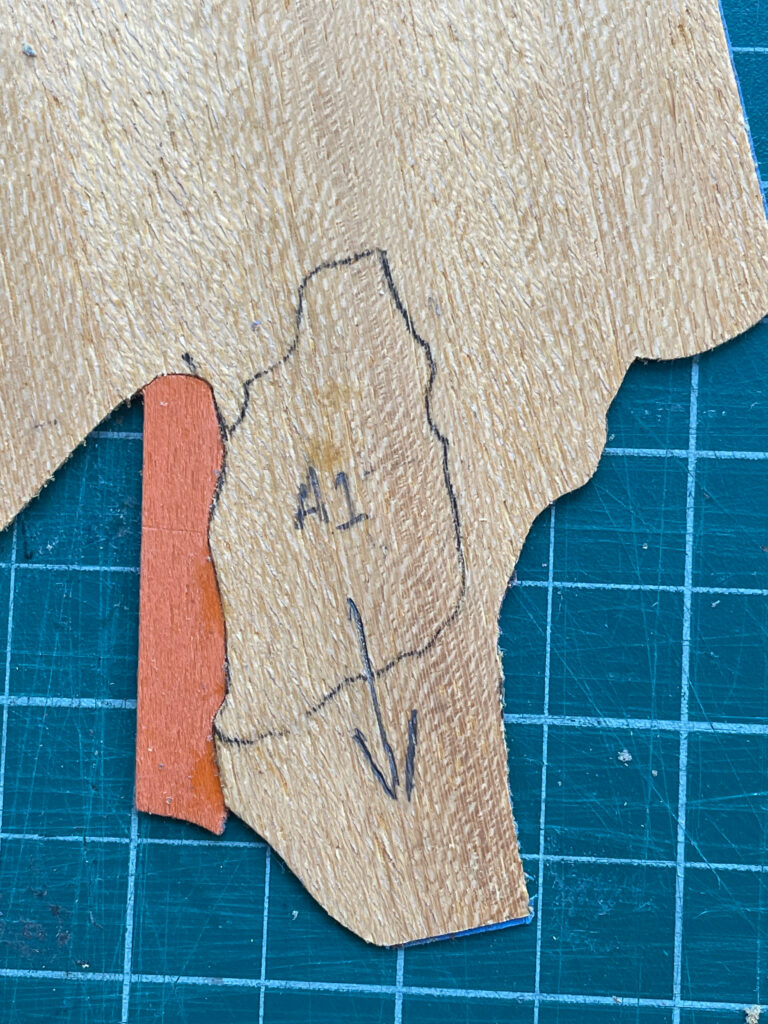
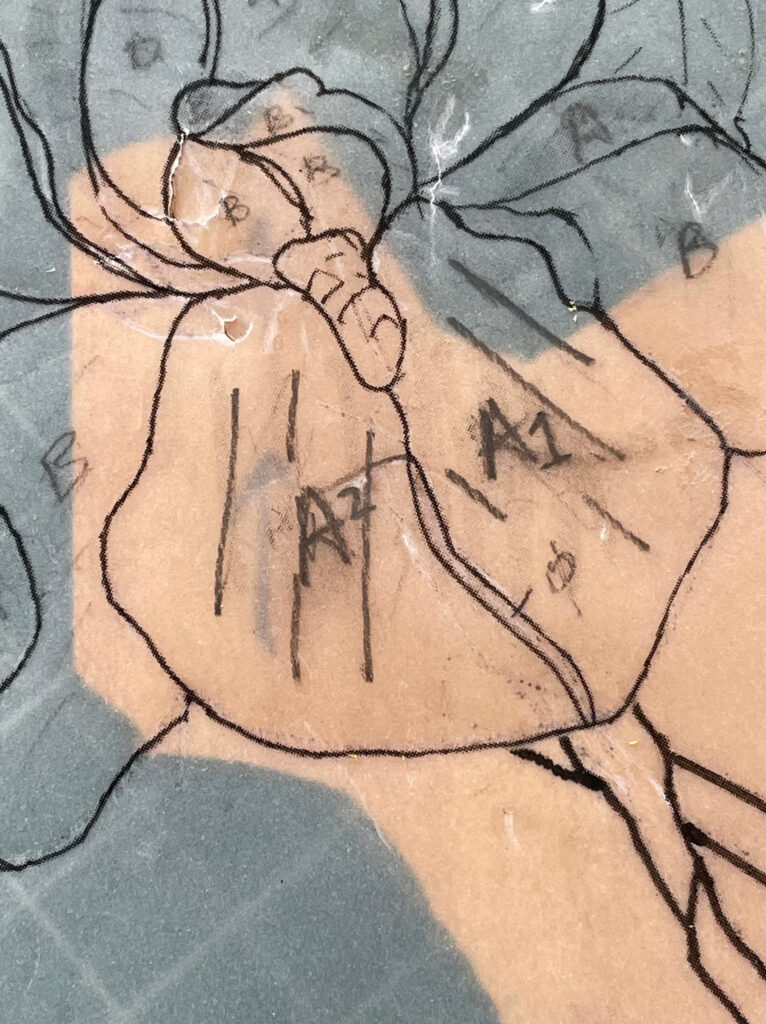
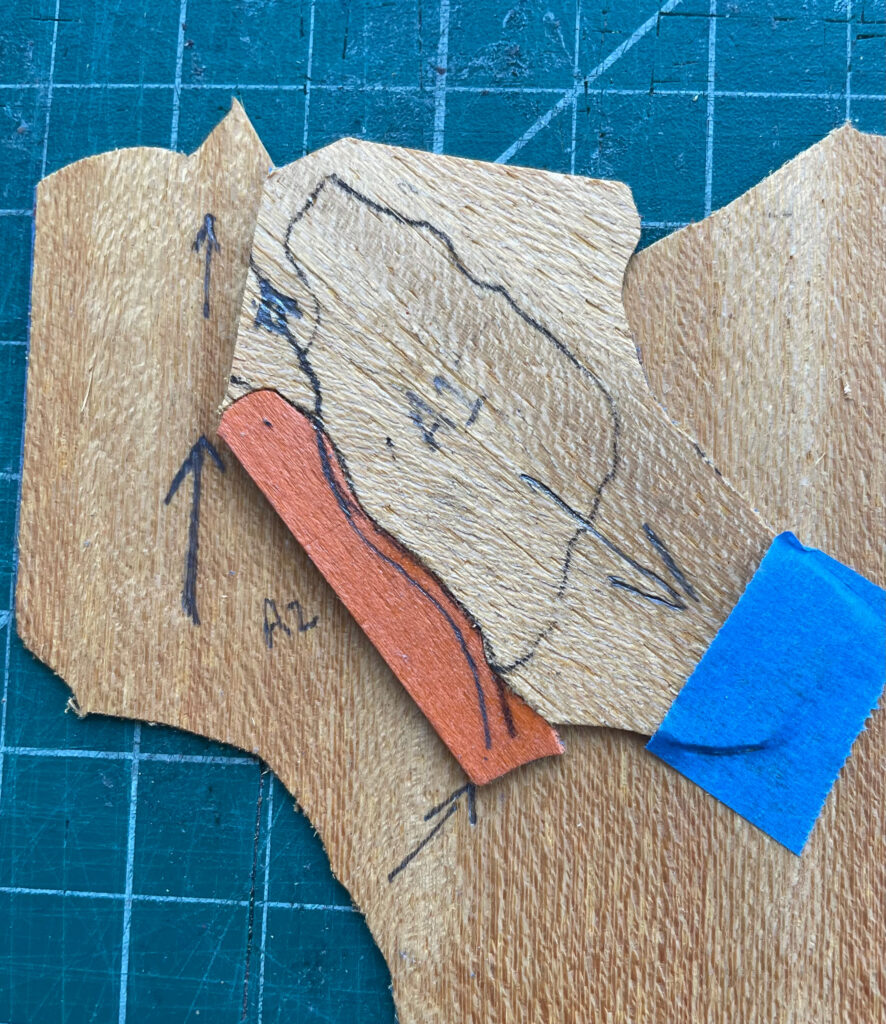

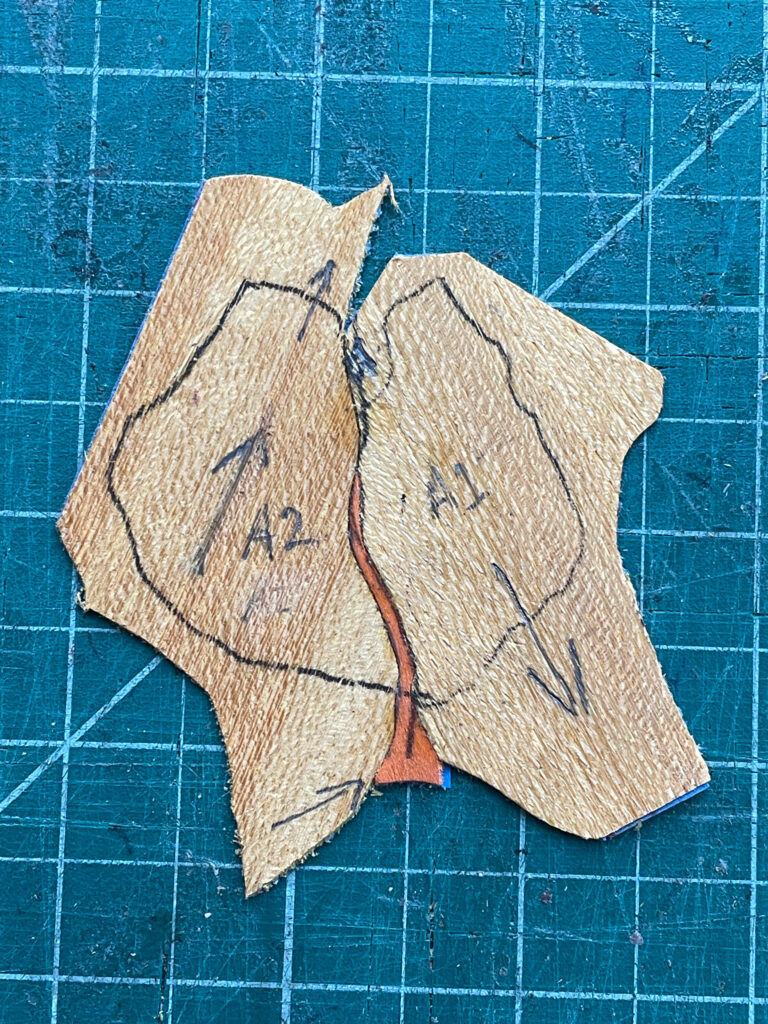
This traditional technique works better with thicker veneer, but as you can see it will work with (most) commercial veneers. It is challenging if the thin strip is a fibrous weak wood, but no problem with maple, cherry, sycamore or other fine grained stronger woods. Since the final line is thin, only the color really matters (not the figure), so choose something strong.
This technique and others is covered in my Double Bevel I class. If you’re interested, I have 2 spots left in my March class, and I will not offer Double Bevel I again until the fall at the earliest. Click here to learn more and sign up.
return to the running with chisels archive
return to top
©️ 2025 Heller & Heller Furniture | Privacy Policy | Terms