Running with Chisels Vol. 6
Marquetry tips
Browse by Category:
Welcome
Our corner of the internet dedicated to decorated furniture
#saynotonakedfurniture
#dressyourfurniture
rwc archive
tools
classes
Vol 6. | September 15, 2023
Welcome to Running with Chisels, or welcome back.
This month we’ve got Dave’s top marquetry books (ideal for gifting, with the holidays right around the corner it’s the perfect time to update those wishlists!) and a sticky subject: glues & the glue up process.
First, a big thank you to those of you who have already signed up for classes next year – we are looking forward to welcoming so many new students to our shop and the community. Our journey to abolish naked furniture is ongoing, and we appreciate your support #SayNoToNakedFurniture !
This is the final reminder that we will be slightly raising class prices for next year on October 1. If you would like to secure this year’s pricing for next year’s classes, you have another couple of weeks.
In this edition of Running with Chisels:
- Ask Dave: Top Books for the Marquetarian
- Events & Classes: New Double Bevel II Class
- Tech(nique) Topic: Glues & the Glue Up Process
Ask Dave: Favorite Books on Marquetry
I have several woodworking books. Possibly several hundred, but only a dozen or so on marquetry and veneering, and another dozen that include it among other woody topics, like box-making.

The book that I recommend in class is The Craft of Veneering by Craig Thibodeau,(ISBN 9781631869006). It was published in 2018, so it is up to date. It covers all of the common techniques, and it is well written, so it’s easy to understand. It also shows inspirational pieces. There are only two chapters on marquetry, but you have this newsletter! The veneering information is the important stuff, and it’s well done.
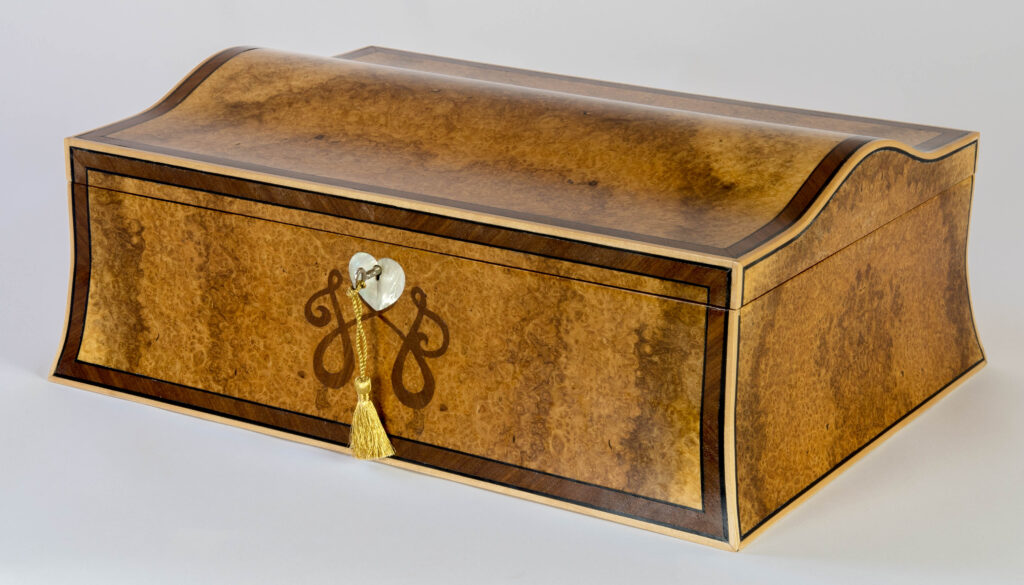
Andrew Crawford has a wealth of veneering technique in his first two books, the Book of Boxes (ISBN 1-56138-290-6, 1993), and Fine Decorative Boxes (ISBN 0-8069-9862-8, 1998). Both are sadly out of print but are available from used book stores. I made several of his boxes as skill development exercises, as shown. Andrew later wrote a couple of books that were primarily inspirational. He is promising a new book on box making later this year, which I am looking forward to. For more inspiration, follow Andrew on Instagram at @smartboxmaker.
The three book opus the Masterpieces of Marquetry , by Pierre Ramond (ISBN 0-89236-592-7, 593-5, 594-3, translated in 2000) is a history of techniques and styles starting in Italy in the 1400’s through the present. It is illuminating and masterful, but it’s not an easy read. This is a book written for academics, historians, and furniture conservators. It is translated from the French, so it is more structured and formal than is typical in English. I am told these books were from Pierre’s Master’s thesis, required when he became the Head of the Ecole Boulle.
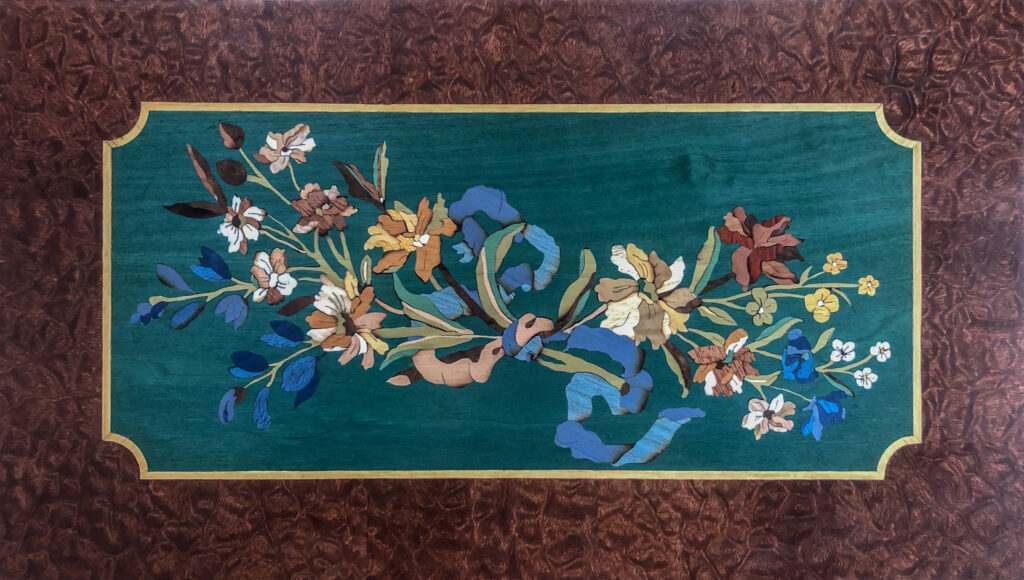
There is an enormous amount of information in it, much not applicable to modern marquetarians because the materials have changed vastly over the years. Woods, glues, substrates and tools have all evolved, and techniques have evolved with them. They are great books, but interpretation is required. Note that all three books have large scale drawings of outstanding designs – the third book is entirely plans. If you want to make some serious French Marquetry, he has the plans for you. This is a panel I made from book three, just to see if I could.
There is also a one book summary called Marquetry, by Pierre Ramond, (ISBN 0-89236-685-0, 2002). I found what was included quite random, and I prefer the three volume set, which has all of the information in a clear and sensible order.
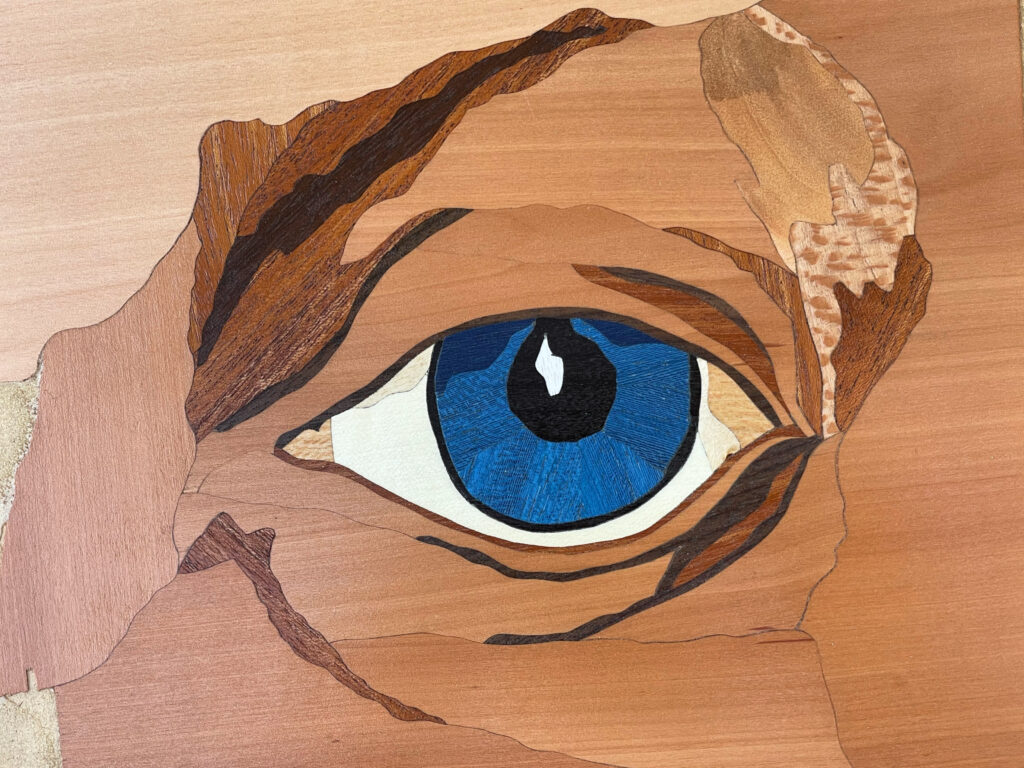
A Marquetry Odyssey by Silas Kopf (ISBN 978-1-55595-287-7, 2008) is similar in concept to Ramond’s book but is both more specific and accessible – for starters, it is written in English from a practicing Marquetarian’s standpoint. Examples are interwoven with Silas’s biography, and shows the evolution of his work and the historical precedents he was inspired by. There is some technique in the book, but mostly history and pictures of extraordinary work. This eye is my interpretation of one of his technique sections.
For broader design inspiration, I go through furniture books in the style that I am interested, and I go to Decorative Arts Museums. I will write about my favorite museums in the newsletter later this year.
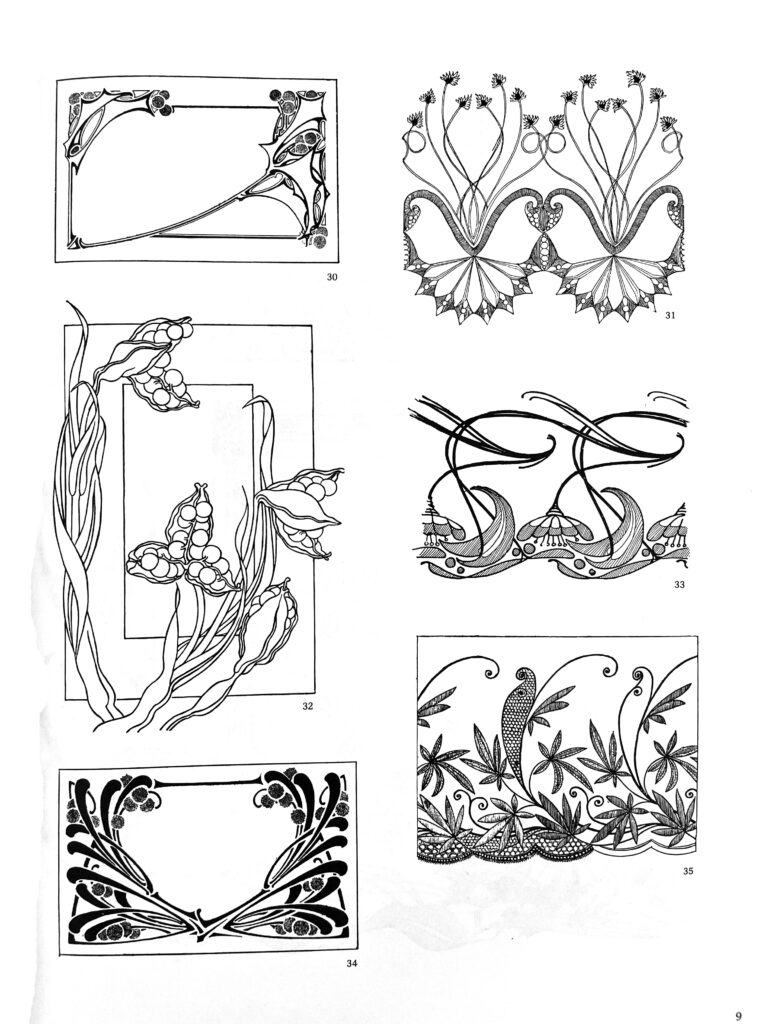
If I need line drawings in a particular style to work from, I use Dover Press Reprints. There are hundreds and they are individually quite inexpensive. As an example, this picture is from “Treasury of Art Nouveau Design and Ornament” by Grafton, Dover 1980. The series is widely available in used book stores as well as new, and have very liberal copyright rules – some even come with digital files included (albeit on CD)
Class Focus: Double Bevel II
Our new class expands on our Double Bevel I with some…fishy results.
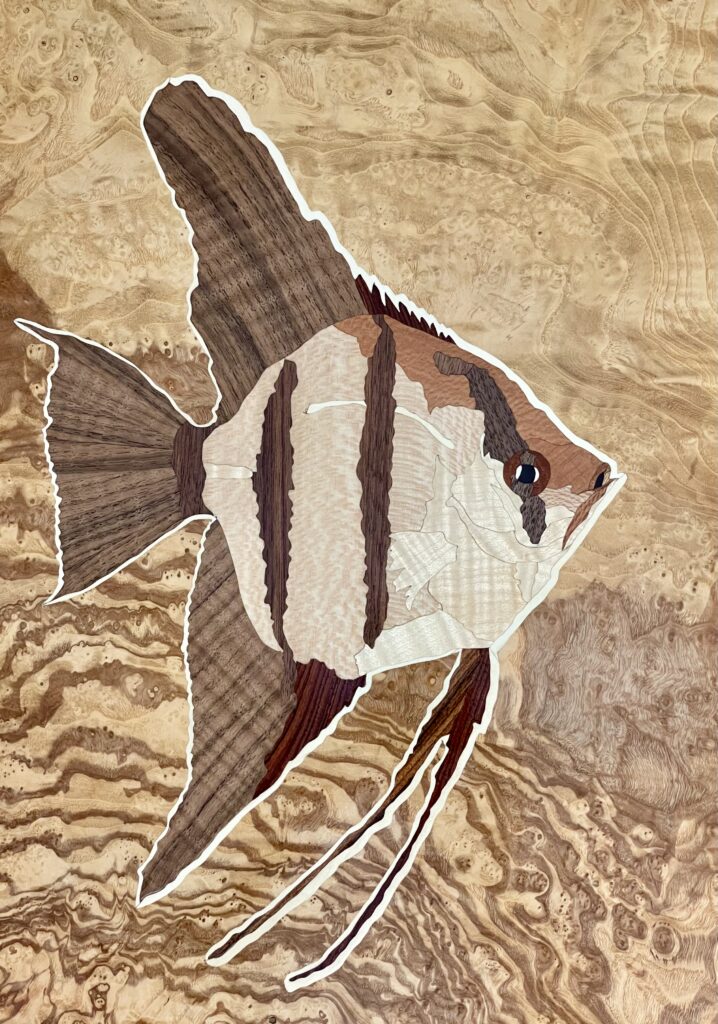
This new intermediate level class will be taught on March 2-3, 2024 in my shop in Charlottesville.
The objectives are to focus on the sequencing required to make a complex picture, and include some fine lines. The Angel Fish picture will be the project that we will make while focusing on those techniques. It includes a multistep eye and mouth, some interlocking pieces, and the long thin line all the way around the fish. It is a challenging but manageable picture.
There are only a couple of spots left in the March class, though I will happily teach a second edition if the first class fills. This was an enjoyable picture to make, and thanks to suggestions from my Instagram followers I now have a raft of alternative colors to try out for my next version.
Geometric Marquetry II update coming next month!
Technique Topic: Glues and the Glue-Up Process
The text below is recently updated, and is part of the reference material I provide with each of my classes on marquetry and veneering.
Once the veneered panel is assembled, the veneer tape is applied and the substrate is prepared, it’s glue-up time.
Both surfaces of the substrate need to be veneered in the same session unless a non-water-based glue is used. This is especially true of thinner substrate panels – ½” or less. If only one side is veneered, the water in the glue will cause that side to swell and therefore bow. The glue will then harden, locking the bow in place. The water will then evaporate, but the hardened glue will not allow the panel to relax. Veneering the other side later will add more stress to the panel, and cause it to flex in some other direction, but going back to flat is unlikely. We therefore glue up both sides at once.
PVA (white glue, Titebond) works fine for normal veneering. It is inexpensive, has decent open time, and it’s already in most shops. Its downsides are that it can cause finish issues if it gets on the veneer’s surface, and that if you get a bubble it can be hard to repair, since PVA doesn’t adhere to PVA, only to raw wood. I use PVA when I’m in a hurry. I apply PVA with a 4” fine foam roller, which I then store in an airtight bag so that I can use it again later.
Usually I use Old Brown Glue for veneer panels. It is more expensive than PVA, but it addresses all of PVA’s limitations. It is much more finish tolerant and can be reactivated indefinitely with moisture and heat. Bubbles are easier to fix, as are longer term repairs. It does take about 24 hours to completely dry though, vs 6 hours for PVA. Franklin also makes a urea inhibited hide glue, which is what OBG is, however I know the owner of OBG and am already familiar with its quality, so I buy it from them ( via Lee Valley). I use a different 4” fine foam roller for my OBG than the PVA, and store it in an airtight bag. This roller can last six months if I am careful with wrapping it.
I use traditional hide glues and hammer veneering for certain applications, but not for complex panels.
Craig Thibodeau, a very fine veneer-oriented furniture-maker, uses Gorilla Glue for veneering. It does not contain water and has a decent open time. It only foams when there is room for it to expand. He described his techniques in Fine Woodworking and in his book, the Craft of Veneering. I have tried it and it definitely works. Since Gorilla Glue is an epoxy resin, it has no water, so the panel doesn’t bow when veneer is only attached to one face. (Gorilla now makes a PVA glue that is completely ordinary, and several other formulas – I am referring here to the original formula only.)
Gorilla Glue has two of the issues that PVA has – it interferes with finish, and is resolutely unrepairable. My other main beef is losing a roller for every application. With PVA and OBG, if the roller is wrapped in plastic (a bag, or wrap) so that air can’t get to the roller, it stays wet for at least a couple of weeks. This doesn’t work with Gorilla Glue, or any other kind of epoxy.
I would only use epoxy glue for a complex two-sided glue up which has to be done one side at a time. You also must be able to sand the final panel by machine, since all of the glue that seeps through the pores has to removed and it is hard as a rock. I would highly recommend making some test pieces. Note that Gorilla Glue sticks to almost everything, so use silicone baking sheets to keep it away from your platens and cauls. Sticking the panel to the platen is very discouraging.
Bubbles
These are very sad, and quite common. I wish I could say they never happen to me anymore. Glue needs to be applied to the substrate very evenly, which is why I use a 4” roller. The glue needs to be continuous but not too thick. That would interfere with the veneer staying where you placed it.
If you miss a spot more than half the size of your smallest fingernail, you will get a visible bubble. You will see it as soon as you apply water or finish to the surface, a good practice to do soon after the panel has dried, since it is easier to repair a bubble before the glue has fully set. .
If you used hide glue you would quickly heat the spot to revitalize the glue, and then clamp it, and it will probably stick. PVA is also heat sensitive for up to 72 hours after gluing, so apply an iron if you catch a bubble the next day. Otherwise you need to slit the bubble (on the side, with a scalpel, on a grain line if possible), insert a little glue, and then clamp. It may be fixed and not visible. With practice the repair damage gets less noticeable. If you sand without repairing first you will sand through the bubble. Repair is now really complicated.
Worse is that everything may appear fine until you apply some finish, then the bubble swells with moisture. This is very bad because the finish interferes with the repair. I routinely wash a veneered surface with water or alcohol before sanding or finishing, seeing if bubbles appear. That also will show you if any glue is visible and will show under your finish. Fix any bubbles prior to applying finish – it is much easier. Shellac is moderately tolerant, water-based poly or varnish much less so.
Sometimes the bubbles get through regardless. And sometimes you get lucky, and the ones that only become visible while you are applying the finish coat go away as the coat dries. I don’t know what happens to them in the long term, but I have seen this happen, and so far those bubbles haven’t reappeared.
Clamping/Pressing
Once a complete and even coat of glue is applied, the veneer panel is applied to the substrate. I always apply the back first. The panel is flipped over and the process repeated. The front veneer panel is applied, and maybe a little tape to align things.
I use a vacuum press for all of my work. It applies about 12 pounds per square inch of pressure evenly over the entire surface, up to the size of the press. I put the picture show side up so that any variations in veneer thickness can be addressed by the bag. I often place a sheet of silicone on top so that bleed through doesn’t get glue on the inside of the bag.
Small panels could be pressed in a book press, or a similar screw-driven unit. They work well if the pressure is evenly applied, which works best for panels the size of a book or smaller. If there are any deviations from flat, a rubber mat or something similar is required. I’ve had decent success, but prefer the vacuum press.
Clamps and cauls are the other alternative. Very large setups are possible. I have no experience with the old mechanical pressing systems that were used before vacuum presses.
return to the running with chisels archive
return to top
©️ 2025 Heller & Heller Furniture | Privacy Policy | Terms