Running with Chisels Vol. 4
Marquetry tips
Browse by Category:
Welcome
Our corner of the internet dedicated to decorated furniture
#saynotonakedfurniture
#dressyourfurniture
rwc archive
tools
classes
Vol 4. | July 14, 2023
Welcome to Running with Chisels, or welcome back. Last month’s newsletter was a bit brief – Dave and Elizabeth were traveling and teaching and the schedule has been jam-packed.
This month’s newsletter is absolutely full of information – and you may notice some housekeeping changes as well.
Without further ado – Vive la résistance! Say no to naked furniture! & Happy Bastille Day.
In this edition of Running with Chisels:
- Ask Dave: How to dress up a basic box?
- Events & Classes: Catching up with the “Grandkids” at Sam Beauford School
- Class focus: Elliptical Fan part 2
- Tech(nique) Topic: Best Scroll Saws
- Shop Updates
Ask Dave: What are some simple or subtle things box makers can do to “elevate” their work from four sides, a top and a bottom, to artistic pieces?
A: Ooowww, good question. It’s still one that I am working on, but I have some ideas.
To start with, it helps to have a style, and then to refine it with successive boxes. And then occasionally, do something completely different, to try out new directions and approaches.
I am an unapologetic devotee of Andrew Crawford, who designs and makes stunning veneered boxes and elegant box hardware that I use on my best boxes. He has written several books in which he shows how to make a variety of boxes. They are out of print but available from used book sellers. He has a consistency of approach and feel that I find attractive. This compound curved serpentine lid box is described in his first book and when I made it in 2011 it was the most challenging thing I had made.

I am always open to inspiration. I go to Applied Arts Museums wherever I find them. They have boxes in many styles. The box below is very similar to one designed by Hoffmann in 1905, which is in the MAK in Vienna.
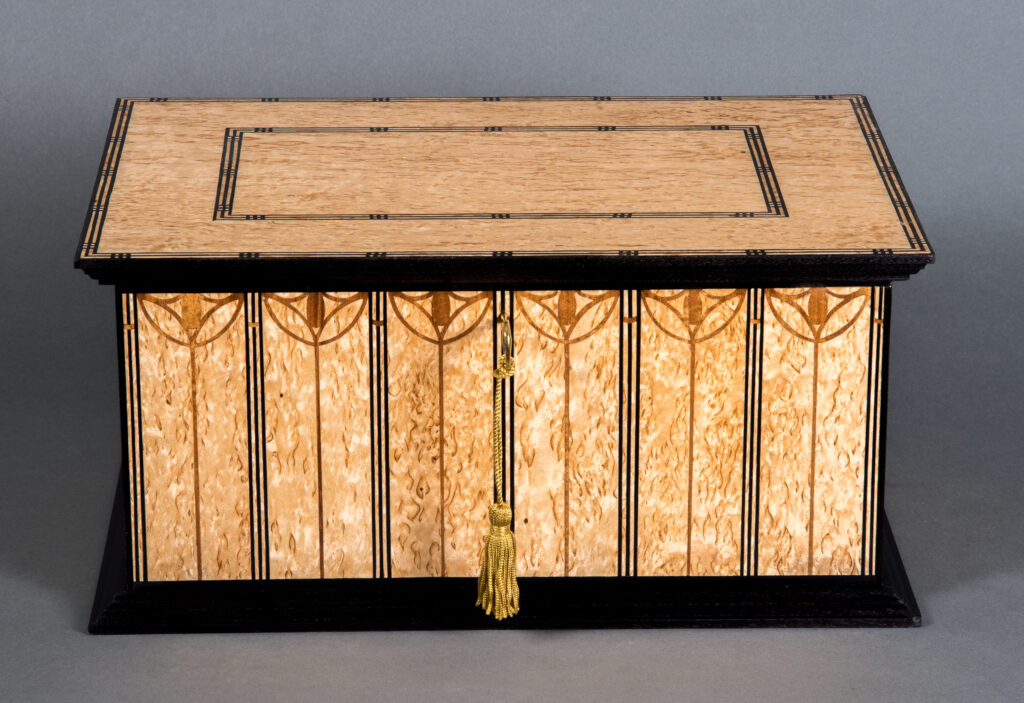
Since boxes are small, they don’t require a lot of materials. Exquisite materials go a long way towards elevating the look and feel of the finished piece. Given how many hours go into a beautiful box, material costs are secondary. Incorporating unusual materials can also add pizzazz, as can using a standard material in an unusual way.
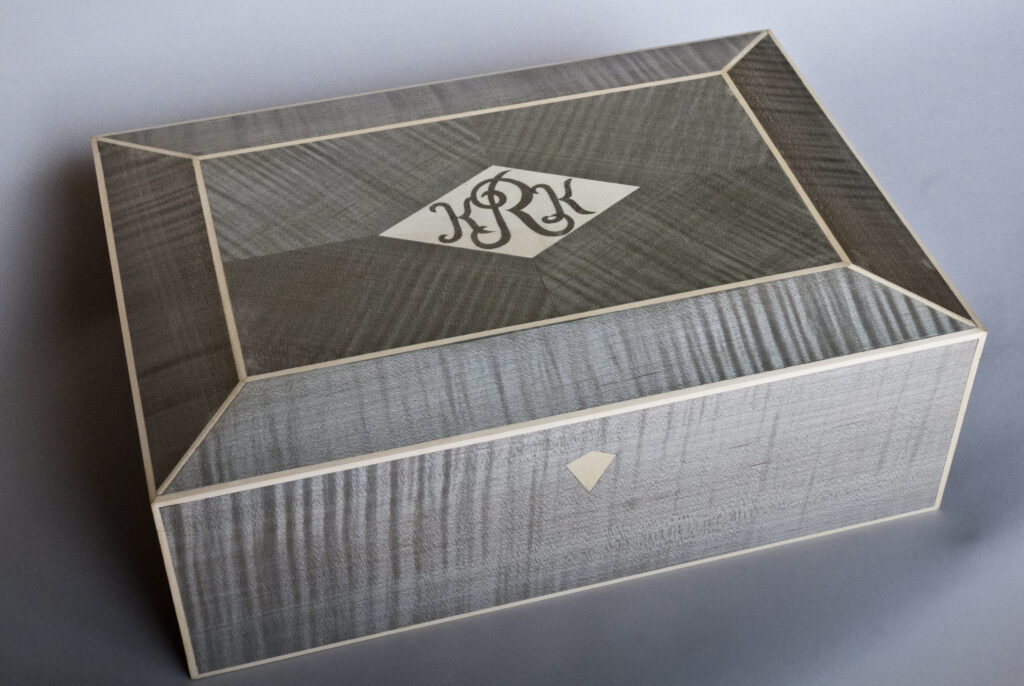
My boxes tend to be rectangular, possibly from my engineering background. There are some very interesting ones in funky shapes, which you can see in books like Celebrating Boxes. There are several other books in this vein as well.
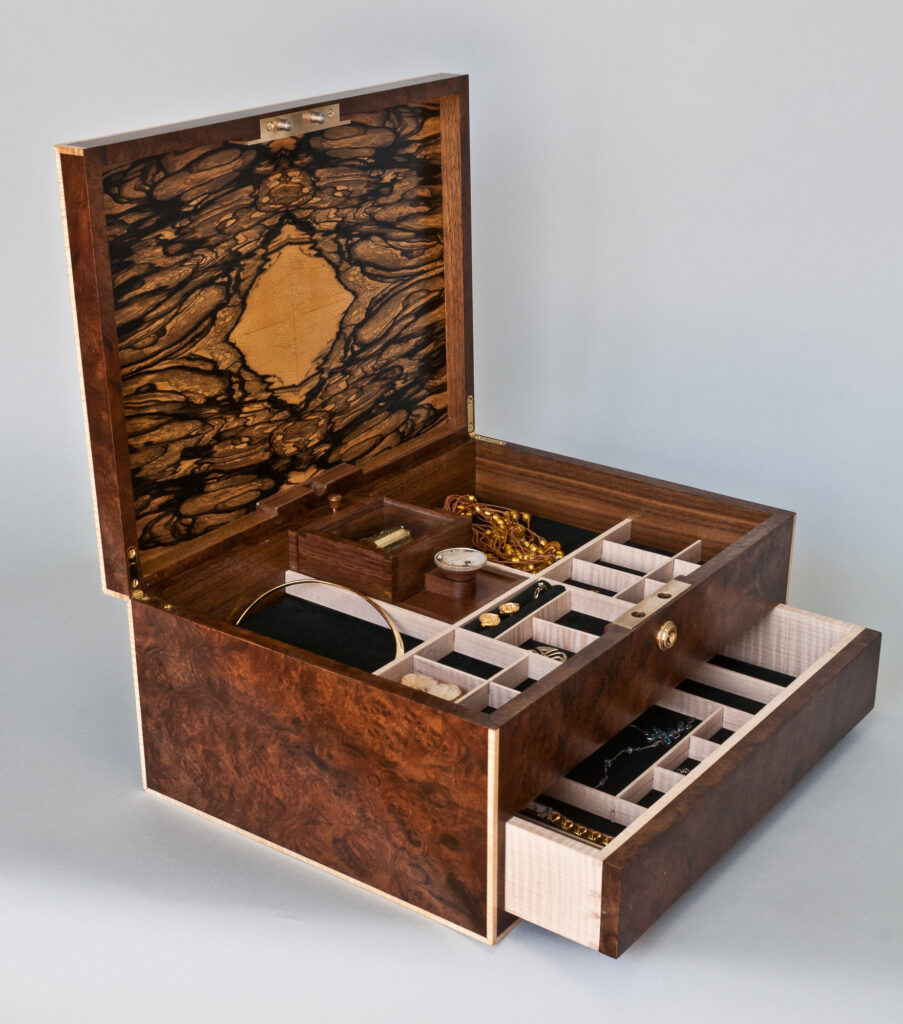
Mechanical or electronic features are possible. This box has a hidden compartment and a complex mechanism to wind the music box mechanism. I don’t yet do electronics but some features would require it.
There are certain themes that I always include in my boxes. Since mine are veneered, I always use ebony or hard maple solid wood inlays on all of the edges of the box. This protects the otherwise fragile veneer edges.
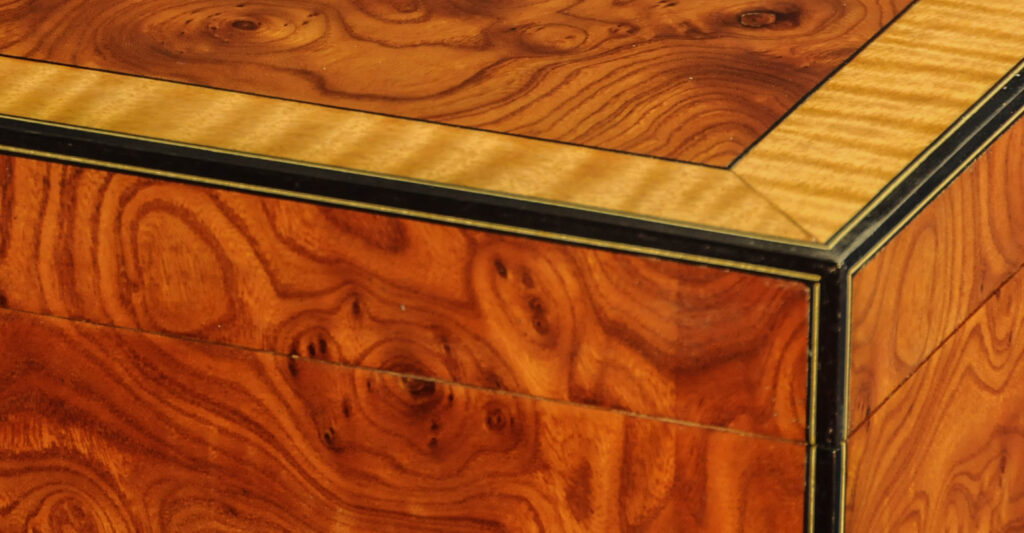
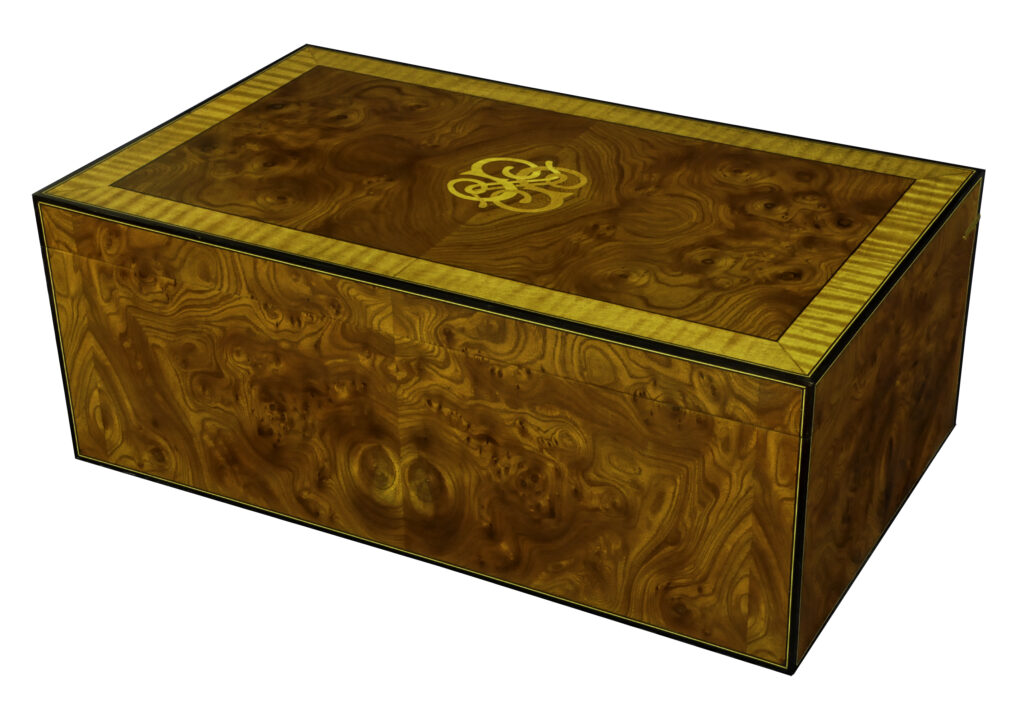
Whenever possible, I add pinstriping just inside those inlays, because I like to. These stylistic consistencies identify an item as “made by Dave Heller”, regardless of other details. I encourage you to hone in on details that make a box yours.
I hope that this was useful, and I am very open to new paths here. Anyone got some suggestions? Tell me about it!
Catching up with the “Grandkids”
The Sam Beauford Woodworking Institute in Adrian MI runs a nine month cabinetmaking program for students that would like to enter the business professionally. The school also brings in teachers (such as Mary May and myself) to teach. I have taught both introductory and advanced veneering and marquetry programs at the school, and some of the teachers at the school attended. Those teachers have added a veneering and marquetry module to the cabinetmaking program, introducing the concepts and practicing veneer cutting and pictorial and geometric marquetry techniques.
When I was out in June they held a woodworking festival, where several of the most recent cabinetmakers program graduates displayed pieces including the capstone piece, a buffet. They were all different, displaying both the technical and design skills of the graduates.
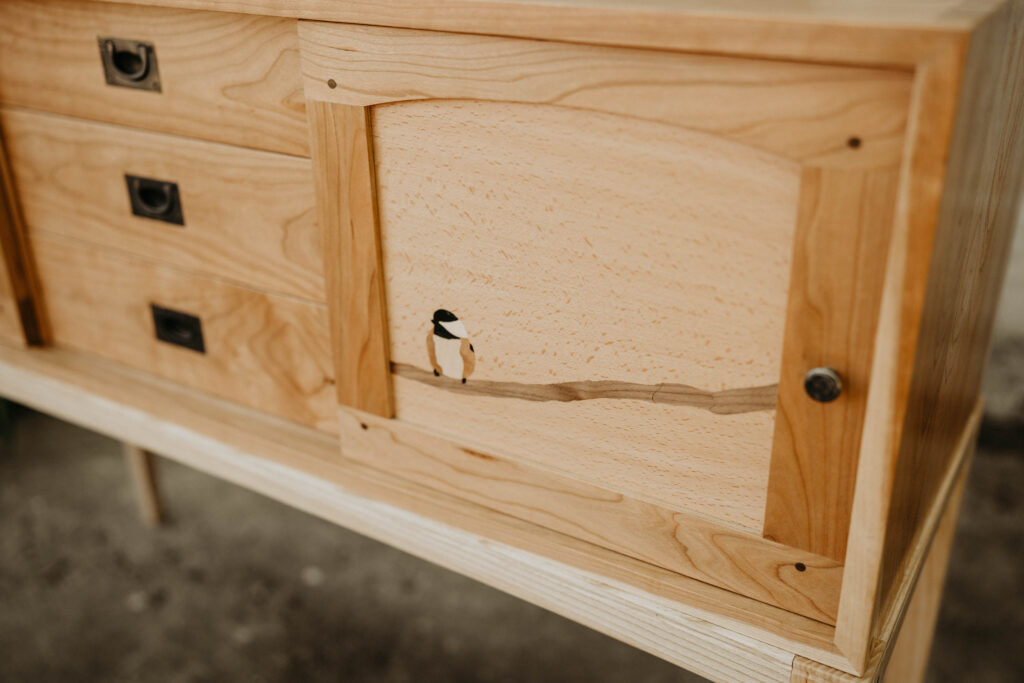
I was very pleased to see that several of the cabinets included veneered or marquetry-decorated door panels. In fact, almost all of them did!
I have attached pictures of several of the cabinets and details from them. They are very well done and it made me very happy to see them – those cabinets are almost like my Grandkids. I had nothing to do with them directly but they came out of something I once did, and I am pleased as punch that they all took the ideas and ran with them, in different directions. It’s so cool.


Tech(nique) Topic:
Making an Elliptical Fan – Part II
If you missed part I, it is available here.
This note was missing from the last paragraph of part 1: Once complete, apply packing tape to protect the drawing.
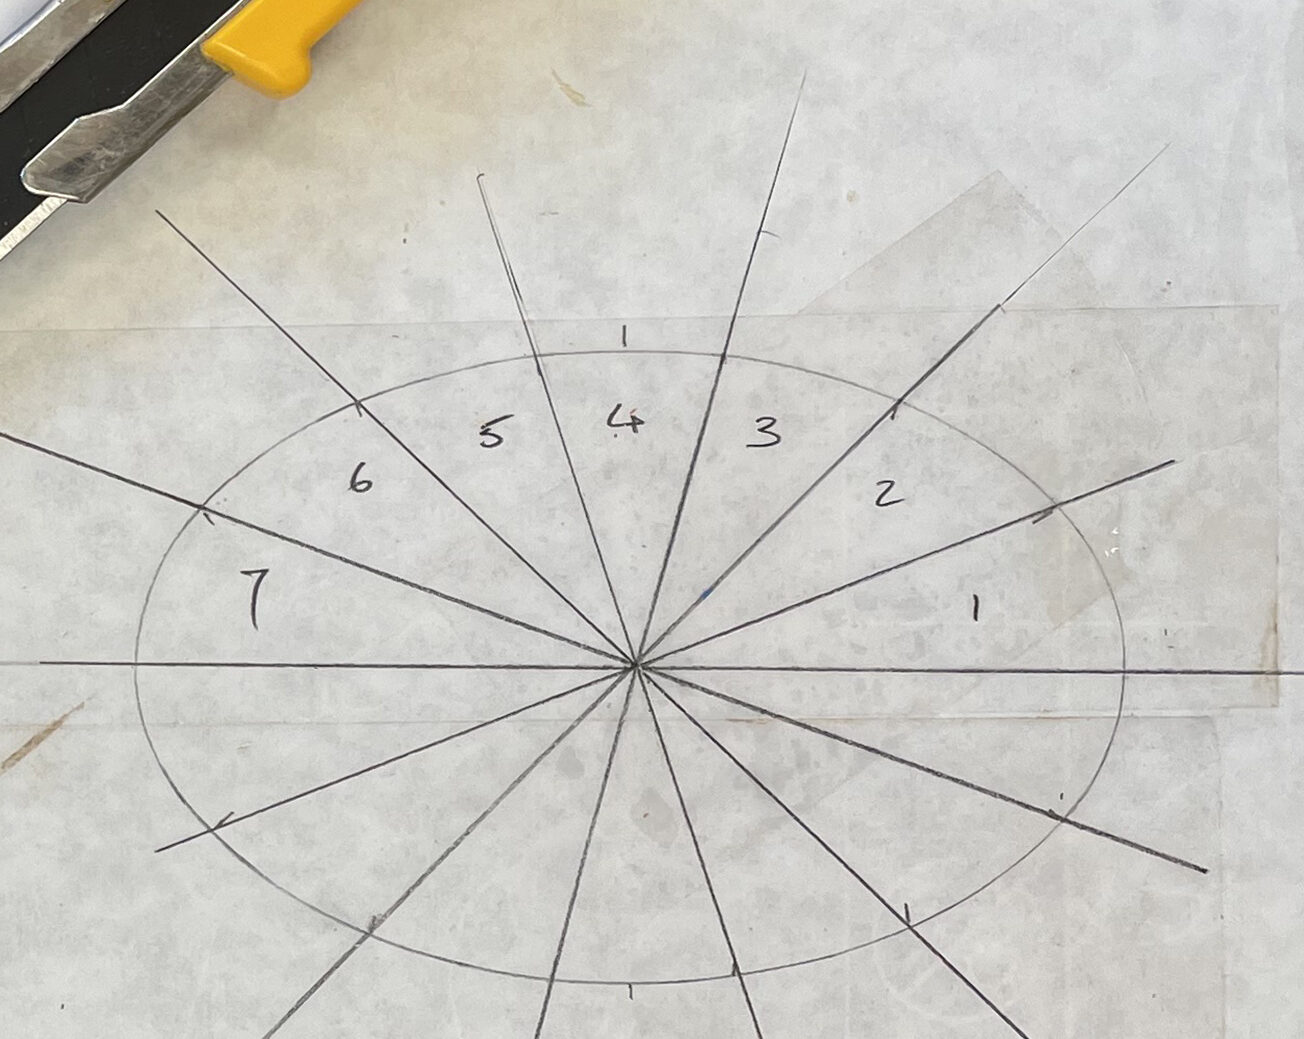
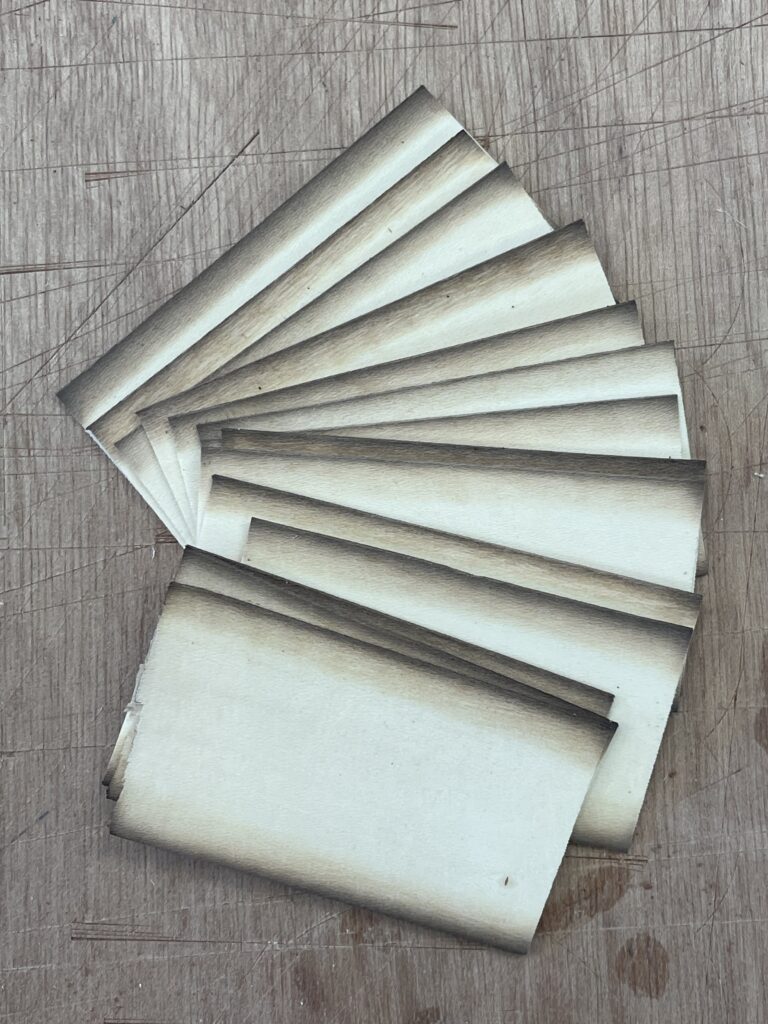
This drawing is now ready to be used to cut the sand shaded holly that we have already made, shown to the right. They are each longer and wider than the segments drawn above.
Select 7 pieces of holly whose shading is as close to each other as possible. Outliers distract from the visual symmetry of the fan.
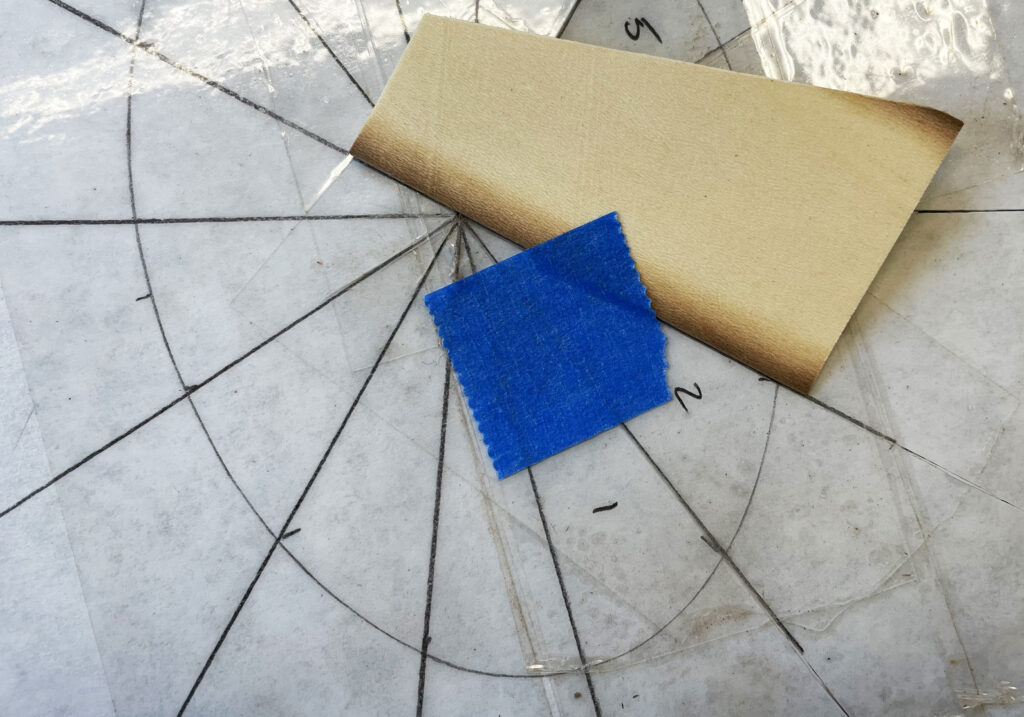
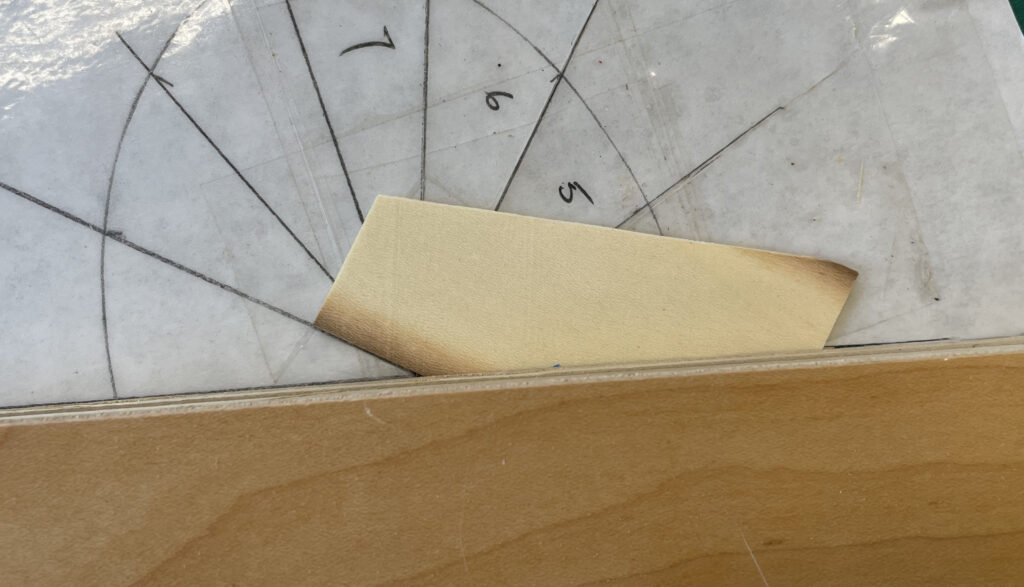
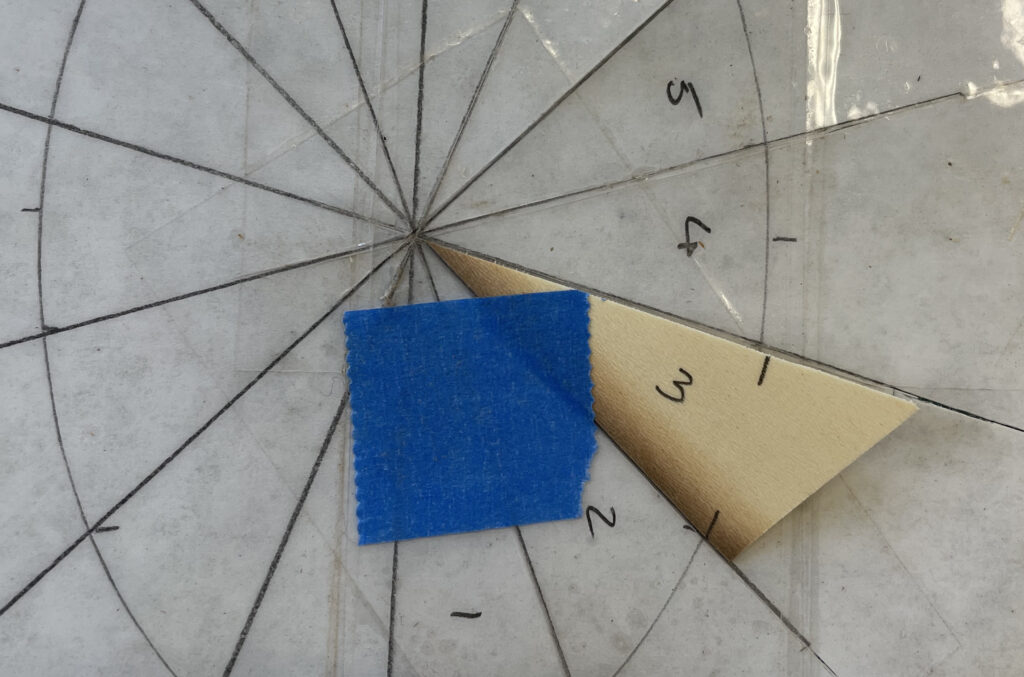
What we will do is tape the holly to the template, dark edge along the lower edge of the wedge we are making, the horizontal line for piece 1 above. Insure that the center point is covered, and that the end of the upper line is visible.
Place the straightedge, then cut to the line. Before removing the piece, mark the points where the wedge crosses the oval. We will use this to align the pieces during assembly.
Make two of these, since pieces one and eight are the same. The template has now been cut, so repair it with packing tape if necessary. I do this after every second or third piece is cut.
Repeat the process for pieces two through six: tape, cut, mark the oval edges for alignment.
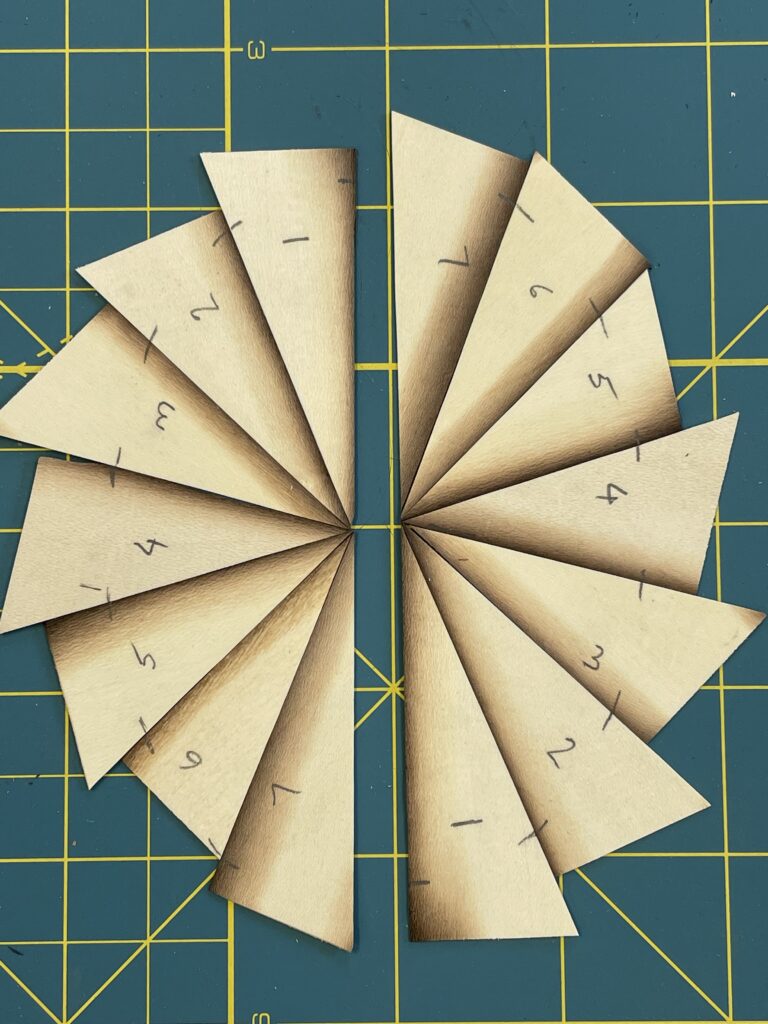
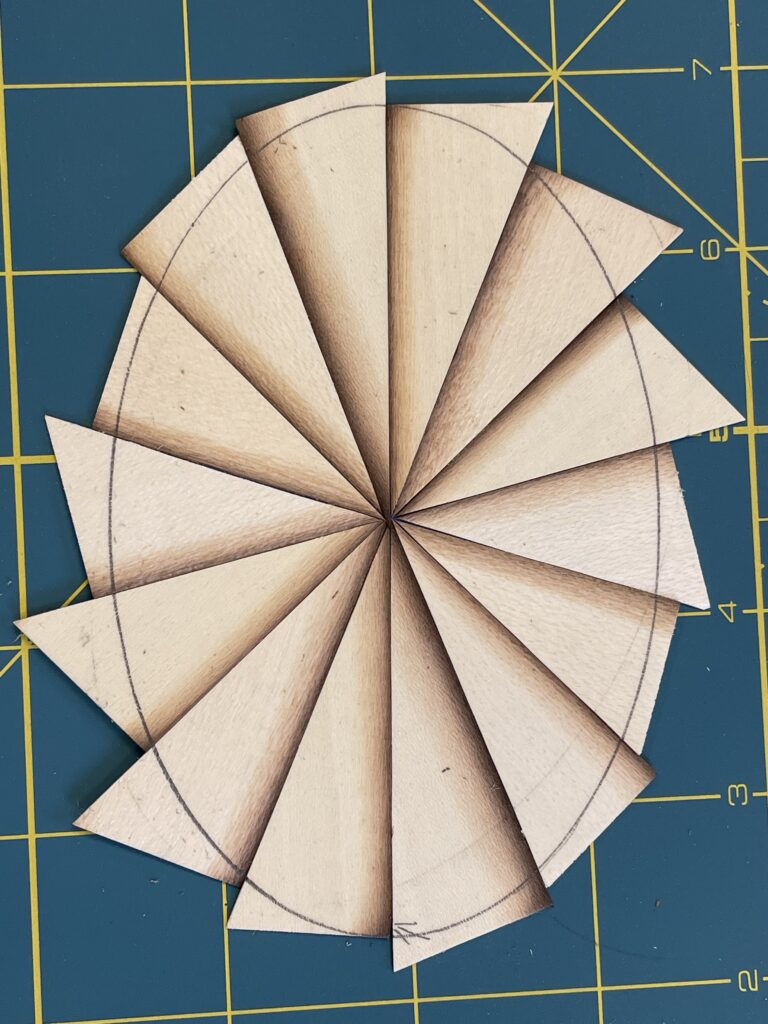
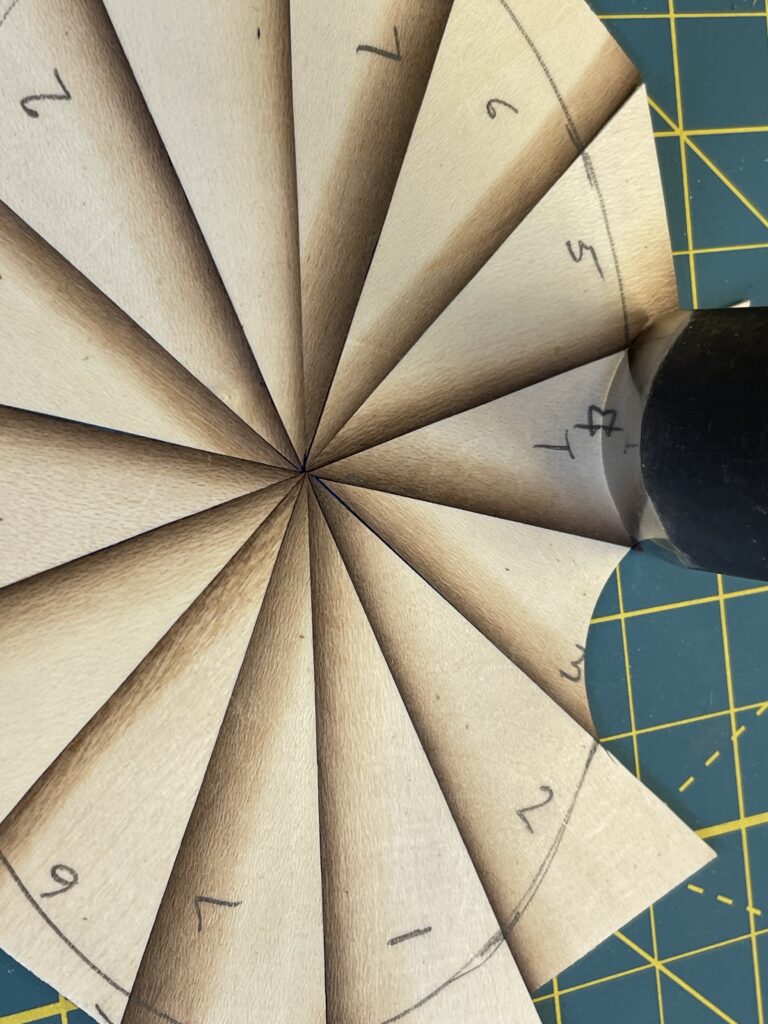
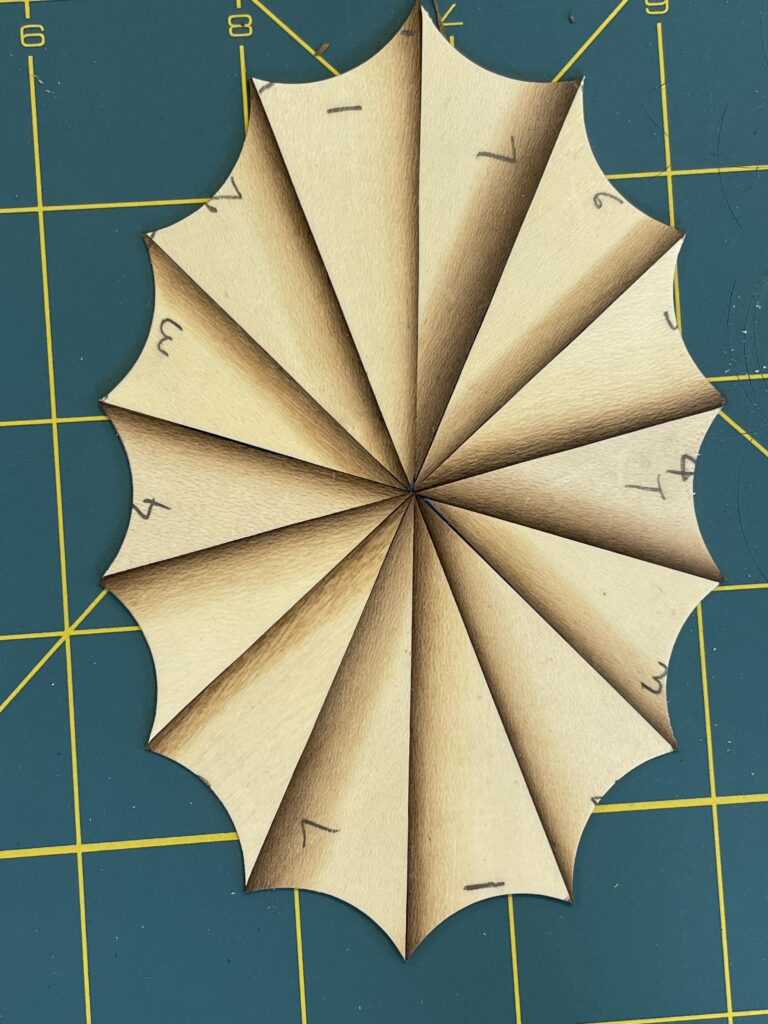
Tape the (2x) six pieces together, using the alignment marks. They make sure that the overall shape is correct, and the points should line up also. Tape a whole piece in as number seven, tape the whole assembly to the template, and cut the long axis cut. Repeat for the other half. Line up the two centers, and tape the assembly together. I do all my taping on one side, align on the other, then firmly tape on the back side.
Use your mdf template with the horizontal and vertical axes marked to draw the outline of the finished oval on the holly pieces.
Cutting the curves requires a gouge wider than the wedges. My 7-25 works well. A 5-25 would give a flatter curve, and I prefer the rounder one. As the photo shows, align the chisel with the intersections, and press down. The holly holds a crisp edge. Cut all the way around.
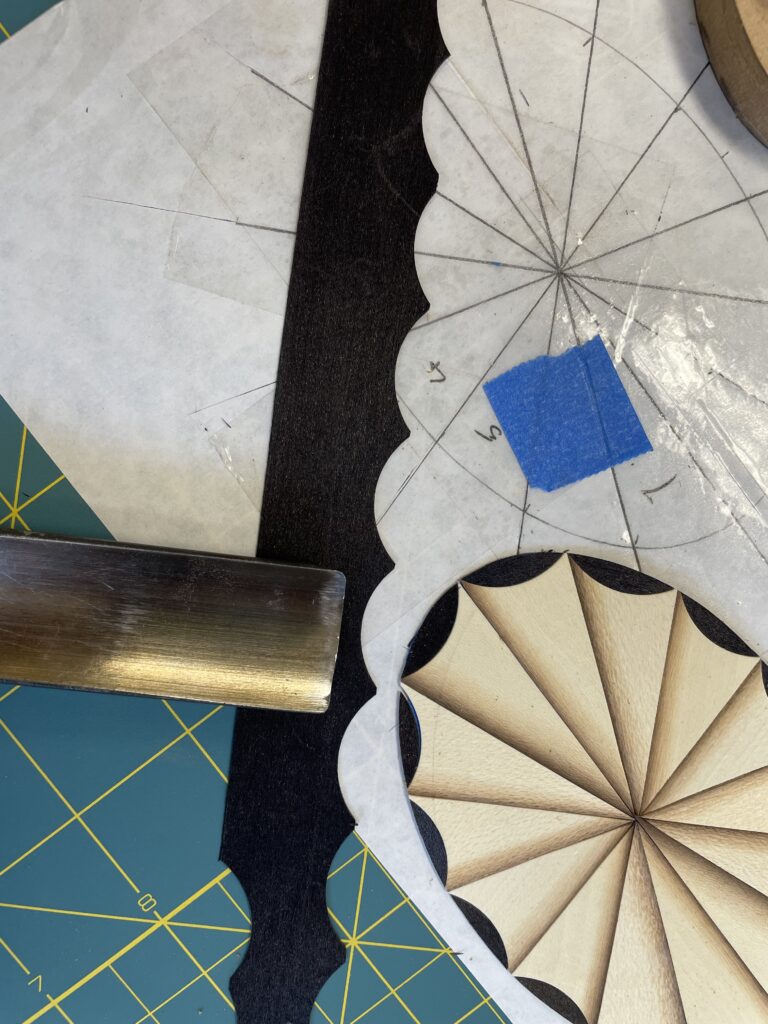
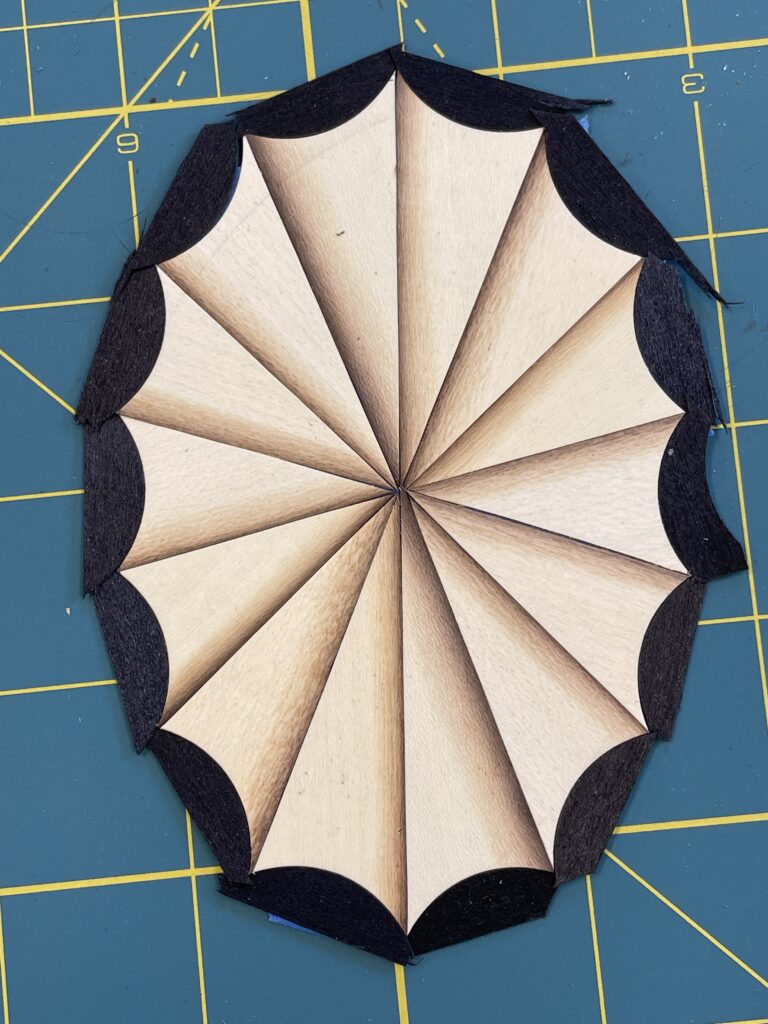
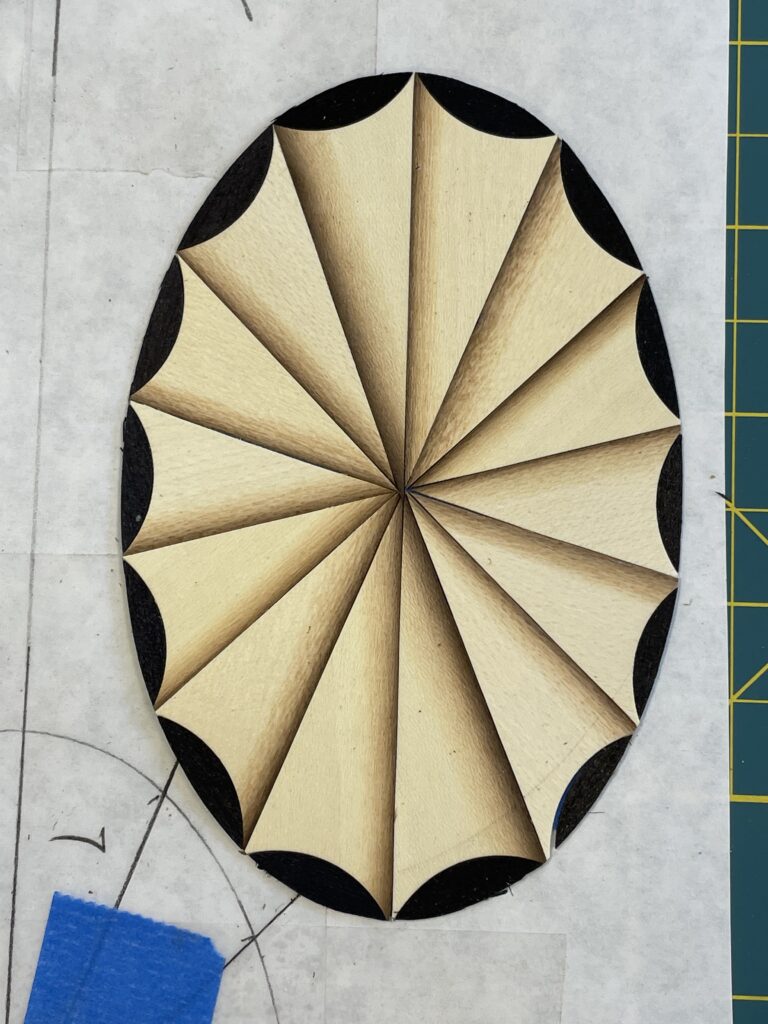
Take a piece of black dyed red gum or pear, or some other wood that cuts cleanly, and cut some segments with the long grain running parallel to the long axis of the cut. Since the same gouge is used the shape should match perfectly.
Tape the black pieces into the spaces in the oval. They will overlap beyond the holly. Use a chisel to splice them so that they don’t.
Place your mdf template on top of the medallion. Once you are sure that the position is correct, use a knife to cut out the medallion. A sharp blade and light cuts reduce the likelihood that you will peel off some black segments.
Apply veneer tape to the top surface, let dry, then gently remove the blue tape from the back face. The holly is well behaved but the black can be tricky. If you oriented the grain of the black veneer wrong you can get many corners breaking off.
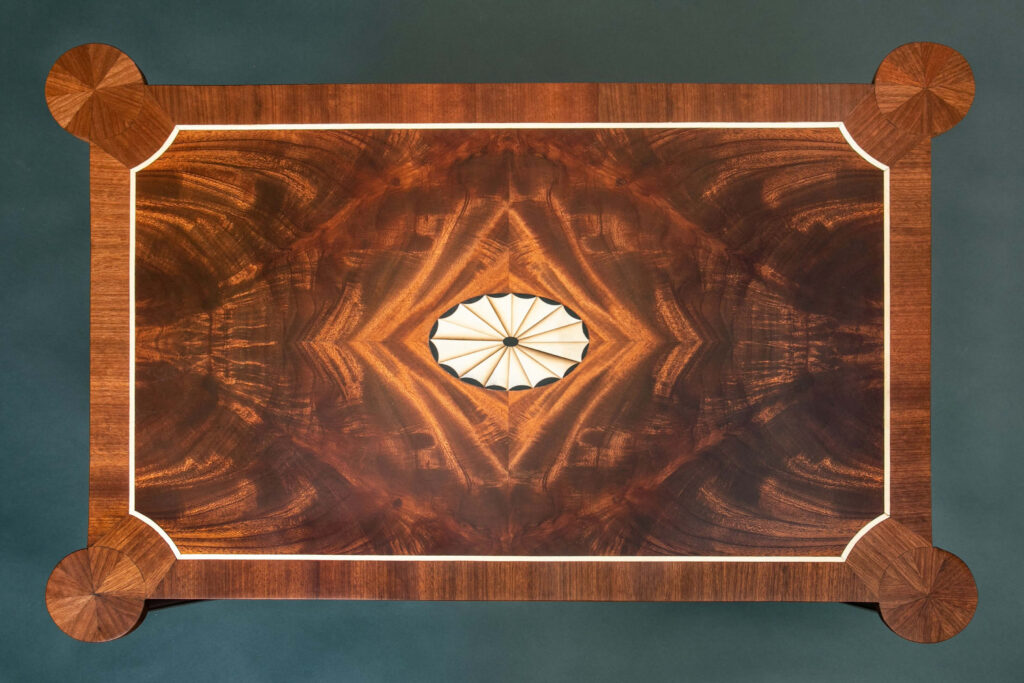
Now your completed fan
is ready to be inset into your project
Tool Review: Scroll Saws
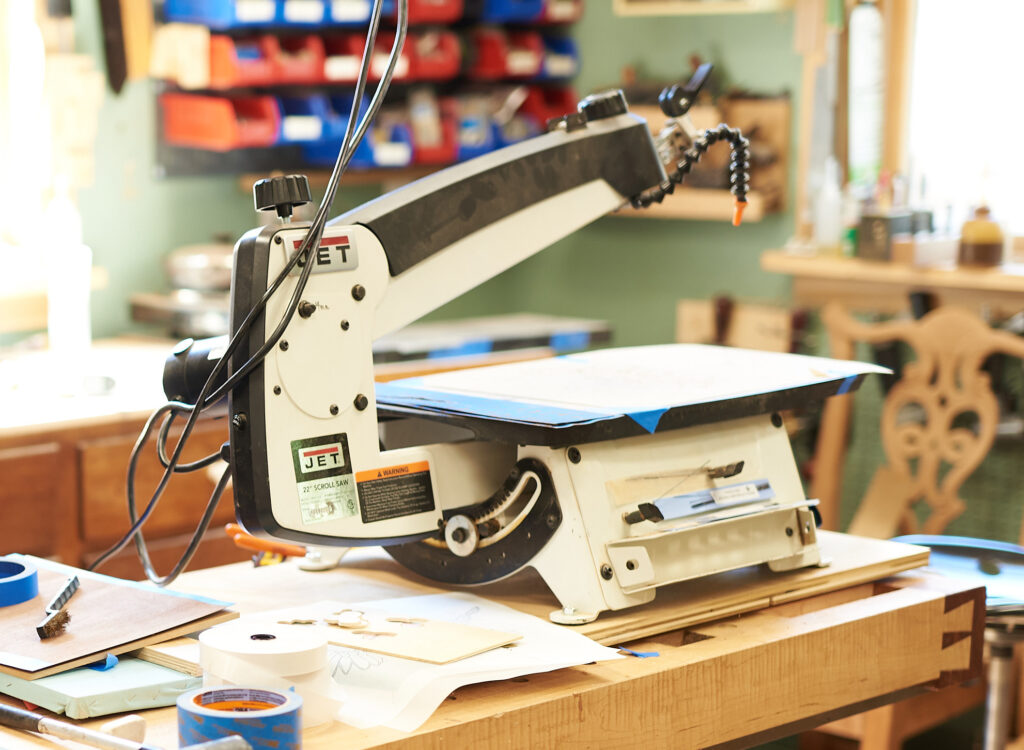
Choosing the best scroll saw features for your marquetry use
Though I have a chevalet I made myself, I use an electric scroll saw 90% of the time when cutting marquetry. A modern scroll saw is quiet, almost vibration-free, and has good variable speed control (which is important since we want to run at a very slow speed). It cuts interior curves smoothly and holds a consistent angle.
All modern saws use pinless blades, which means that the blade can be inserted through a 1/32” hole, allowing clean interior cuts. If yours is old enough to have pins, it’s not very good for marquetry.
I have used five modern scroll saws: DeWalt DW788, Excalibur*, Hegner Multimax-2 (1988 vintage model), Jet JWSS-22B, and King International KXL-30/100. I will review each of these against the features I consider necessary for marquetry work, as well as those which are only beneficial.
* For an interesting read on the branding and manufacture of Excalibur saws check out this article.
Blade holding approach:
A scroll saw blade has to be very taut to cut accurately and without vibration. Accuracy is mandatory, and vibration is very bad for veneer, which is quite fragile until glued to the substrate. We need to be able to rethread a broken blade through the tiny groove cut by the blade. In addition, we also need to thread the blade through a small drilled hole when we are doing pierced work, common in double bevel marquetry.
Looking at blade holding, Jet is clearly the best. It is the fastest and easiest. My 1980’s Hegner is the worst, even with after-market attachments to improve it. The other three saws are all similar in design and performance, and are in the middle.
Related to this is that the Jet, Excalibur and King International all have a feature for holding the saw arm up while you are threading the blade through the packet. This makes the job much easier. There are aftermarket tools that will do this for the DeWalt. The Hegner is designed differently and can’t do it.
Straight up and down cutting:
Some saws rock forward and backwards as they cut, here the Hegner comes out on top as it goes straight up and down. Their arm design is different, giving very smooth cuts. All of the others except the DeWalt have an adjustment to reduce the rocking. The DeWalt has nothing, and rocks the worst.
Tilting arm vs tilting table:
When cutting double bevel marquetry with conventional veneer, the blade angle needs to be at 13 deg to the table. That is pretty steep. The DeWalt and the Hegner have tilting tables, and the others have the same tilting arm system. This makes it easier to stop in the middle of a cut, since the work is lying flat on the table. It’s not a deal breaker, but the tilting arm is nice.
Low variable speed control:
The Hegner has the lowest speed though not all are even variable speed, so beware of that. Who needs a single speed scroll saw? The Dewalt has the highest minimum speed, and the rest are in between.
Throat depth :
This refers to the distance from the blade to the post that holds the blade, and is the maximum size that you can rotate all the way around. The smallest saws are 13”, and the biggest is 30”. Most marquetry panels are small enough that most saws will work. I recently bought a 30” saw to cut the panels in the headboard shown in the next section, but I use a 22” saw most of the time.
In summary
In my shop I have a 1988 vintage 14” Hegner, a 2019 22” Jet, a 2005 21” DeWalt and a 2022 30” King International. I encourage all of my students to try at least two of them out when taking classes. Every single student that has then bought a scroll saw has purchased the Jet, which is my favorite as well. The blade holding system is the best I’ve seen, the arm tilts and stays up by itself when asked, and vibration is minimal. It is a great saw.
It is often listed at $950 but for the month of July 2023, it is $799 with free shipping on both the Woodcraft and Amazon sites. If you are in the market for one, I highly recommend it. It is also very well packaged for shipping, unlike the King International I bought last year that was damaged during shipping due to flimsy packaging.
For marquetry use, I recommend adding a sheet of thin plywood to the table of all of these saws to act as a zero clearance insert, and support the veneer right up to the blade. A stiff piece of art board will also work. The tables all have a big hole around the blade to make it easier to get the blade in, but for marquetry the hole is a menace and needs to be spanned. It does make it more difficult to get the blade installed, but once you have tried it you will use it
Shop updates
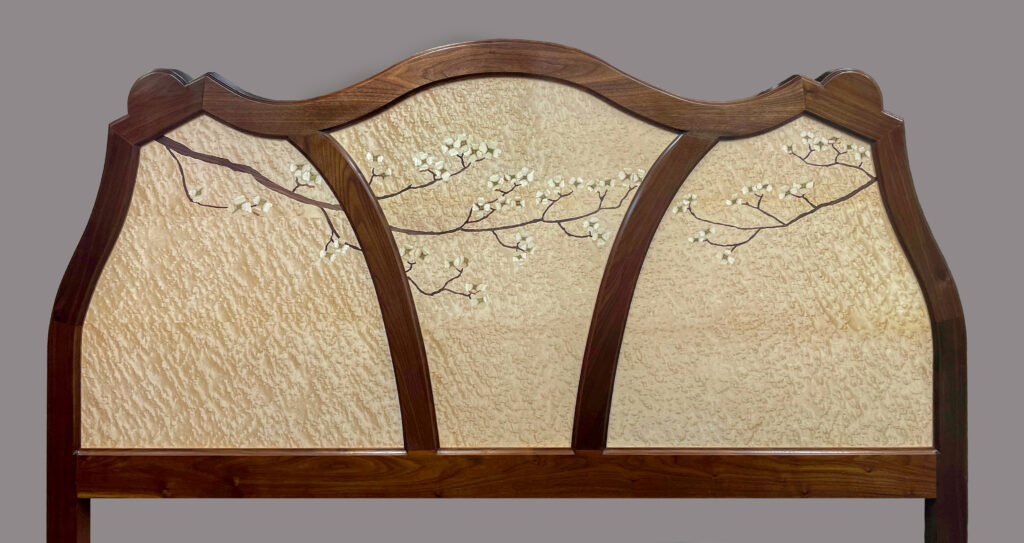
I finished the king-sized marquetry headboard that I’ve been working on. The panels are large – about 30” to a side – and that required a large scroll saw and complicated doing the double bevel marquetry that I used. Overall I was very pleased and may be open to making another one.
It was very difficult to take pictures of because it is flat and shiny, so reflects light in an unfriendly manner. You may have seen some peeks on instagram.
Not to bury the lead, but you may have noticed…..
WE HAVE A NEW WEBSITE!!!!!Jenn here – I am thrilled to announce that the website refresh I have been promising Dad for months years is finally LIVE. Please check it out – let us know what you think, or generally just let me know I did a fantastic job. Thanks!
return to the running with chisels archive
return to top
©️ 2023 Heller & Heller Furniture | Privacy Policy | Terms