

Running with Chisels Vol. 23

Vol 23 | February 18, 2026
In this issue Dave reviews the new class formats and potential future classes, discusses cutting fine lines or dots into your marquetry work, and reviews how he uses templates in his geometric marquetry.
Class Update – 2026 Schedule
Thank you to everyone who has signed up for a class.
I’m comfortable teaching classes, but every year I struggle with what classes to offer, and when. Most of my classes are two days long because that’s how I started doing this, ten years ago.
I’ve been unhappy with the Painting with Wood class – nobody ever finished, and it seemed rushed, so I added a third day so that we can cover the techniques more fully. I tested out the new curriculum January 16-18 and Feb 7-9, and both sessions went really well. I was very pleased with the quality and amount of sand shading that the students did, which was one of the areas that was underserved before.

The Veneering for Furniture Makers class has been popular, but the second level class, Radial Veneering, hasn’t been. That is my favorite technique, so I created a four-day Veneering for Furniture Makers Intensive, putting the two classes back to back. As I mentioned above we now have one open seat in that upcoming class starting Feb 27.
It has occurred to me that the short classes may be an inconvenience for folks travelling from further away, so I will try to schedule a 5 day session later in the year and see how that is received. Any suggestions? Would anyone be interested in a Geometric Marquetry Intensive – the two classes back to back, with a few add-ons?
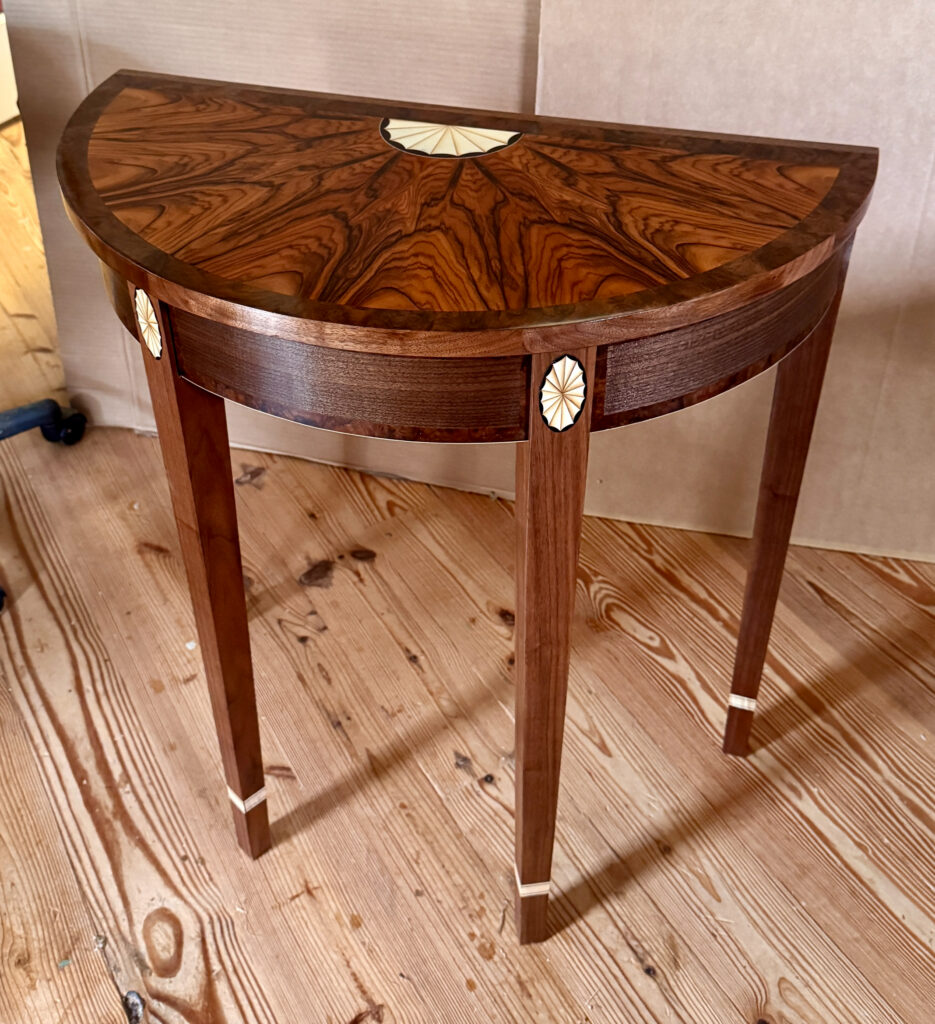
I’ve had one person express an interest in the seven-day Demilune Table class, and I need two to make it happen. Maximum class size is three. If you’d like to be that second person, let me know and we can figure out a time later this year that is convenient for everyone (ie me, you, and the other person). It worked last year. Here is a picture of my table- I snazzed up the legs afterwards, which I would of course also discuss.
I’ve wondered whether holding a class like that in two four-day sessions could work, including the snazzed up legs. Any thoughts?
If you are interested in organizing a class not in Charlottesville I have space in my calendar for a couple of road trips. Let’s talk!
In this edition of Running with Chisels:
- Ask Dave: How to work with fine lines in marquetry
- Tech(nique) Topic: Templates in Marquetry: when and how to use them
Ask Dave: How do you work with fine lines in Marquetry?
Q: How do you deal with fine lines in marquetry? For example, veining lines in leaves and flowers that are as thin as the saw blade kerf? Do you simply make a saw cut and rely on dark glue to ooze up through the saw kerf to create the line?
A: Fine vein lines can certainly be created the way you described, with a thin saw cut. That is a standard technique in packet cutting (which I call Painting with Wood as a class name). When packet cutting though, you fill in the kerf lines with walnut sawdust from the back, before glue-up. the dark fill accentuates the lines.
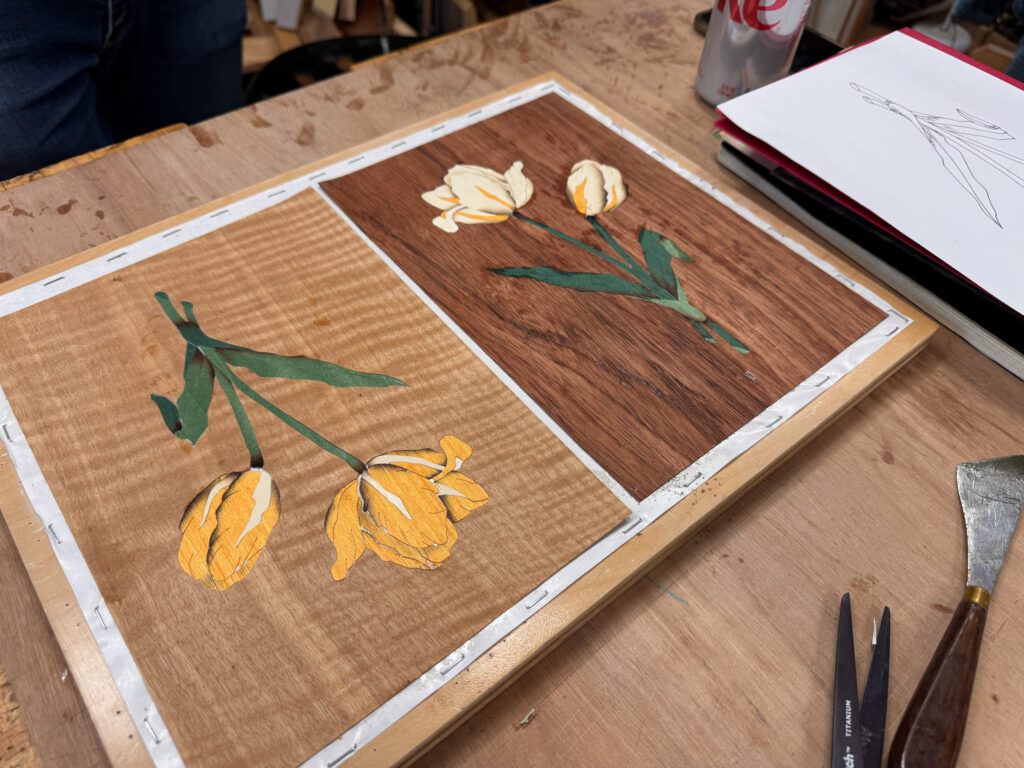
Another approach: Let’s say you wanted a thin brown vein line in a green leaf. When doing double bevel cutting, you could add a piece of brown veneer to a piece of green, defining one edge of the green/brown shape. Glue and tape it on. Then you can cut nearly all of the brown away, laying in another piece of green, to define the other edge. The result is a green leaf with a thin brown vein line in it. You can’t do that in packet cutting because the final brown line is too thin to be stable, but when bevel cut the brown line is never alone – it is always supported by the green piece that it’s attached to.
There may be another way, but those are the options I’ve used.
FYI, I cover the first technique in the Painting with Wood class, and the second in the Double Bevel I class, but if you experiment you can work it out for yourself too.
We’ve reviewed this technique before about cutting small dots, but today we’re revisiting with better photos!
Here is a variation on that question: how to make the small spots in butterfly wings. The concept is the same – add the white shape to the black, then remove most of the white by replacing it with black.
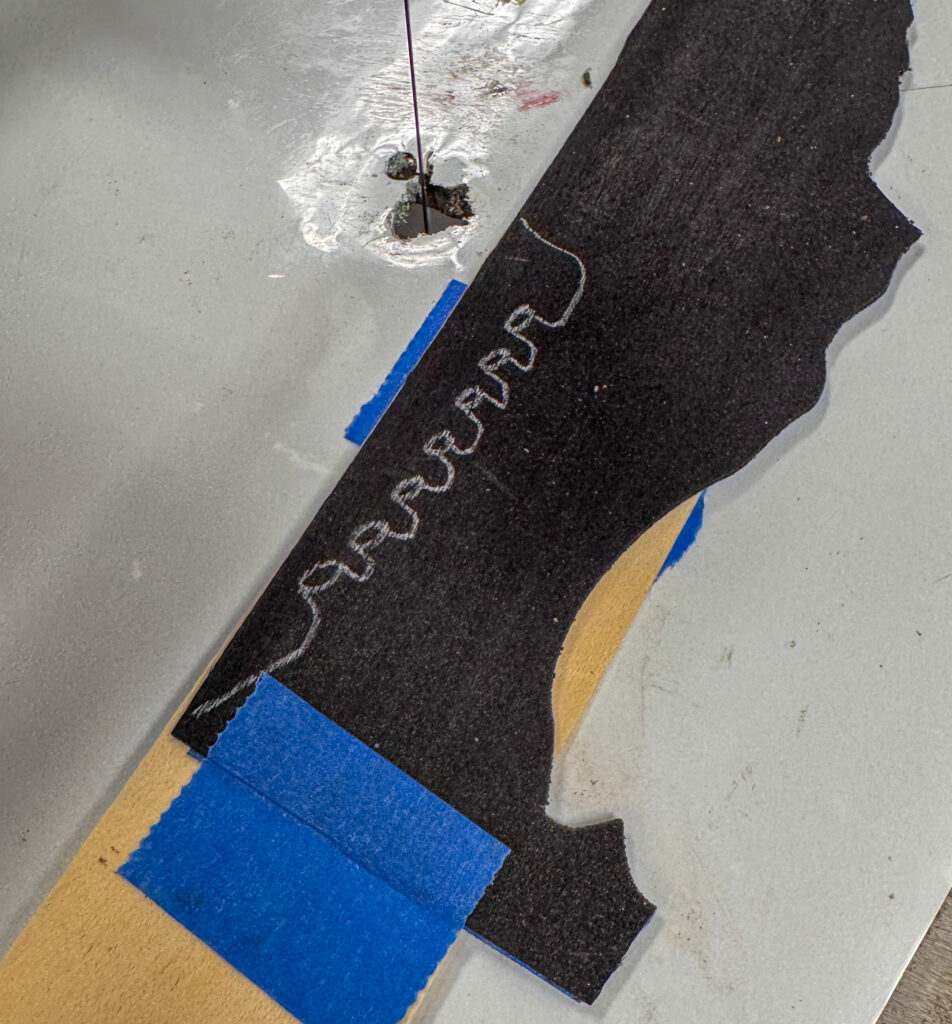
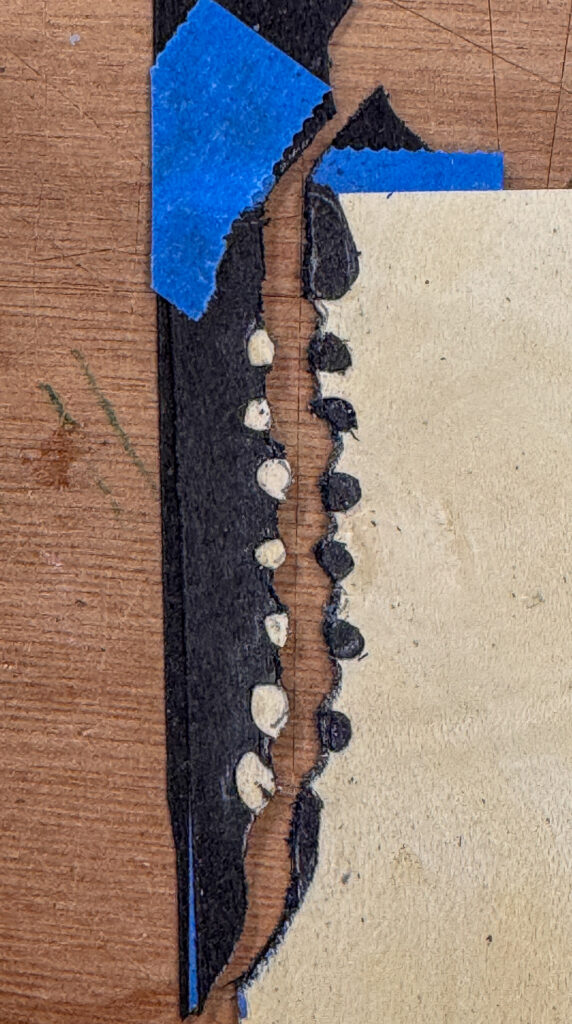
In photo one I have drawn the dots that I want to have eventually on some dyed black veneer. I have connected the dots with a path that looks much like a zipper. There is a piece of holly underneath – it looks quite yellow in the photo but it isn’t.
In photo 2 I have followed the path shown in picture one and taped them together. It reminds me of 70’s pop art. Note that all of the dots are there, connected together with extraneous holly that allowed me to make all of the dots in one cut.
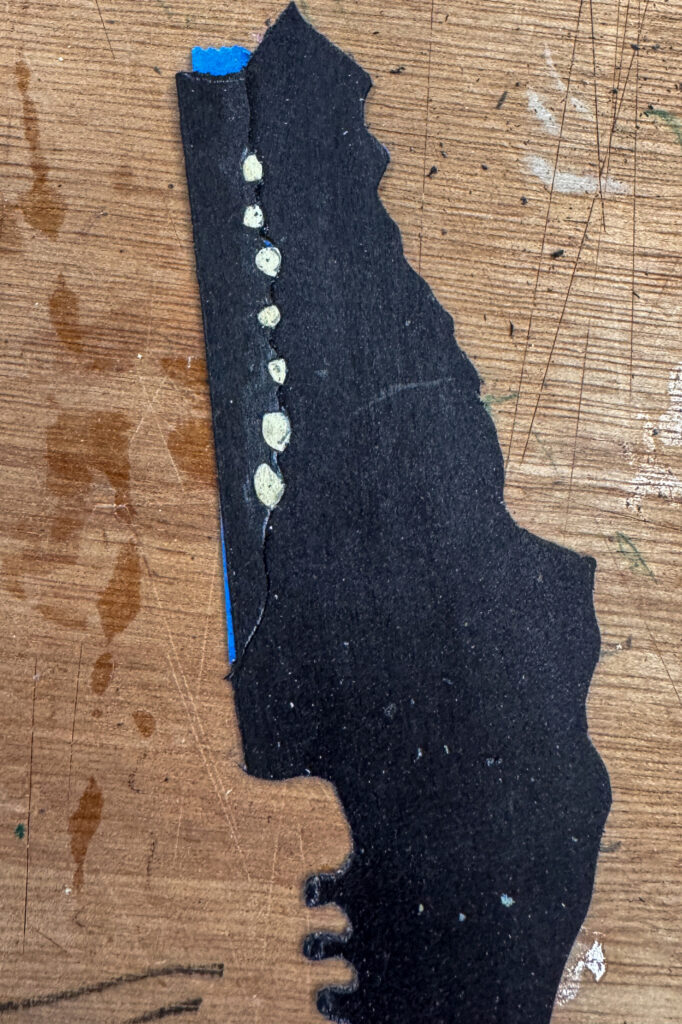
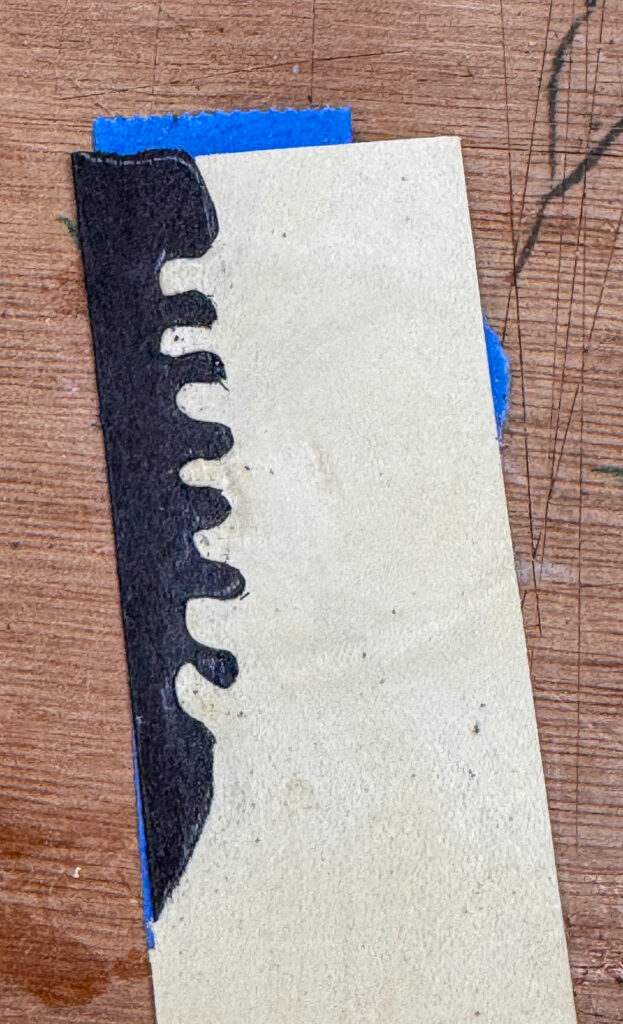
In picture 3 I have cut off the extraneous holly, and some of the black that was the zipper fingers that extended into the holly. Notice that there is a second piece of black veneer under the holly that I cut off.
In picture 4 I have removed the top right portion of the holly veneer from picture 3, revealing the black veneer underneath. In the photo you can clearly see the seam that is in the veneer, but a light sanding and not looking at it from 3” away will hide it, and the white dots then float in a visually solid piece of black veneer.
Tech(nique) Topic: Templates in Marquetry
When and how to use templates to enhance your marquetry work
Cutting smooth lines with a scroll saw requires great skill. I’m comfortable doing it that way as part of a painterly composition, but when the work is stark and graphical – say Art Deco, or picture borders, a knife is the tool I choose. For straight lines, a straight edge is needed. I use a wooden straightedge made from ½” to ¾” good quality plywood, and I use 120-180 grit PSA sandpaper on the underside, so that the straightedge doesn’t move unexpectedly.

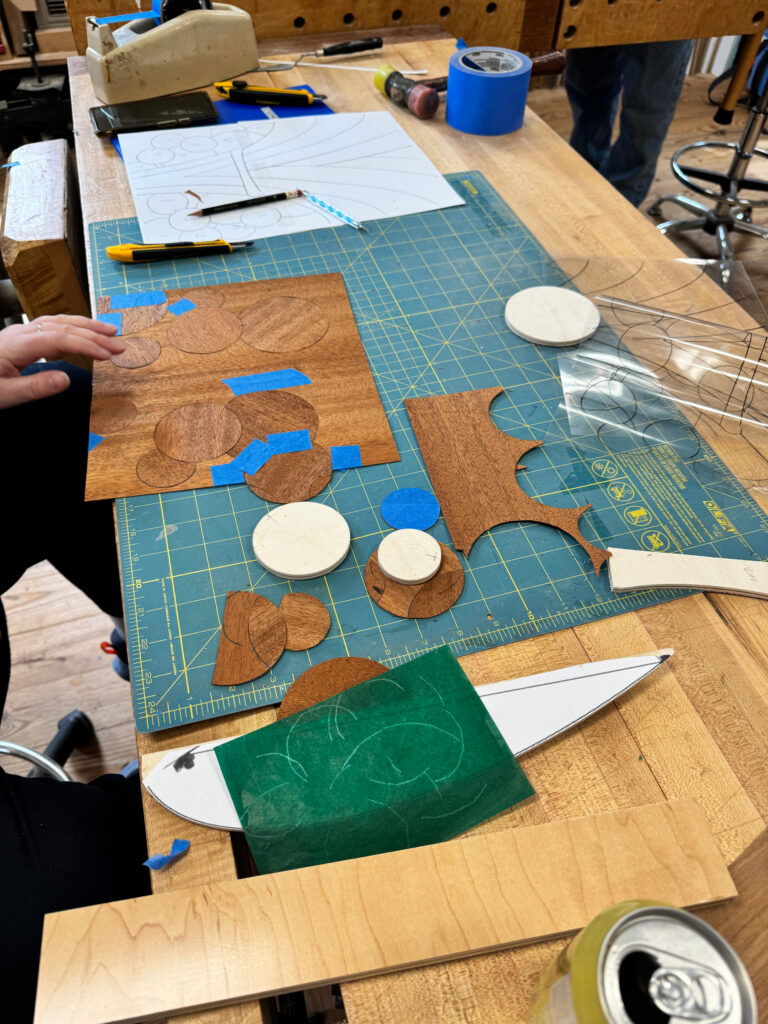
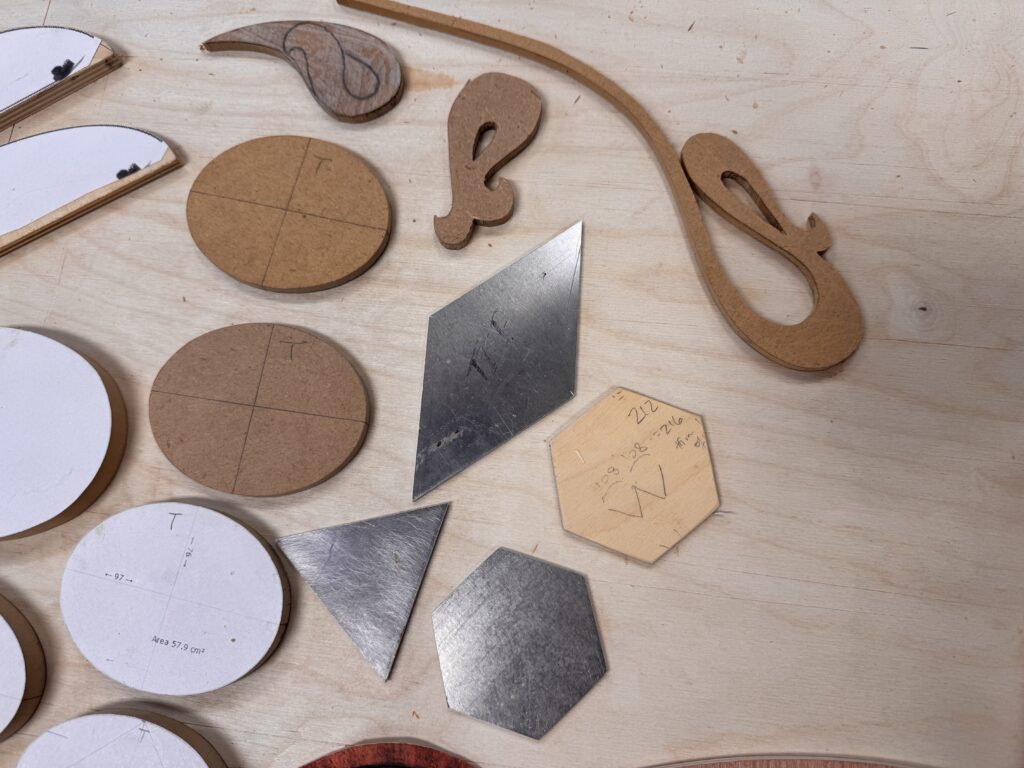
For curved lines, I use a plywood or mdf template. The thickness depends on how tight the curves are: thick templates interfere with the knife following a tight curve, so sometimes ¼” is best, even though it can be flimsy. I use ¼” mdf to make small oval templates for my fan inlays (paterae).
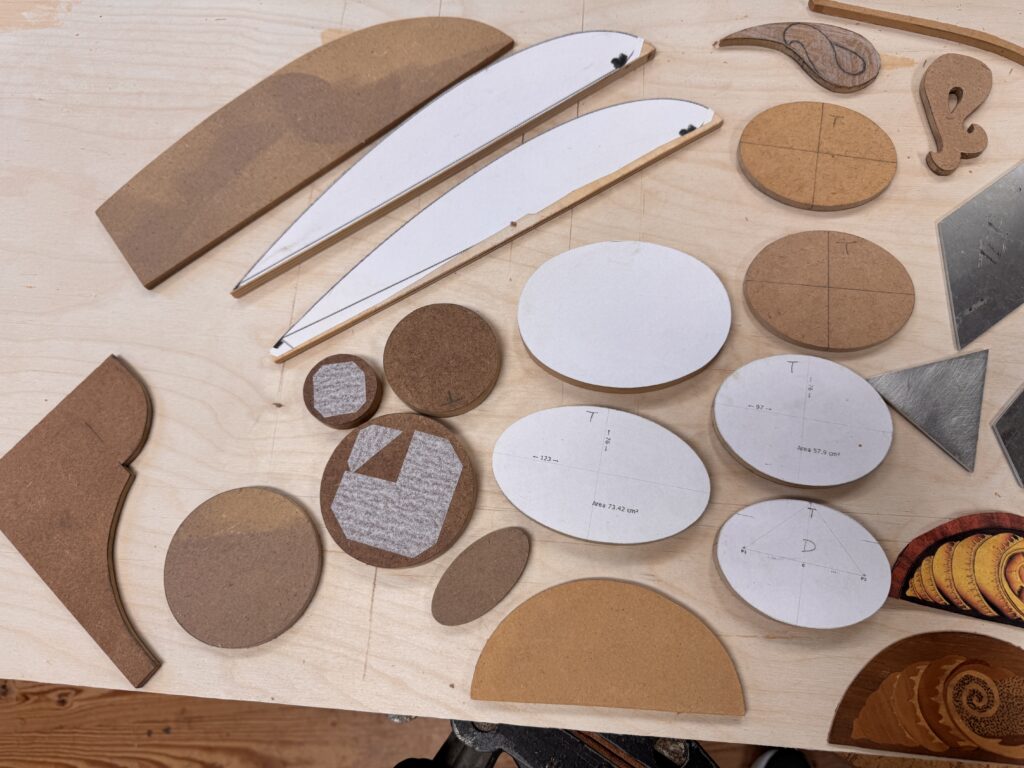
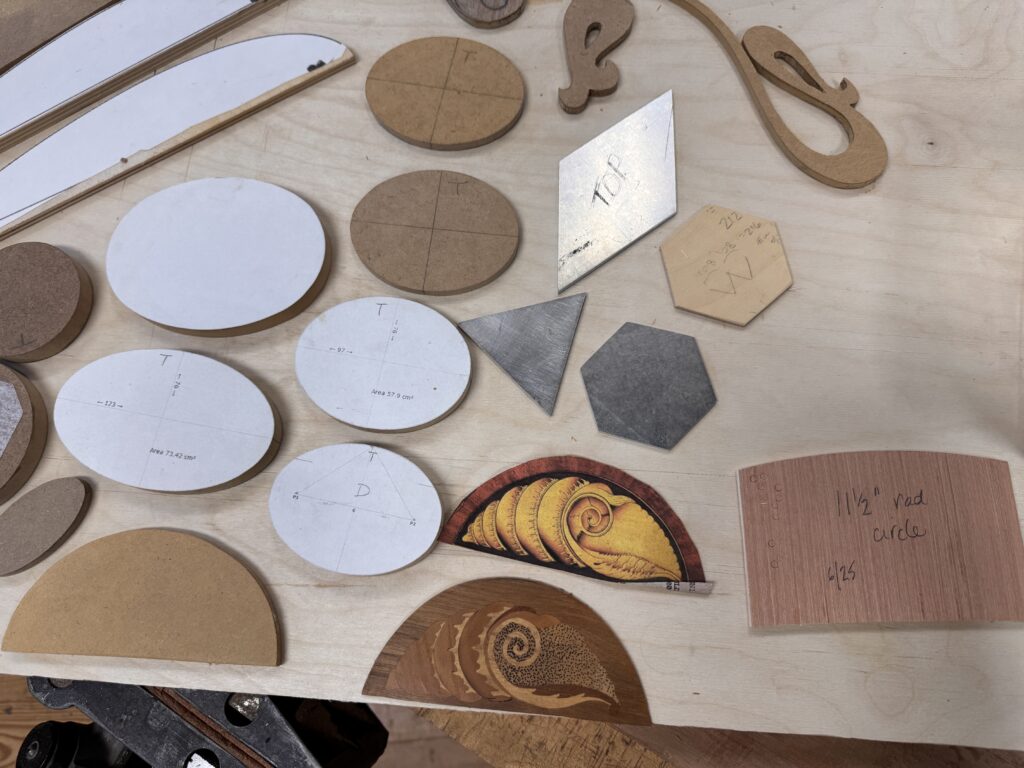
I have made and used aluminum templates for precision work, but I’ve not been able to reuse them so I don’t think it was worth the time. I save my templates and reuse them when I can.
I use a program called Blocklayer to draw the ovals for my fans. It is flexible and free, though you can’t have an ad blocker on when you use it.
If I had a CNC, I would use that to make my templates. As I don’t have or want one, I make mine by sticking the pattern – either hand drawn or computer generated – onto mdf or plywood with UHU glue. It is important to use UHU because it contains no water, so the template substrate doesn’t flex. I cut the shape on the bandsaw or scroll saw, about 1/16” outside the line. I then use a drum sander or disc sander to sand away to the line. Since they are shaped by hand, they are not perfect – there are small flats and the ovals are close but also not perfect. Label the top front so that you can get a consistent orientation.
A couple of my designs have smooth curves as important elements. I drew those templates by hand – a long sweep of the pencil, trying to go from almost straight to heavily curved over a 24” piece of mdf. Draw them until you get one that you like. Using different parts of the same curve in the design provides a unifying feel to the piece. We make and use a template like that in the Geometric Marquetry II class.
More marquetry tool questions?
We’ve got you covered – click here to access RWC Vol. 20, with the complete tool list updated in 2025 (with links!).
return to the running with chisels archive
return to top
©️ 2025 Heller & Heller Furniture | Privacy Policy | Terms
