Running with Chisels Vol. 2
Marquetry tips
Browse by Category:
Welcome
Our corner of the internet dedicated to decorated furniture
#saynotonakedfurniture
#dressyourfurniture
rwc archive
tools
classes
Vol 2. | May 26, 2023
Welcome to Running with Chisels, or welcome back. This is the second edition of my attempt to convert the world to a love of decorated furniture, mostly using veneers or marquetry. #saynotonakedfurniture
In this edition of Running with Chisels:
- Ask Dave: What is cockbeading, and when would I use it?
- Events & Classes: Sam Beauford School
- Class focus: Elliptical Fan part 1
- Tech(nique) Topic: Sand Shading
Ask Dave: What is cockbeading, and when would I use it?
A: Cockbeading is a decorative and protective edging put around drawer fronts.

It can either be flush with or proud of the front of the drawer. I generally prefer the proud version, since that adds a shadow line around the drawers. For veneered drawer fronts, the cockbeading protects the edge from being struck during use. Edges are the most vulnerable part of a veneered surface, so protecting that edge extends the life of the drawer and reduces the likelihood that you will be asked to repair a damaged panel.
Sometimes cockbeading is added to a solid drawer front for decorative effect. There is a period style (1750’s?) when beads were shaped in the rails and stiles of chests of drawers. This doesn’t help to protect the edges of the drawer; it is done for the shadow lines.
The cherry cabinet in the middle image was the first serious furniture I made, from a Carlyle Lynch plan, in 1984-5. The cockbeading and inlay are maple, in a cherry case. The drawer is solid, not veneered. It’s a bit rough but I learned a lot and it’s an attractive piece that is still in my home today.
I am teaching a Veneering for Furnituremakers Intensive (four day) class this coming weekend. This next class is full (3 students) but spaces are available in the Aug 26-29 and Oct 26-29 offerings. Details are on the website.
I am also teaching the two day Veneering for Furnituremakers class at the Wood and Shop in Earlysville on June 2-3. There is still ONE space available.
I will be teaching the same class in my shop Aug 5-6, with space still available.
Sam Beauford Woodworking Institute
I will be participating in the Great Lakes Woodworking Festival in Adrian MI on June 17-18. I will have marquetry products for sale and I will be demonstrating. I’d love to chat if you are in the area.
Following the festival, June 19-24 I will be teaching an Advanced Veneering and Marquetry Intensive at Sam Beauford Woodworking Institute in Adrian. We will make an oval radial veneered tray with a double bevel cut hummingbird and hibiscus inset into the radial pattern. This is the most complex combination of techniques that I currently teach and it’s pretty spectacular. Please contact them for availability.
Laying out an Elliptical Fan – Part I
from Veneering for Furniture Makers Class
This is part 1; I’ll finish it off next month, since I also need to talk about sand shading, in the Tech Topic.
(photos) The federal fan is a classic design element. They are round or oval, and can be made as ¼, ½ or a whole round.
This description is for drawing an elliptical /oval fan. The round fan is the same, but all of the elements are the same size.
As in any veneer work, the layout is critical. If you lay it out wrong there is no chance that you can cut it correctly, so take the time to draw it precisely. Making it is pretty straightforward once you have it drawn.
Let the machines do the math for you
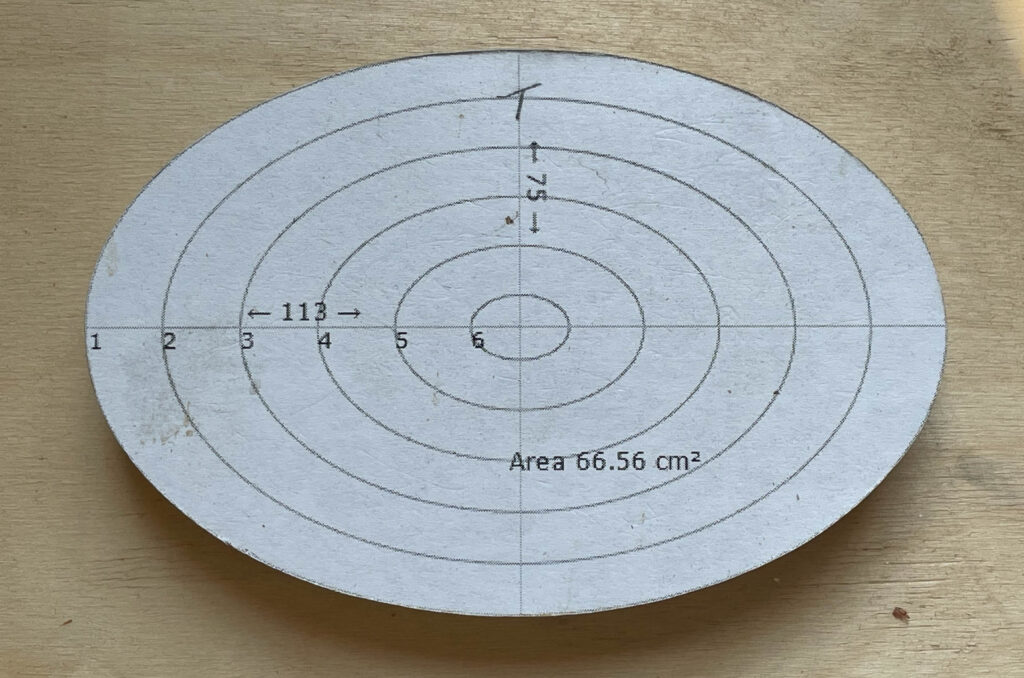
Drawing an oval without a computer involves two pins and a string. This technique has been used for centuries. The math to determine the pin locations (foci) and string length to get the shape and size you want is inconvenient, so I use a website called https://www.blocklayer.com/oval
You specify the oval, and it provides the foci and string length. I use this when my oval is bigger than a single piece of paper, otherwise I use https://www.blocklayer.com/oval-templates and print the oval at 100% of the size desired. Since the printer will sometimes change the scale, measure it after printing.
So, what dimensions do you make your oval? I make mine so that the length and width are the same ratio as the panel the oval will be placed in, i.e., if the panel is 9” x 12”, my oval has a 3:4 ratio of width to length. About 20%-25% of the length of the central panel seems about right. Print out an oval and place it on the panel and see if it looks right.
Making a template
Once you’ve decided the correct size oval for your piece, stick the printout to a piece of mdf and sand it exactly to the line. Label the top, front and back, and mark the four axis lines on the edges. This will be your template. You will use this for several things, and I save mine for potential future use.

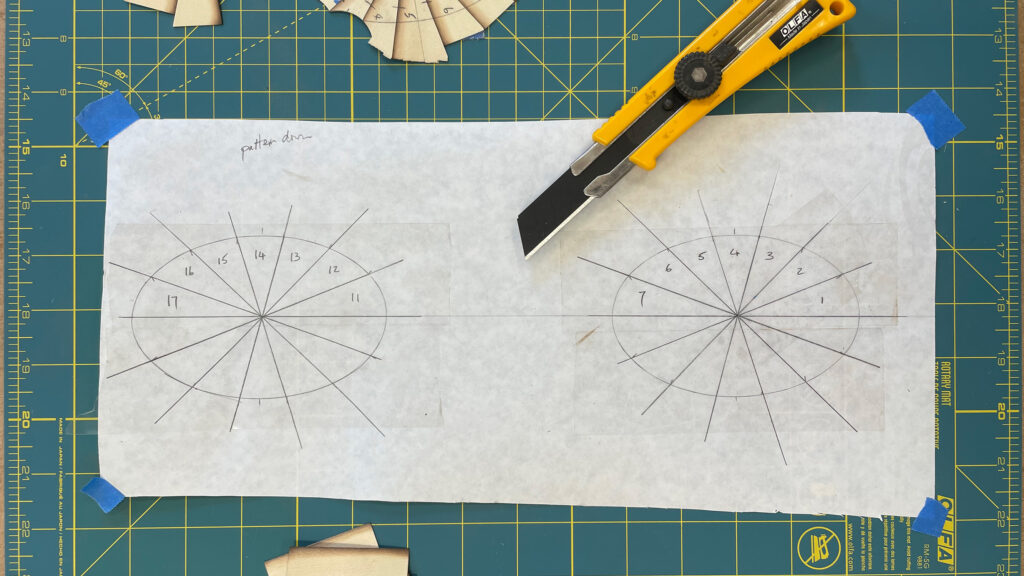
Place your template on a piece of paper, trace the shape and the axis lines, and mark the top. Note on the paper whether the template was up or down when you drew it, since the two sides are not exactly the same.

Now you have a drawing of an oval with horizontal and vertical axes marked. So, how many segments do you want for your fan? I prefer that there not be a seam on the short axis (i.e. I don’t generally make a 16 segment fan), but I do generally have a seam on the long axis, so I have an even total number of pieces. For the fans in the pictures, I made 14 segments, seven on each half, so that there is no seam on the short axis. You could have an odd total number of segments but I’m not sure it’s worth the aggro.
Use dividers to step off 7 segments, to the half way point. It takes several attempts for me to get really close. Once I’m that close I step off six, then leave the seventh one as whatever it is.
We need sand shaded holly for the next step, so let’s talk about sand shading.
There are still several more steps, so I will complete the article next month.
Tech(nique) Topic: All About Sand Shading
Sand shading adds depth to your work. Hot sand will burn veneer. How much and how long a piece of veneer is in the sand determines how wide and dark the shading is. It’s that simple, in concept. In practice, we need to talk about how to really do this.

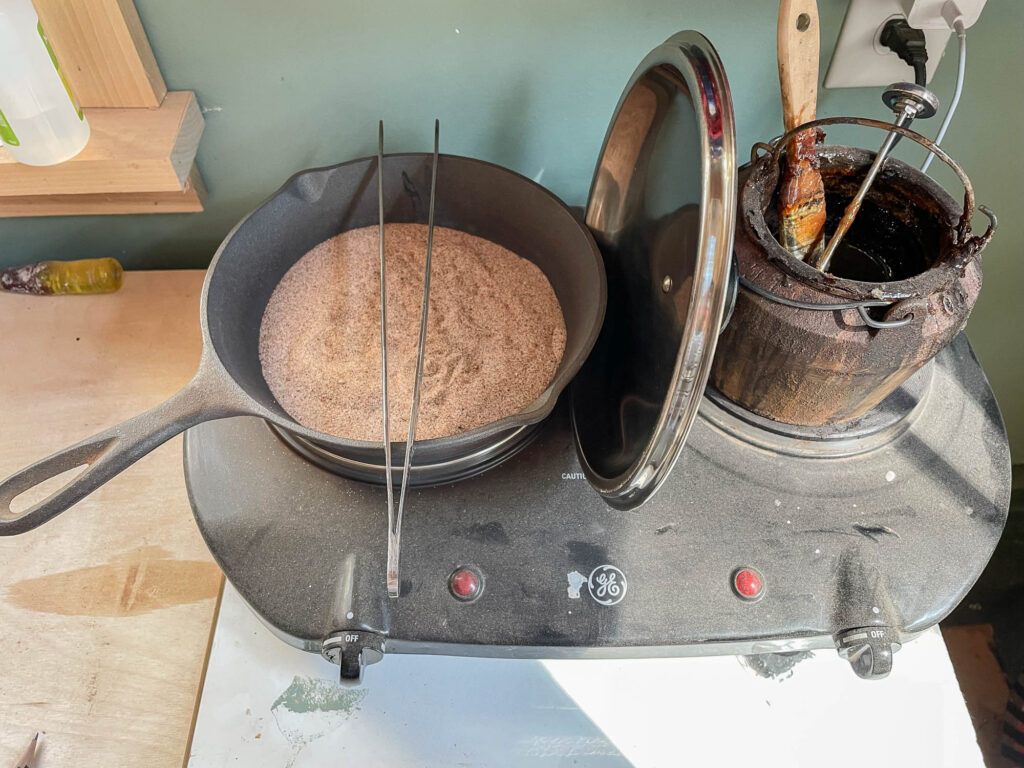
My sand shading tools consist of a long pair of tongs, an old hotplate, a cast iron frying pan with a lid, and fine beach sand. (photo) The sand is hot, about 650 deg F on the top, so long tongs are required, or you will toast your knuckles. The edge of the pan is what gets you. The old hotplate is only 1000W. More would be better, but modern hotplates have maximum temperature limits which are too low for this work. We need HOT. The cast iron pan is inexpensive and durable and holds heat well. The lid reduces heat loss, necessary with the low powered hot plate. (This was stolen from our travel trailer and my wife wants it back, but it fits perfectly) Fine uncoated sand works best. Coated sand burns, and coarse sand can cause speckling. The sand is ~1/2” deep, enough for what I usually do. If I need it deeper I heap the sand, which also leaves a hotter shallow section.
My setup takes 30 minutes to heat up. At that point the sand is hot on the bottom, and cooler at the top. This is what you want for stronger graduations. The longer the sand is heated with the lid on, the hotter and more even the temperatures get.

The basics of sand shading are simple. Heat the sand. Pick up a piece of veneer in the tongs, stand it up in the sand, remove after one second to gauge the sand temperature. Repeat until the color gradation is correct. Repeat until all the pieces are done.
The veneer starts “tanning” when it hits 450 deg. Any points will get to temperature very quickly, and edges soon after. They will burn if you let them.
If the piece is stuck straight in to the bottom the color band will be tight – if inserted at an angle the shading will go further and be more gradual. The closer to the bottom, the faster it will get black. 5 seconds in two intervals is not the same as 5 seconds in one go, because the wood cooled when you took it out, and it takes time to reheat. I count aloud when shading to get more uniform results, and they’re still not uniform because the placement isn’t exactly the same each time, and the sand surface is cooling when uncovered.
More tidbits: All woods shade but some species shade more predictably. Some dark woods like walnut shade very nicely. Species tend to be consistent, but other species may take much longer or shorter times. Some tropicals resist then char. Purpleheart is very challenging. Use scrap pieces to test the sand and your technique – veneer is cheap but carefully cut pieces are expensive when burnt. It you leave a piece in too long, the shape will change and it may not fit when intended. Hot sand can be poured onto the surface to tan interior segments, but this hasn’t worked well for me. It is best to know what you intend before you start, since you can’t undo this. Sculpt the sand to shade only what you want.
As you can infer from the tidbits, this takes practice. My general rule is shade to close but less than I want, then shade a bit more once I’ve assessed the results on all the pieces. Since I only sand shade occasionally, there are always a few test pieces before I get to the main job. Excellent shading makes the work look very elegant. Shading that is too dark can look excessive, but light shading is always better than no shading.
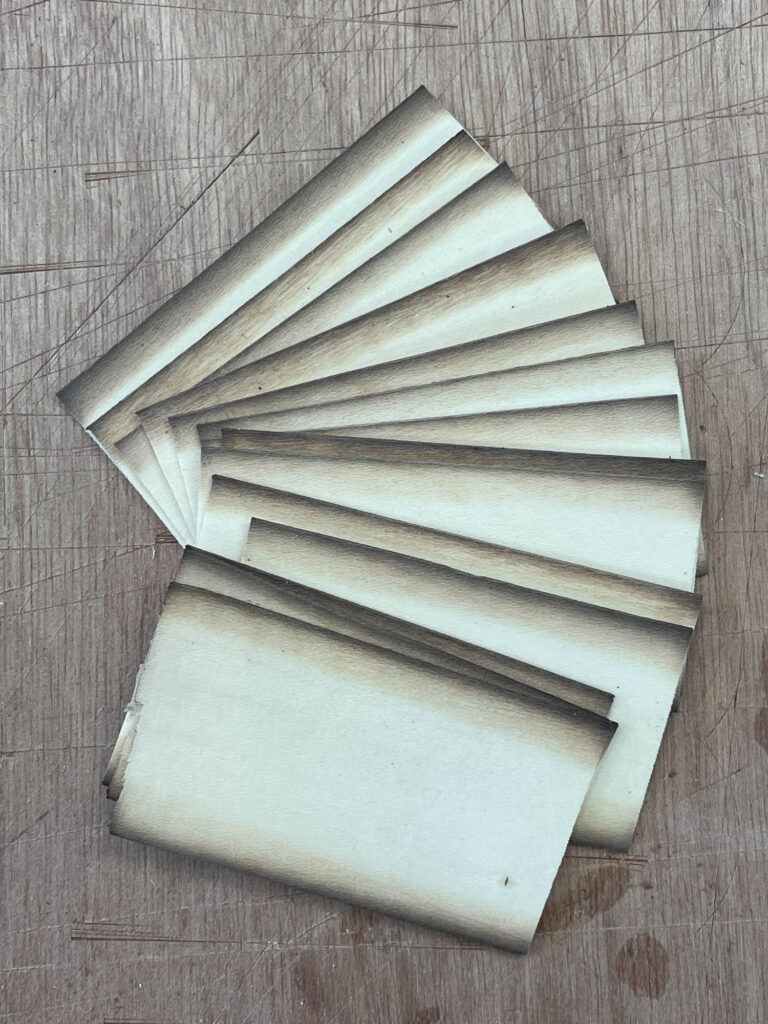
When making fans, as in the preceding article, we are shading many pieces of holly. (photo) I cut rectangles slightly longer and wider than the fan requires and shade both edges. The wedges are then cut from the shaded rectangles. If the wedges are cut first the tips will burn off before the edge is dark.
What to shade: with the fans you shade the outside edges then cut the wedges. With marquetry, my convention is that the sun is at 10 o’clock on the picture. Determine which pieces are behind and below others from that sun angle, and mark the portions of the pieces that would be in the shade. Those are the bits that need to be shaded.
return to the running with chisels archive
return to top
©️ 2025 Heller & Heller Furniture | Privacy Policy | Terms