Running with Chisels Vol. 16
Marquetry tips
Browse by Category:
Welcome
Our corner of the internet dedicated to decorated furniture
#saynotonakedfurniture
#dressyourfurniture
rwc archive
tools
classes
Vol 16 | November 1, 2024
Marquetry is in the air. Classes are proceeding apace. The new tool cabinets that have been creeping into my work flow while other things are drying will be done soon, and hanging on the walls. They are part a larger plan of improving my workspace, primarily for classes (but who doesn’t need four workbenches in their shop? Ok, other than all of us without three woodworking siblings.)
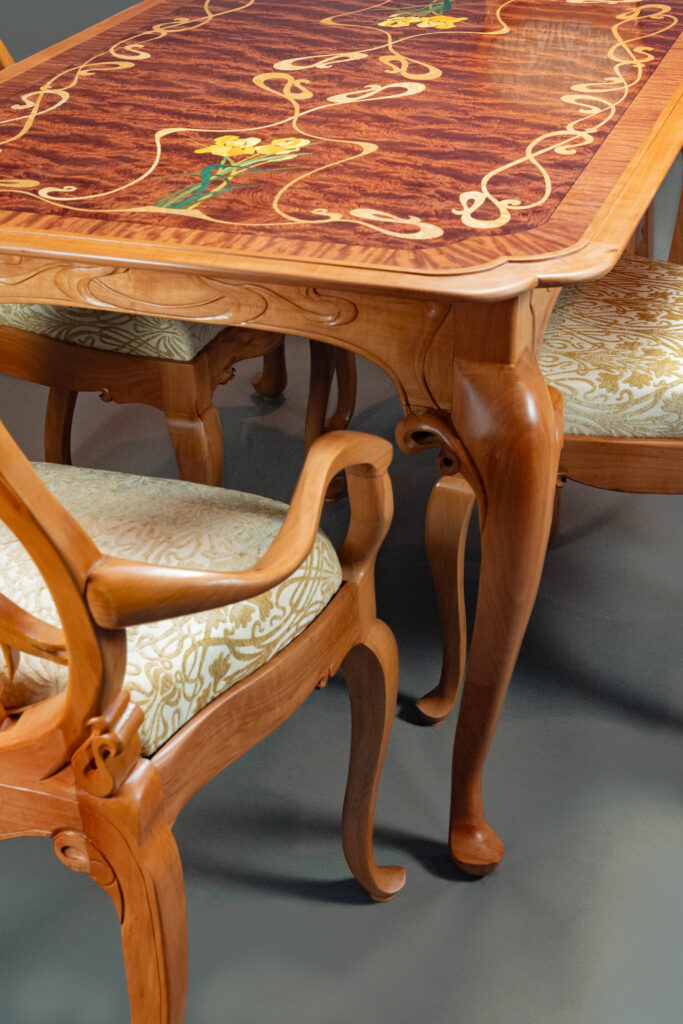
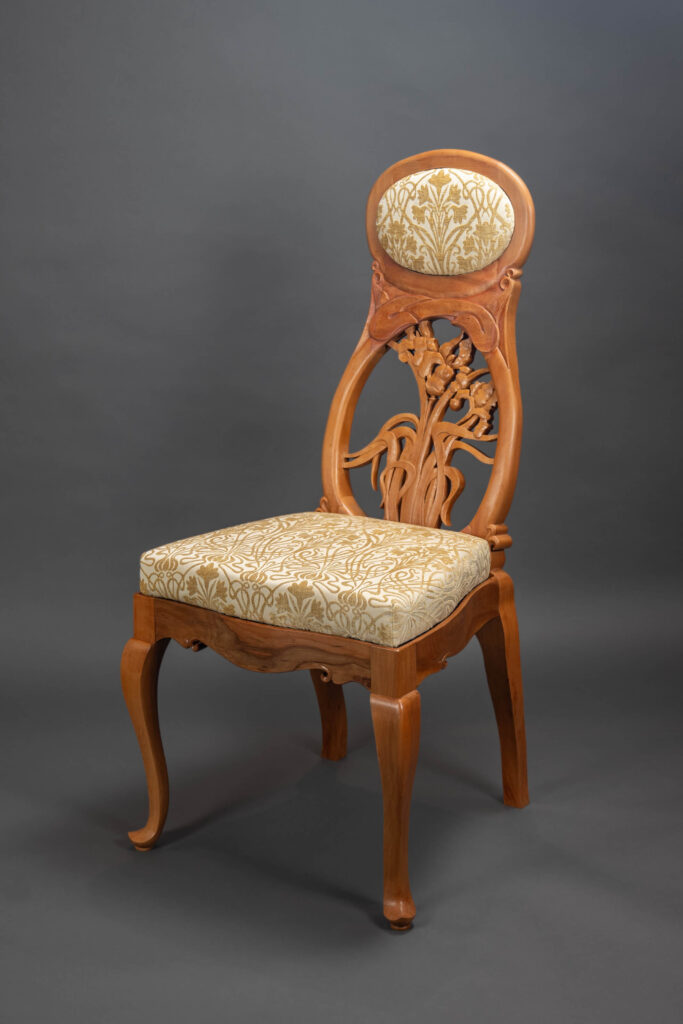
Firstly, the never-to-be-completed Art Nouveau table and chairs are finished!!!!! I am so relieved. There are still several pieces to go with these, but there is also a plan. Details to follow once there is a design, so the plan can then be fleshed out.
Secondly, the new class schedule for 2025 is not yet ready to be released. I had a plan, and then …….
My current intention is to schedule each of the introductory classes in the Spring and Fall, and the more advanced classes once in the year. I hope to have something out very soon. There are currently plans for classes to be held at the Wood and Shop in Earlysville, VA, the Fredricksburg (VA) Workshop, the GoggleWorks in Reading, PA (new to me) and the Sam Beauford Woodworking Institute in Adrian, MI.
I am open to a couple more road trips in 2025 if you or your organization would like me to teach at your location – just reach out.
In this edition of Running with Chisels:
- Classes for 2025: New offerings
- Tech(nique) Topic: Inlaying Curved Veneer Elements into a Table Top
New Classes for 2025
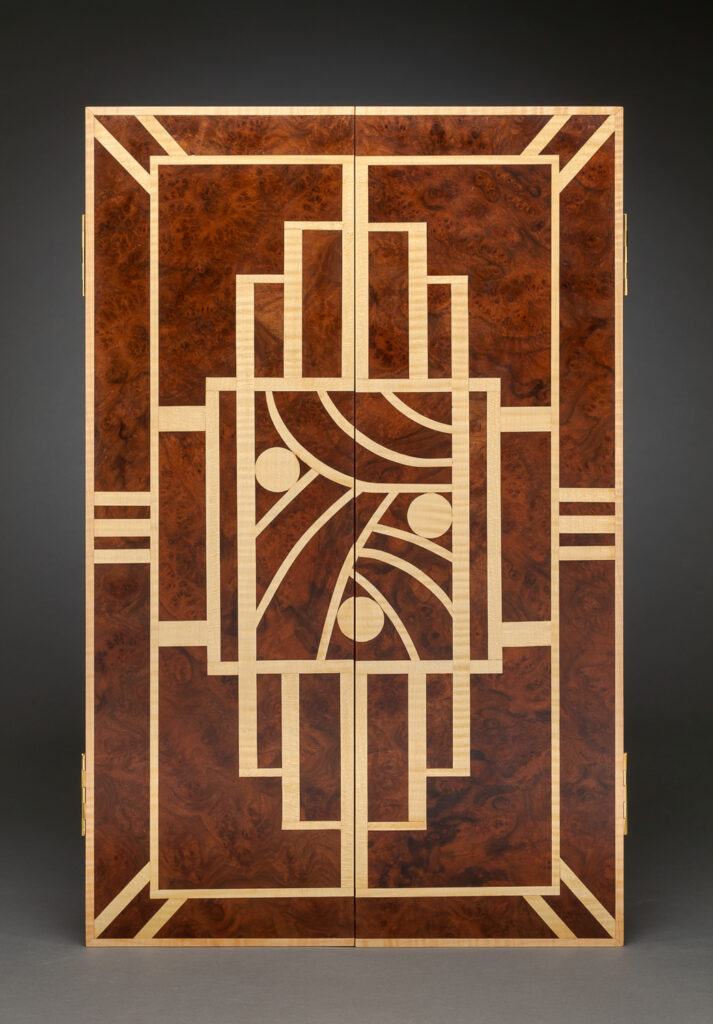
2025 will bring some changes to my class structure, including the long-awaited Geometric Marquetry II! Geometric II will involve curves, and multilevel jigs. The specific design of the project will be on paper by the next newsletter – right now I am working through a couple of possibilities. It could look like the center of the 66th St cabinet, which caused me fits when I first came up with the design.
Next: a new pathway to Double Bevel. I have taught double Bevel marquetry as an intermediate class requiring either previous marquetry or scroll saw experience. The concepts are more complex. The Painting with Wood class provided that experience, but the packet-cutting focus to create multiple pictures is not as useful to some people. I will continue to offer that class, since it is a useful introduction and we cover sand shading and kerf filling.
As an alternative, I am going to offer a three-day Double Bevel 0 class. This assumes that the student has little to no woodworking or marquetry experience. On Day 1 we will learn to use the scroll saw and deal with veneer, then make a simple double bevel picture. Day two and three will cover the same material as DB I, and by the end of the class we will have made the hummingbird. I know that there will be some folks that don’t want to burn a day of vacation like this, so the original path is still available.
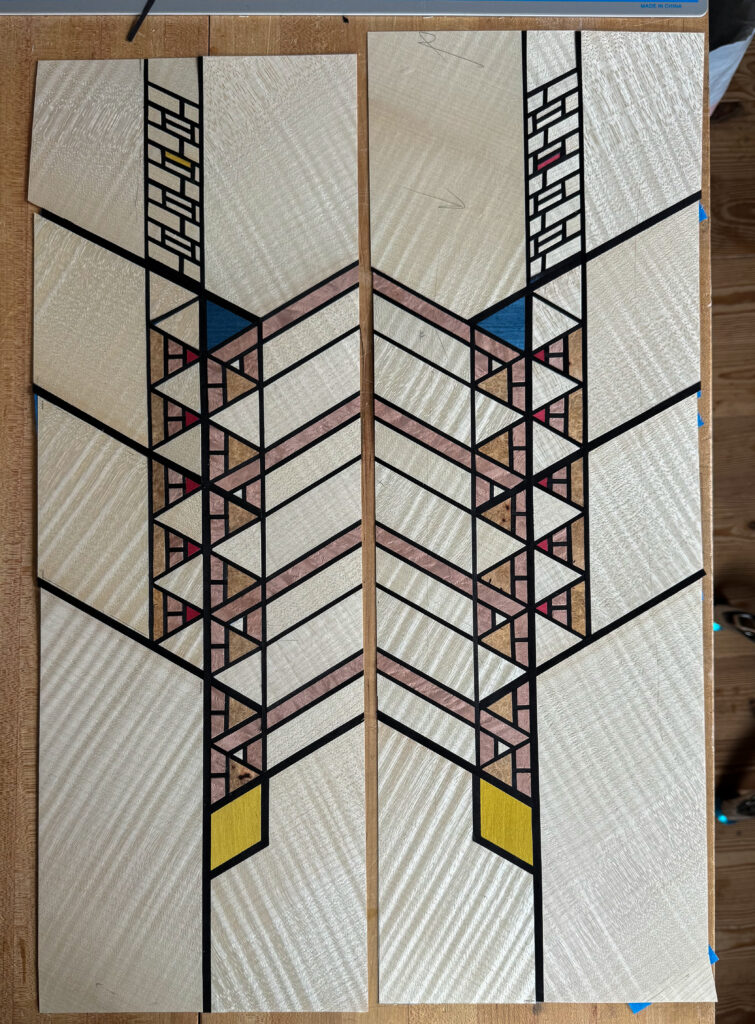
Finally: We have considered the idea of an open studio type session before, and a recent custom class brought me back to the idea. My focus has always been on teaching techniques that woodworkers could then bring back to their own studio and work, however I know some students come to my classes with a specific project of their own in mind.
Along those lines, I recently held a custom class for a student wanting to make a complex Prairie style pair of doors for a small cabinet.The design was demanding, so execution had to be tight. We made the pattern together. The first door went OK and the second one better, and we got a lot done in two days.
As a way of moving the needle on your own projects and work: What are your thoughts on having an Open shop weekend, where four people could work on their own projects in my shop while I provide support as needed? Let me know, and please reach out to me if you’d like some assistance kickstarting a complex project.
Tech(nique) Topic: What are some best practices for storing veneer?
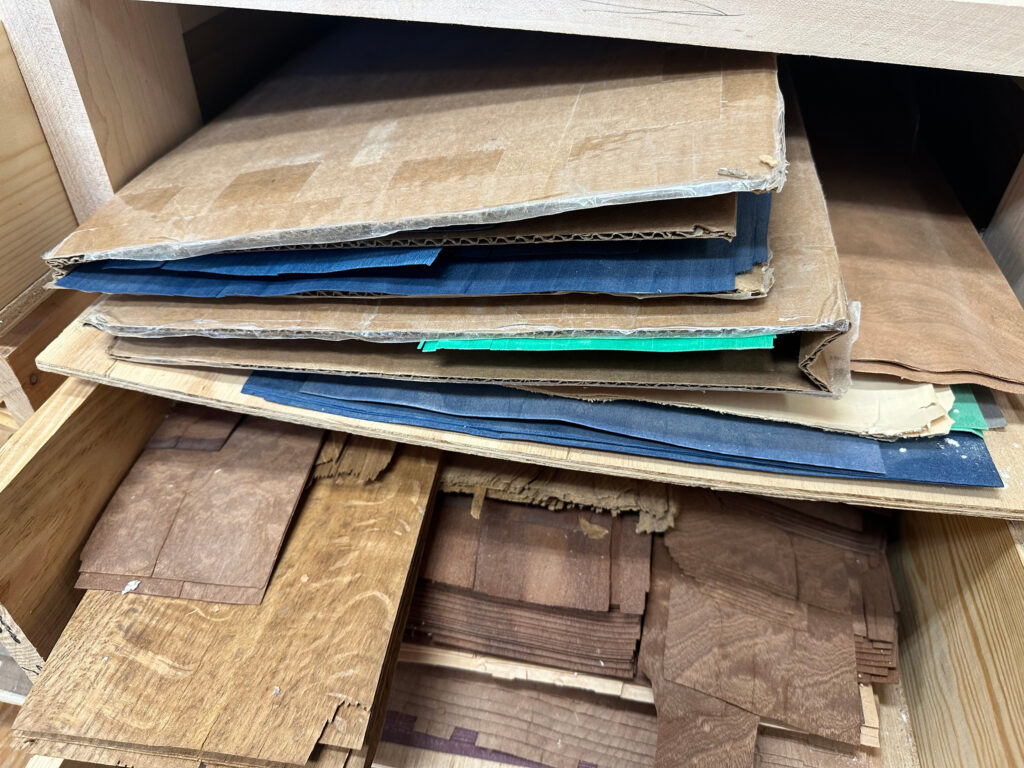
Storing veneer is both easier and harder than storing wood. Wood is hydroscopic – it loves water. Woodworkers do not like the effect though. Since veneer has much more surface area than solid wood it reacts more quickly and vigourously to changes in humidity. The most important element in storing veneer so that it remains useable is to keep the humidity stable. A reasonable temperature is also good, but if you are comfortable, so is the veneer. Humidity fluctuations are very bad though.
When I first started veneering I only had a couple of boxes. I kept the veneer in the boxes, which reduced the amount of variation the veneer saw. That worked fine until I bought too much veneer, including longer pieces. Now I had to do something more forceful to manage the humidity.
There are a couple of approaches depending on the size of your shop, how much veneer you have, and how much the humidity varies. Here in Virginia, summers are hot and humid, and winters are moderate but dry. I dehumidify all summer, both using an air conditioner and a dehumidifier sized for my shop. In the winter I humidify. My target year-round is 50%. If I lived in a drier climate it might by 40 or 45%, and further into the swamp maybe 55%. The key is to have a target and a plan. I have at least three humidity sensors around the shop as well, so that I will notice if the system isn’t working.
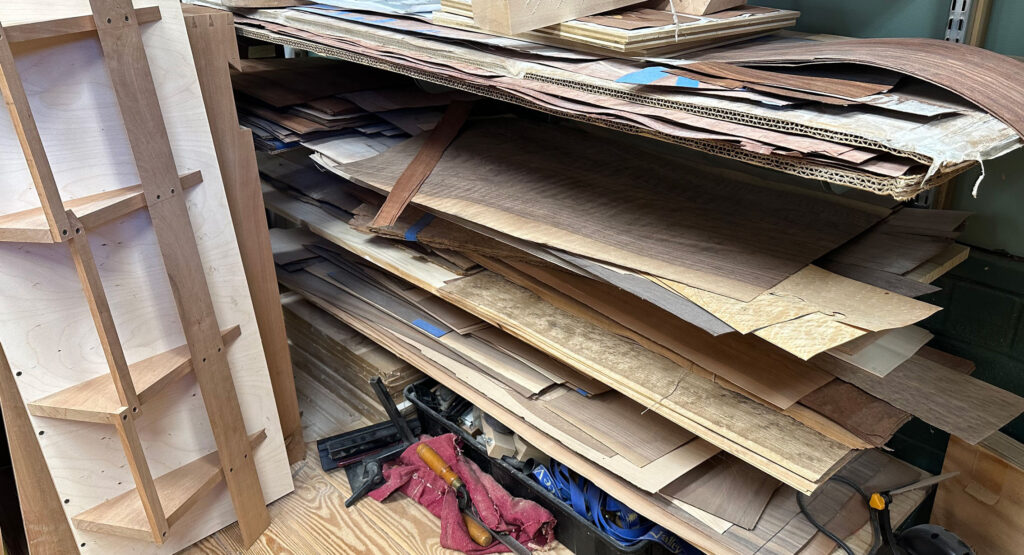
In a damp warehouse in England I saw blankets over every pile of veneer to filter the fluctuations caused by the temperature going up and down. Higher temperature damp air contains a lot more moisture than cool damp air. I have used carboard laid on the veneer stacks to filter humidity variations. That will slow down the effect of any changes, but large fluctuations will cause some veneers to flex. Less stable veneers like burls and crotches are the worst. If a flitch arrives wrapped in plastic wrap, that’s a hint. Leave it in the plastic, with weight on it if possible. I often store my burls in the original shipping packages, stacked.
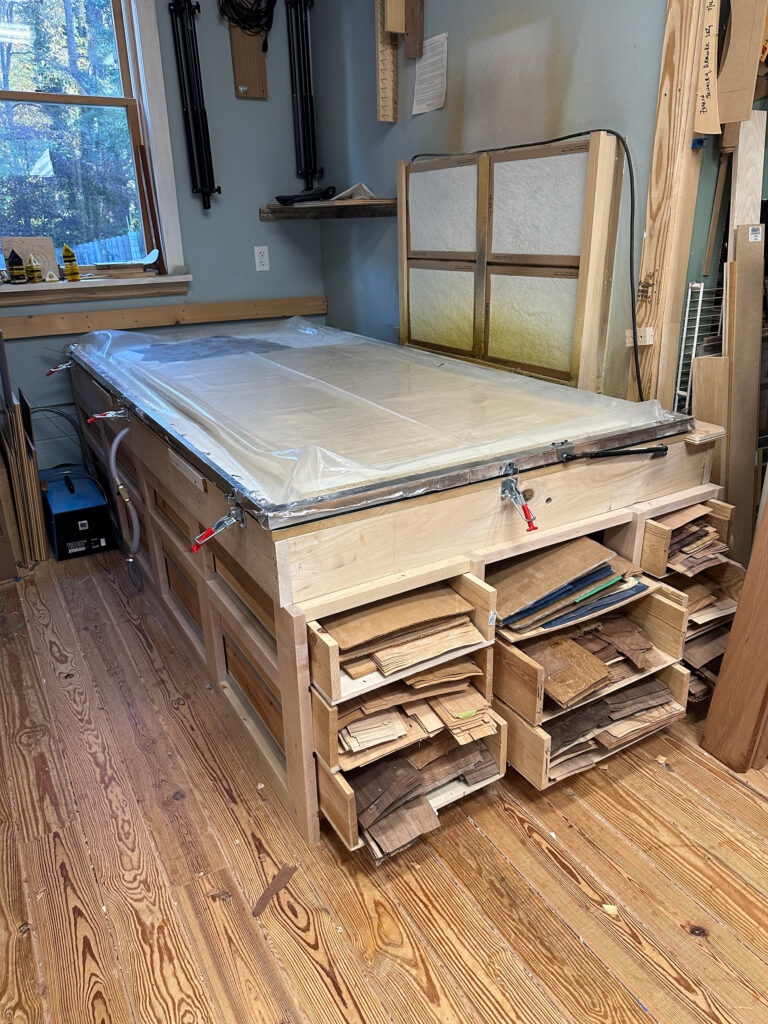
Since I have a lot of veneer I built a drawer storage system under my vacuum press. There are three levels of drawers in three different widths, all 8’ long. This gives me a lot of capacity and lets me store veneer up to 19” wide. I cut veneer longer than 8’ since I don’t make large or long things often. So far, I haven’t regretted it. Initially I had open shelves of veneer, but as I bought more it became harder to keep track of what I had. I now have the contents of each drawer written in a book, so it’s mostly accurate.
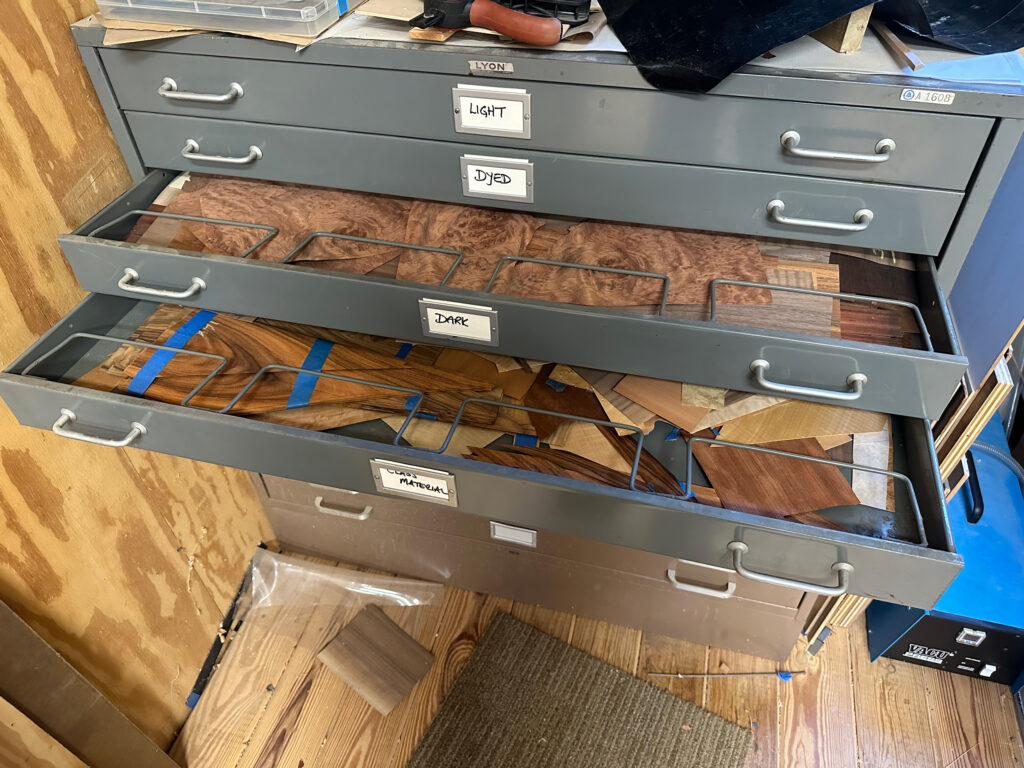
I also have two 30”deep by 40” wide five drawer architectural filing cabinets. I store my smaller pieces here by color, use and quantity. They are terrific for all of those mid-sized pieces that are still useful but not long enough for the main shelving area. These cabinets are expensive to buy new but are often available used. Mine were free, available from someone who wanted the space back. They are heavy, so need two people to move. You could make your own as well. Shallow drawers are better than deep ones. The 30” width is less useful than the 40” long.
If you have a good way to store veneer that I haven’t covered, I’d love to hear about it. Storage is mundane, but it needs to be done well to keep your veneer flat and happy years into the future.
return to the running with chisels archive
return to top
©️ 2025 Heller & Heller Furniture | Privacy Policy | Terms