

Running with Chisels Vol. 1

Vol. 1 | April 21, 2023
Welcome to the inaugural Running with Chisels newsletter. This will be a monthly conversation about all things marquetry and veneering, and likely other woodworking things a well. The problem won’t be in finding topics, it will be in limiting the length of the newsletter so that I can actually woodwork as well. My intent is to inform and amuse you in a geeky way, and help to spread the word.
We are a very small operation right now, but the objective is clear: world domination. Every naked piece of furniture would look better if it was dressed, however scantily. We will dress our furniture with veneer or marquetry, to make the world a more decorous and elegant place. Pass it on.
In this edition of Running with Chisels:
- Ask Dave: What type of solvent do you recommend for shellac?
- Class Focus: Veneering for Furniture Makers
- New Videos by Wood and Shop on YouTube
- Tech(nique) Topic: Using Palette Paper in Veneering
Ask Dave: What type of solvent do you recommend for shellac?
A: I strongly recommend only using “natural and renewable” denatured alcohol.That verbiage (which will be on the label) is marketing speak for ethanol, made from corn. All alcohols are metabolic poisons, so breathing their fumes is not good for you (I wear a chemical respirator when I mix or use shellac). Some are more dangerous than others.
Ethanol is an alcohol that your body can break down within a few hours, so is much less bad for you than not-processable methanol, the primary component in non-renewable denatured alcohol. Methanol’s only claim to fame is that it is cheaper for the supplier than ethanol, and they don’t even pass that benefit along. You can also buy ethanol from Amazon, or Everclear (95% ethanol, and food safe) from the Liquor Store in some states. I have heard it said that ethanol, no matter the source, also gives better results than methanol, and it may. It is definitely less toxic for you.
To confirm the composition of the solvent you bought, lookup the Material Safety Data Sheet (MSDS) for the product. All commercially available chemicals are required to issue MSDS’s for their products, so that users can handle them safely. The marketing verbiage on labels are masterpieces in obscuring what is in the package, but the MSDS short circuits that.
(I am a 30 year experienced Chemical Engineer, so this rant is from someone who knows somewhat of which he speaks. Feel free to consult a medical professional for further clarification.)
Changing environmental and safety regulations can make this product difficult to find and for several years the brand I bought most often, Klean Strip “Green” was discontinued. I came across some at Home Depot a few months ago and stocked up, but it now seems to be unavailable again. The product linked below is one I have used as a substitute.
Class focus: Veneering for Furniture Makers
With world domination as the objective, I need to convince skeptics that furniture is better when it is decorated. This may involve drawing them in slowly, so they don’t even notice how they have seduced by the beauty and grace of repeated patterns in veneer.
There are several styles of furniture which use veneers and bandings as their main decorative elements. That is in fact how I got into this: I was making a rolltop desk and didn’t like the interior of the design I was working from. I went to my furniture books and looked for alternatives. All of the desks and secretaries that attracted my eye had veneered drawer fronts, so I learned to veneer to make the desk interior that I designed from the examples in books. That was the beginning, and look where I am now.
While the Veneering for Furniture Makers class is centered around techniques common in Federal style pieces, the experience will leave the student with the knowledge to pursue their own veneering journey in the style of their choice. This Federal bedside table pair is made using techniques form this class.
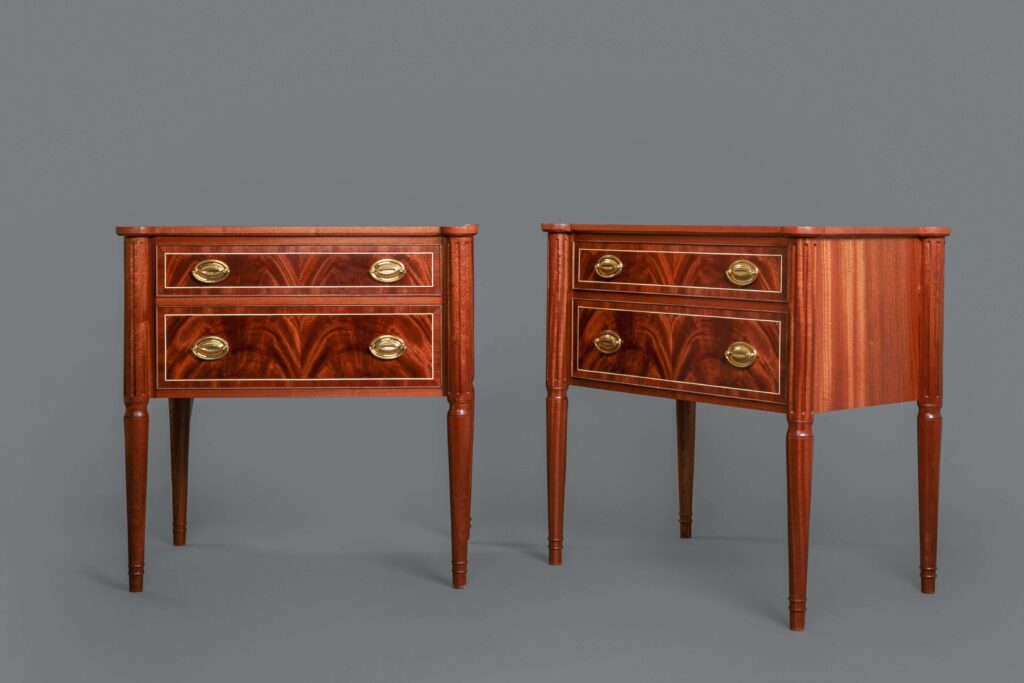
Day 1 covers making bookmatched panels, and edging them with a fillet and crossbanding. This is a very traditional approach that is easily modernized though choosing different woods for the fillets or bandings.
On Day 2, we make an oval fan inlay, and set it into the panel we made on Day 1. The key to the fan is the design and the shading, and we will consider several design alternatives. Sand shading is a
straightforward and very rewarding technique for adding a shadow gradient on the edge/end of a piece of veneer.
On the bedside tables, two and four way matches of the mahogany drawer fronts and top, holly fillets and a red tropical crossbanding. The only more complex elements are the rounded sections above the legs.
For those that hanker for more, I also offer a four day Veneering for Furniture Makers Intensive. In
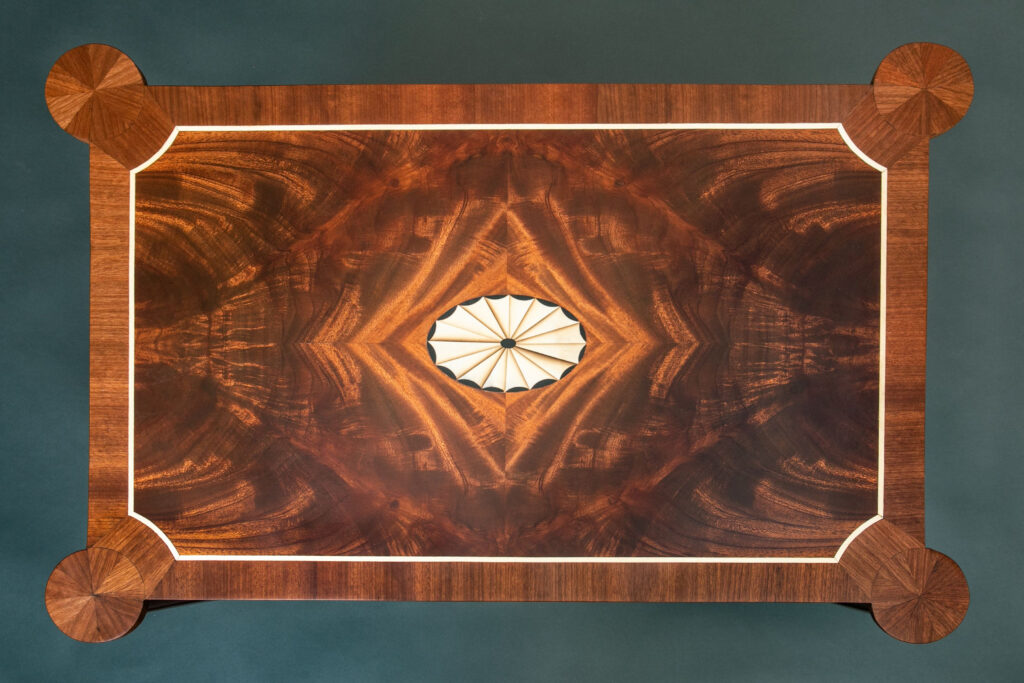
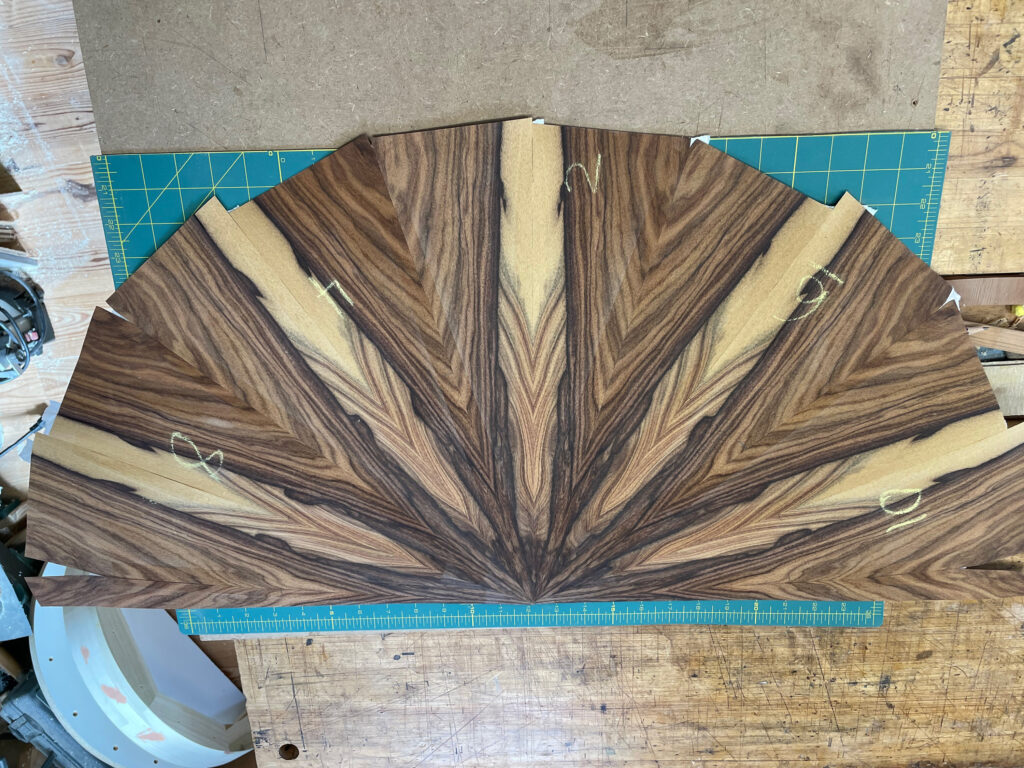
addition to the material above, on Day 3 we make a small radial veneer demilune table top. Again, the emphasis is on the layout process, and how different designs are laid out. The technique is an extension of the four way pattern match technique covered on Day 1. That may not be obvious the first time you do it, but as you practice these techniques the common threads become clearer.
The Day three product then looks like this.
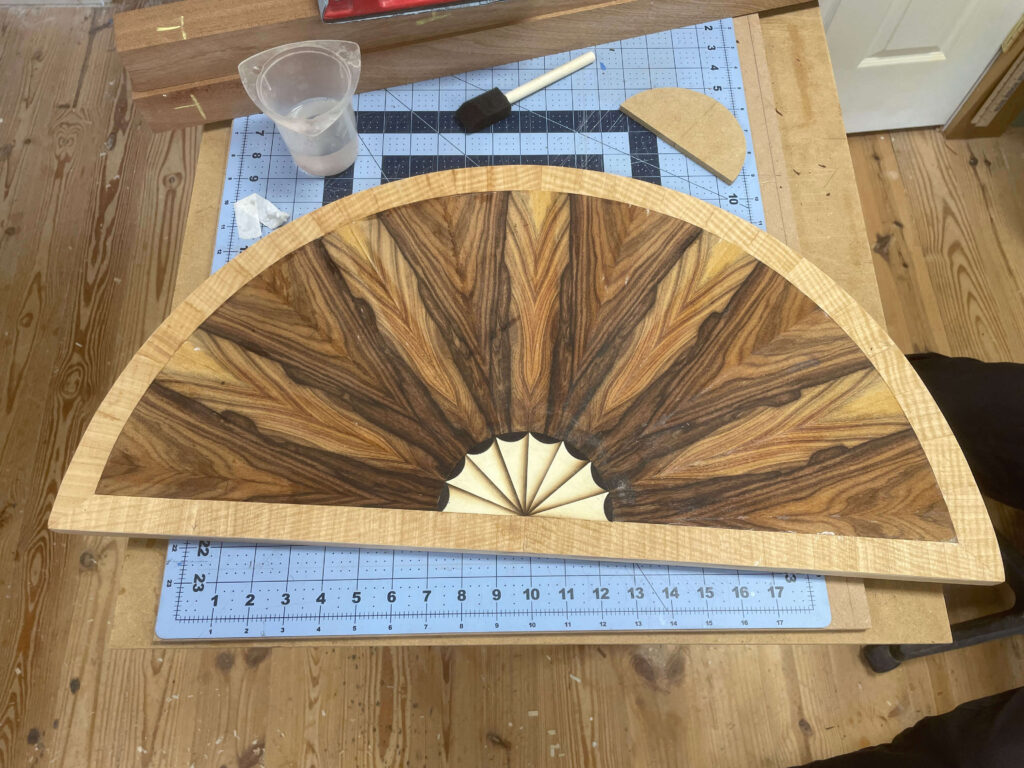
On Day 4 we apply edgebanding to it, and if we have time we also make a fan inlay and install it.
As you can see, this technique can be used to make traditional or more modern furniture, based on your choice of wood and which portion of the veneer you use for the repeat pattern.
New videos by Wood & Shop
Now live on Youtube!

From Dave: The Wood and Shop is a hand woodworking school run by Joshua Farnsworth in Earlysville VA, about 10 miles from my shop. I have taught a couple of classes there, and will be teaching there again on June 2-3. The
topic is Veneering for Furniture Makers (which you now know more about.)
Joshua has serious videography experience, and has posted many excellent videos on a variety of topics. His website is a treasure trove of hand woodworking, and they are also posted to Youtube, where he has 226,000 subscribers(!). He has recently posted a series of videos by me, describing what we will be doing at the class in June.
Here are the links to the most recent videos:
Part I | Part II | Wood and Shop’s YouTube channel
Please pass them along to all of your friends, and consider subscribing to Joshua’s platform.
And yes, I really do talk like that. All of the time.
But don’t just take it from Dave:
” I love your voice, you sound like Steven Colbert teaching about veneers ” – Álvaro commenting from YouTube
High praise indeed.
Tech(nique) Topic: Using Palette Paper in Veneering
A new material provided excellent, reliable results in assembling pictorial marquetry
This is a recent process improvement to my packet cutting (pictorial Marquetry) approach. It allows us to fill the kerf spaces with walnut sawdust without requiring the use of French Kraft paper, which is only available from a few places in the US.
This technique uses readily available materials, it’s slightly faster, noticeably less expensive, and seems to work as well as the Kraft paper technique. This technique is an improvement from what I have been teaching in the packet cutting class for the past several years, so if you took that class from me I encourage you to read this writeup.
When I was taught pictorial marquetry (packet cutting) we assembled the pictures onto a stretched piece of waxed kraft paper using hide glue. This is the traditional French method, and it has several advantages:
- The hide glue dries slowly enough that the picture can be assembled in zones and the glue will be wet enough to hold the pieces but will set soon after. The pieces can therefore be moved slightly to get the best fit, and then will lock into place.
- The stretched paper holds the assembled picture well, so mastic can be applied to the up side (the back). The mastic fills the kerf and can act as a highlighter.
- The paper can be removed by applying water to the picture after it has been glued to the substrate.
The main downside of the approach is that the waxed kraft paper isn’t commonly used in the USA, so it has to imported from Europe. One of my main objectives in teaching is that the techniques should be accessible by anyone with interest and a modest budget. This approach seemed to me to be impractical to teach to folks who aren’t die-hard marquetarians.
I have therefore been teaching a compromise method, using blue tape instead of Kraft paper. This method also has several advantages:
- It is really fast, especially for smaller pictures such as we make in the class.
- The pictures can be assembled at any speed, because the blue tape is very patient. Hide glue is not.
- It is not prone to pieces swelling or flexing during assembly, since the veneer pieces don’t get wet. They do in the kraft paper technique, from the water in the hide glue.
The major disadvantage of this method is that mastic (grout) cannot be applied because the veneer isn’t stretched (If you try, the water in the mastic it will cause the picture to immediately curl like a pretzel). Therefore the kerf lines are empty spaces between the pieces rather than filled dark lines. They go from being an attractive feature to at best not noticeable, and usually unattractive. Although the benefits outweigh the costs from a teaching and accessibility standpoint, I don’t do it that way myself because I think it is unattractive. And, I really hate teaching a method that I don’t find sufficient myself.
I have been mulling this problem for some time, but I was encouraged by a student recently to come up with a solution. After a couple of experiments I have a technique similar to the French method but using products available in this country. It works well enough that I intend to use it for my work as well as for teaching.
If you want to apply mastic (grout) to your pictures, the picture needs to be held by something that will stop the veneers from curling when the wet mastic is applied, but can be easily removed later. Enter the art supply store:
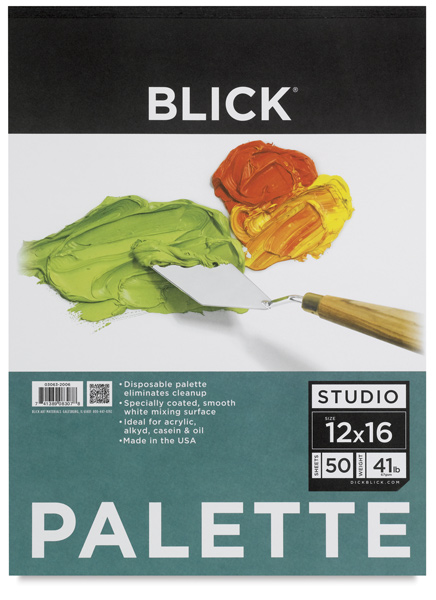
Palette paper is a plastic coated paper used by painters. The plastic (up) side allows the artist to mix water or oil based paints without the paper wrinkling. We want a paper that doesn’t wrinkle when water based glue is applied, which is very much the same thing. The other side is just paper, so it does react when it gets wet, so we can stretch it prior to use, the other key feature we want. Palette paper is inexpensive, and readily available.
Buy palette paper larger than the pictures you plan on making. Any art supply store sells this product. Dick Blick sells this paper in bundles of 50 sheets in sizes from 9×12” to 18×24”. I currently have 12×16 sheets, big enough for several small pictures to be assembled side-by-side, and I will likely buy at least one larger size for bigger pictures.
Cut a board one inch larger than the paper size in both dimensions. I use ¾” material so that when the board gets a little wet it doesn’t curl up. Turn the palette paper upside down and evenly wet the paper side. I use a foam brush. Give it a minute to relax. It will curl. Turn it over, so the plastic side is up, and place it onto the board and smoothly stretch it. It won’t stretch much. Staple the middle of one side, stretch the paper, do the other side, rotate 90 deg, continuing to encourage the paper to be taut, and stapling all around about every inch. When the paper dries (overnight) it will be smooth and taut. I use a lightweight stapler (Arrow Trutac) with ¼” JT 21 staples. This is a wimpy stapler, and quite sufficient. The staples don’t need to be strong – we are stretching paper. It is also nice if they are easily removable later so that the board can be reused.
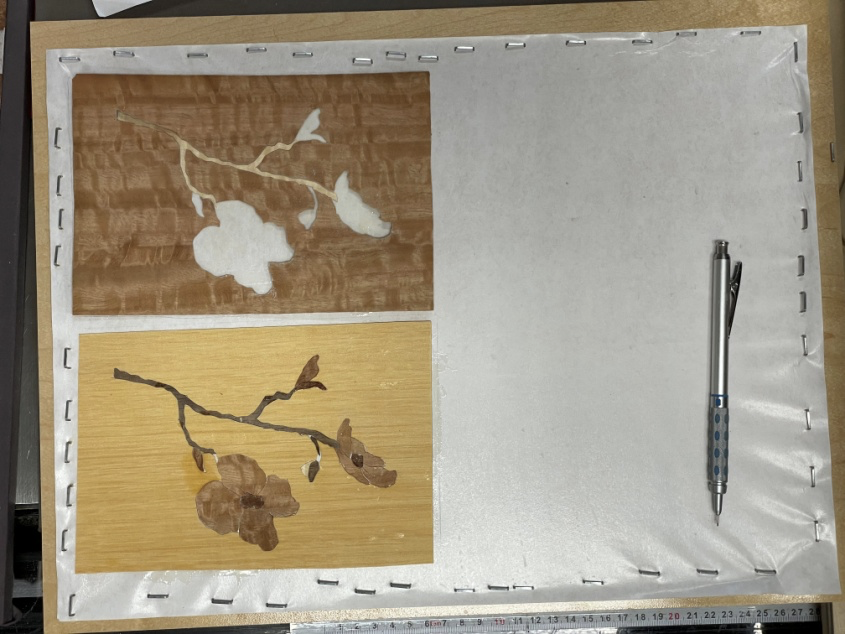
To reiterate – this has to be done at least several hours before the board needs to be used so that the paper can dry and be taut. Wrinkles are not helpful. It is pleasantly surprising how well the paper smoothes out as it dries. Your assembly board is now ready for use.
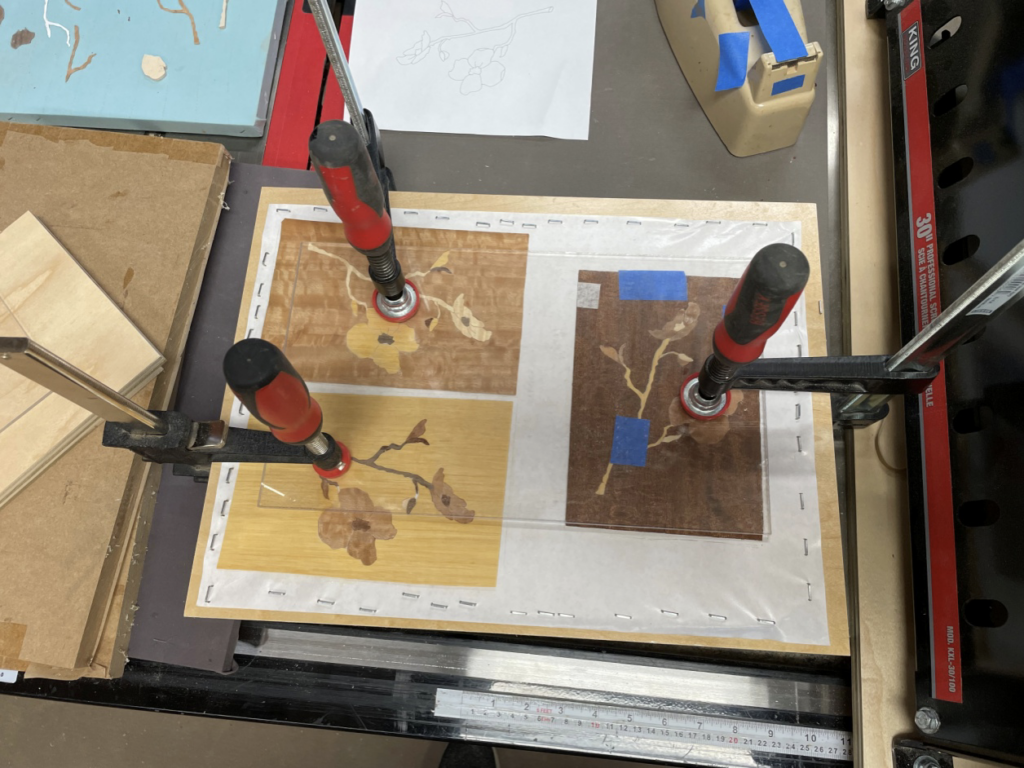
Determine how you will lay out you pictures on the board – if you have space for multiples, do it. Apply fish glue to the palette paper, which is plastic side up so doesn’t wrinkle. Apply the background to the glued surface, and quickly but smoothly install the pieces within the frame that is the background. I build from the outside edges in, trying to get even spacing around my pieces so that the mastic gives an even line.
return to the running with chisels archive
return to top
©️ 2025 Heller & Heller Furniture | Privacy Policy | Terms
