

Running with Chisels Vol 18.

Vol 18 | January 10, 2025
First of all – I hope that everyone is having very happy holidays, and that 2025 is wonderful for you and yours. We had an eventful 2024 and I’m hoping for a calmer but enjoyable 2025.
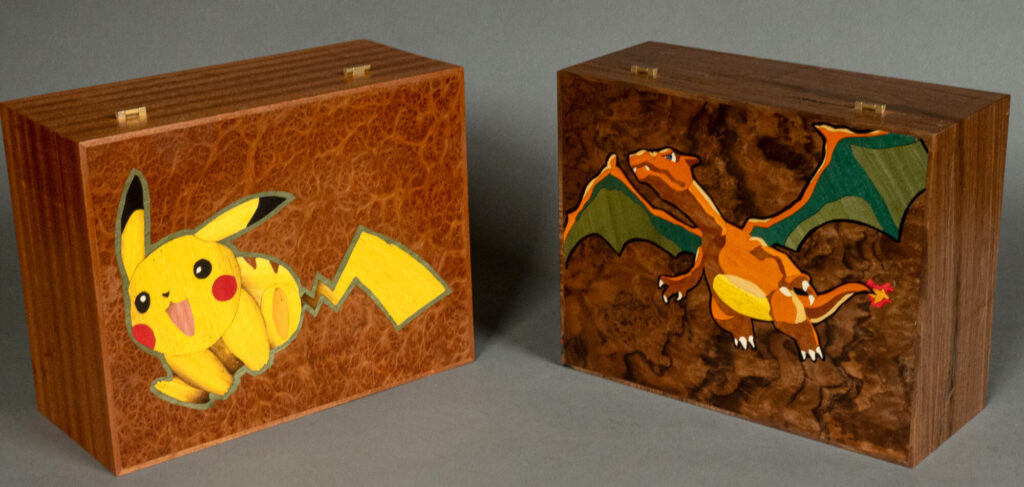
Christmas was approaching when I decided to make keepsake boxes for my two Grandchildren. I had some partially assembled boxes so making marquetry lids didn’t seem too ridiculous. They are both big cartoon fans so I found some images of their favorite characters on the internet and copied them into Photoshop. I modified them so that they were more cuttable, then made them in double bevel marquetry. Dyed veneers matched the original colors pretty closely. The dragon was shaded using different colors, and the rabbit (apparently the other one is a mouse) using sand shading. This was done before cutting the pieces, which avoids the issue of shrinkage from the shading but is more fiddly.
The results were satisfying and the kids liked them. It’s not my usual type of image, but the line drawings are called cartoons!
If you have thoughts on doing something like this that is out of your comfort zone, the Open Studio Class on June 28/29 would be a chance to work these things out and get at least a start on something new. The dragon took me about 8 hours to cut, and the rabbit mouse about 6 hours. It is trickier than it looks.

My 9 year old Grandson likes to be in the shop. He hadn’t expressed any interest in veneering, but he has been playing chess at school and commented that he would like to make a chessboard. It took two sessions to get this far, but I am very pleased with his attention to detail, and so far no blood has been spilled cutting the pieces.
Design Help:
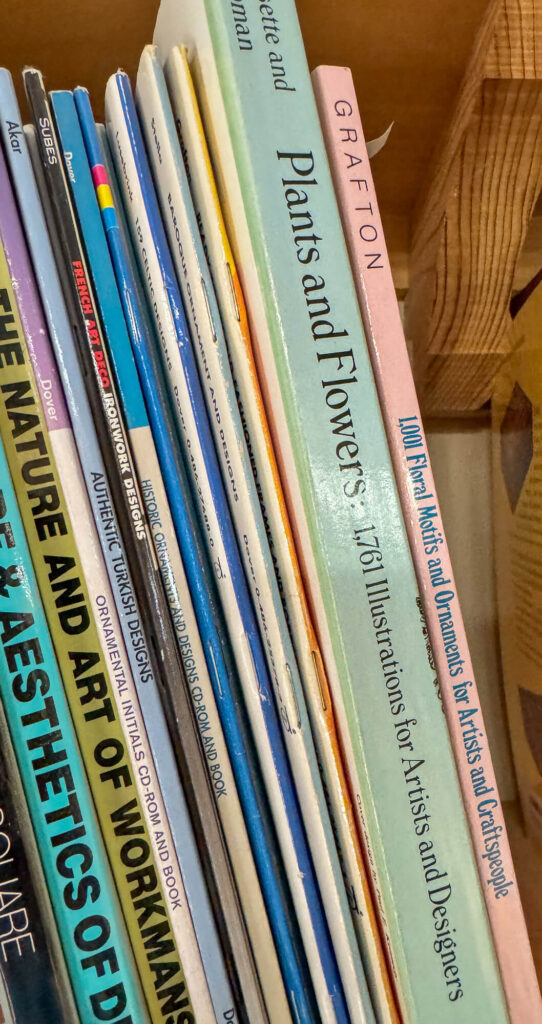
The internet is sometimes helpful as a source of design shapes but books are my preferred source of a starting point. I have several (hundred). My objective is to develop a line drawing that will be used as the cutting pattern. Starting with a drawing is therefore more useful than a photo. A favorite source of shape and patterns is Dover Publications. They have dozens of books of copyright free designs in each of many different styles and motifs. If for example you want drawings of flowers, there are likely a hundred. I have at least ten Dover books on each of Arts and Crafts, Art Nouveau and Art Deco patterns.
Other favorite sources of patterns are stained glass windows, quilts, and coloring books, but Dover books are great. They can often be bought at second hand book stores as well as new. Some newer ones come with CD’s or other computerized media but the pictures are what I’m most interested in.
In this edition of Running with Chisels:
- Classes for 2025: Relevant Updates
- Tools: New to Me Tools for Marquetry
- Tech(nique) Topic: Problems with Thick Veneer
Classes for 2025: Updates
Thank you to those who have already signed up for a class this year. The early classes are filling nicely, and the later ones still have plenty of openings. Details of what is involved in each class can be seen here. A few updates of note:
- The Demilune Table class will be full when three students have signed up, and there is only one opening left. The class will be June 17-23, here in Charlottesville. Contact me for more details if you are interested – its shaping up to be an excellent group.
- The Introductory Double Bevel class at Goggleworks in Reading PA filled immediately. Cool.
- The Fredricksburg Workshop has closed, so no more classes there for now.
Tools: New to Me Tools for Marquetry
I have been using vellum as a way to print the pattern for a double bevel marquetry picture and trace it onto the wood. The second batch I bought seemed less transparent than the first, and I was having a hard time seeing through it. I bought several variations, but no joy.
I now have a better solution. I bought Colemoly Transparency sheets from Amazon. This acetate paper takes a clean image from an inkjet printer and it doesn’t come off when working with it. The wood can clearly be seen so grain orientation and alignment were much easier. It is much less expensive than some acetate sheets but works well. I am very pleased and I will use it going forward.
It is slippery, so I taped it to the table and slid the veneers underneath, to keep things from moving. Other than that, I didn’t need to change my approach at all.
In a recent class we were using dark veneers as the borders for the hummingbird, and drawing a visible line to cut the narrow border was problematic. I used a Pica white pencil, but the line gets thick quickly. The spouse of one of the students is a quilter, and they use the Bohin extra fine chalk pencil to mark thin white lines on dark fabric. I tried it and it works great. The pencil is a 0.9 mm mechanical pencil with white leads. The line is crisp, and the leads didn’t break on me. This is another keeper for me.
The products linked above are affiliate links, to help us continue to add value through this newsletter. If you click the link and make a purchase, we may earn a small commission. Thanks!
Tech(nique) Topic: Problems when working with Thick Veneer
Modern veneer is ~ 0.5 mm, 0.020 inches thick. Wood this thin thinks that it is wood, but it’s not 100% sure. It acts like cardboard with a bad attitude. Until the 1990’s (?) veneer was 0.9 mm, 0.028” thick, and it knew it was wood. Modern veneer can nearly always be cut with a knife – the previous edition needed a saw for many species.
Veneering and marquetry products were more robust when the veneer was .9 mm rather than the current thickness, but nearly all modern veneer is used to make the pretty cover for plywood panels. This task is done in large factories by fancy machines and using exotic glues, so the thinner veneer means that it’s less expensive, which drives the thinner veneer manufacturing. If machines get even more clever there may be a point at which the veneer is so thin that we can’t use it. I hope not, but the trend is discouraging.
Some folks make their own thicker veneer from solid wood, and a few specialist manufacturers make thicker veneers in some species. Certainly Wood sells thicker veneer in 18 species as I write this. They sell cherry, for example, in 1/16”, 1/24”, and 1/28”. There is another company called Ocooch Hardwoods that sells 1/16″ lumber in many species included dyed and the prices are reasonable and one of my students recommends.
This student in particular likes to use 1/16” veneer, but making a picture recently he noticed that some sheets were marginally thinner than others. He asked me whether it would press flat and I assured him that it would, because the vacuum press will secure all the pieces flat against the substrate and then final sanding would level the front.
That is how it works with standard veneer, but not with 1/16” veneer! The additional stiffness of the thicker veneer combined with the bevels conspired to hold the thinner veneer off of the substrate.
Silas Kopf and Patrick Edwards both use mechanical presses to glue their marquetry to the substrate. I had thought this an affectation but they both use thick veneer, and mechanical presses provide much more force for flattening down the veneer. Silas uses an EPDM (rubber) sheet over the veneers to account for the varying thickesses of his thick veneers. I had seen this but hadn’t recognized why until I learned about the issues with the 1/16” veneer.
Having thought about it some, it seems that for double bevel marquetry the vacuum press may not be strong enough to force the veneers flat against the substrate. I suspect that for packet cutting the vacuum press is sufficient, because there should be no overlap and minimal binding between the pieces. If you plan on using thick veneer for Double Bevel marquetry and have unlimited funds and space, a mechanical press may be in your future. For the rest of us, a good rubber backer, deep throated clamps and shaped cauls are in order. Fine woodworking wrote an article in the March 2011 (#218) on making and using these cauls. I have heard that Harbor Freight makes deep throated clamps, which I haven’t tried yet. For small pictures a book press may also work.
Have any of you got a successful technique for gluing down variable thickness thick veneers? If you have answers I’d like to let everyone know.
return to the running with chisels archive
return to top
©️ 2025 Heller & Heller Furniture | Privacy Policy | Terms
