Running with Chisels Vol. 7
Marquetry tips
Browse by Category:
Welcome
Our corner of the internet dedicated to decorated furniture
#saynotonakedfurniture
#dressyourfurniture
rwc archive
tools
classes
Vol 7. | Nov. 3, 2023
Welcome to Running with Chisels, or welcome back.
You may have noticed that this edition would typically have been sent in October, but: better delayed than never. Let’s get to it!
In this edition of Running with Chisels:
- Ask Dave: How to cut veneer perfectly straight?
- Events & Classes: 2024 Update
- Around the Shop: the Collaboration Piece
- Decorative Arts Museums worth a Visit: the VMFA
Ask Dave: How to cut veneer perfectly straight
I interpret this question as – how do I cut two dead straight pieces of veneer, so that I can seam them together and have no gap?
This is the basic cut in veneering, and it is both straightforward and not at all! This is the key technique for joining pieces of veneer, radial veneering or for making chessboards. There is an excellent write-up on making chess boards in Craig Thibodeau’s book “The Craft of Veneering”.
Tools required are simple: a sharp knife or a veneer saw, a straightedge, blue tape, and veneer tape.
- My preferred knife is the Olfa ¾” black bladed box cutter (see my favorite tools PDF) . If the wood is very hard or cranky, I use a veneer saw.
- My straightedge is a piece of bb ply with sandpaper glued to the underside.
- ¾” 3M blue tape and white LV veneer tape, and a wet sponge.
- A cutting mat or piece of mdf/ply under the cuts will save your work surface from scoring.
The basic technique:
- Decide where the cut(s) will be made. Place the straightedge so that it is covering what you are keeping. Maintaining steady pressure from the side of the cutter on the straightedge, lightly score the veneer. I cut towards myself, with the knife on the right, since I’m right-handed. Two or three light strokes develops a channel the blade will run in. You can increase cut weight once that channel is defined. The likeliest places to not cut are at the two ends.
- Cut until the excess jumps away.
- Once the two matching edges are cut, I give one or two strokes of the veneer edge on flat sandpaper. This removes little knurbles that otherwise keep the gap open.
- Place the two edges together, back sides up. Take a 3” piece of blue tape and stick half of it on the left piece, in the middle. Using your fingertips, pull the seam tight, pull on the blue tape, and tape the seam closed. The blue tape stretches slightly and holds the seam in tension.
- Repeat every few inches. The seam should be dead tight.
- Put a full length piece of blue tape along the seam and burnish it with a brass brush. That strengthens the joint, which can then be veneer taped on the other (show) side.
That’s great when it works, which (with some practice) should be nearly all the time.
Troubleshooting
If it doesn’t:
- Disassemble the seam. Look along the cut on each of the two pieces. Are they smooth? No, because if both of them are then the seam would have been tight. Either there is a divot, or an edge is not straight. Divots are most often from a dull blade or cutting too hard. The crankier the veneer, the sharper the blade needs to be and the lighter the first few cuts. Use a fresh blade and try again, cutting lighter.
- If the line isn’t straight, then either the straightedge moved while cutting or the blade wasn’t against the straightedge. I have sandpaper on the bottom of my straightedge so it doesn’t move. Grainy veneers can steer the blade off the straightedge and then the line is random. This happens most often when the target line is almost parallel to the wood grain. The wood grain will press the blade into the straightedge if you cut in the other direction instead, so turn the piece over and cut it again.
- The wandering grain issue can also be addressed by switching to a saw instead of the knife.
- Another potential issue is blowout on the trailing edge, when cutting across the grain. Certain woods such as teak are notorious. Burls tend that way also. When in doubt, tape the entire trailing edge with blue tape, which reinforces the fibres. You can also cut the last ½” first, with the knife or a chisel, but taping the edge is usually sufficient.
Class Schedule Updates
I have just updated the class schedule for next year out into the fourth quarter, and I often fill up some of the classes during the my in-person event coming up. For best selection, you might want to check the schedule before the November 11/12 Studio Tour.
Some classes are now full, some classes we have added or changed dates, and we have finalized the second half teaching schedule. Here is the complete schedule:
Feb. 17-18 Painting with WoodClass is full- Mar 2-3 Double Bevel II
- Mar 9-10 Geometric Marquetry at the Fredericksburg (VA) Workshop new venue
- Mar 16-17 Geometric Marquetry
- Mar 23-24 VFM I
- Mar. 30-31 Double Bevel I
- May 4-5 Painting with Wood new date
- May 18-19 Geometric I
- May 25-26 Painting with wood at the Fredericksburg (VA) Workshop – new venue
- June 8-9 Veneering for Furnituremakers II now a two-day class
- June 15-16 Veneering for Furnituremakers I – Sam Beauford Woodworking Inst (Adrian MI)
- June 17-22 Introduction to Marquetry and Veneering – Sam Beauford Woodworking Inst (Adrian MI)
- Aug 12-16 Introduction to Marquetry and Veneering – Sam Beauford Woodworking Inst (Adrian MI)
- Aug 17-18 Veneering for Furnituremakers I – Sam Beauford Woodworking Inst (Adrian MI)
- Sept 7-8 Double Bevel I
- Sept 28-29 Painting with Wood new date
- Oct 19-20 Double Bevel II new date
- Oct 26-27 Geometric Marquetry II new date
New Class Location: The Fredericksburg Workshop
I am pleased to announce that I will be teaching both the Geometric Marquetry class and the Painting with Wood class in March and May of next year, at their facility. I hope to meet some new folks there and maybe some of you, if that location or class timing is more convenient.
I will also be teaching at the Wood and Shop in Earlysville next year, likely in May. We’re still finalizing details, but as always you’ll be the first to hear.
Around the shop
Work in progress
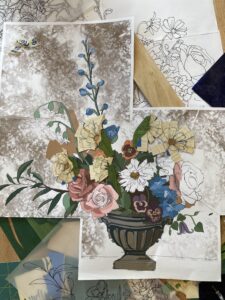
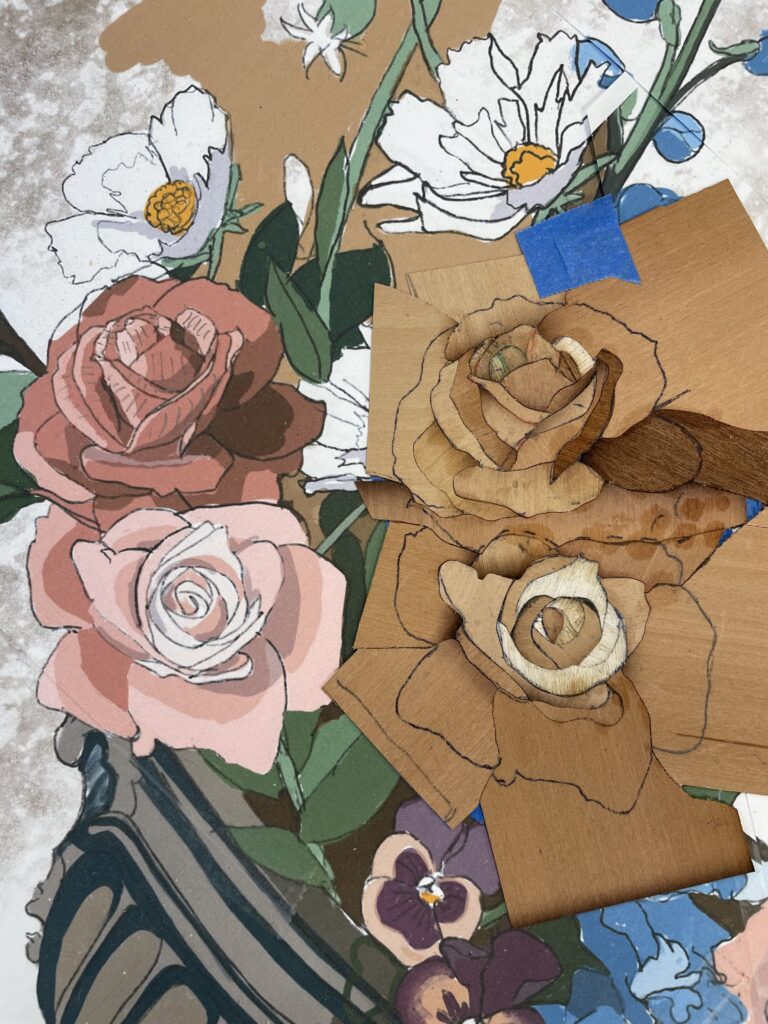
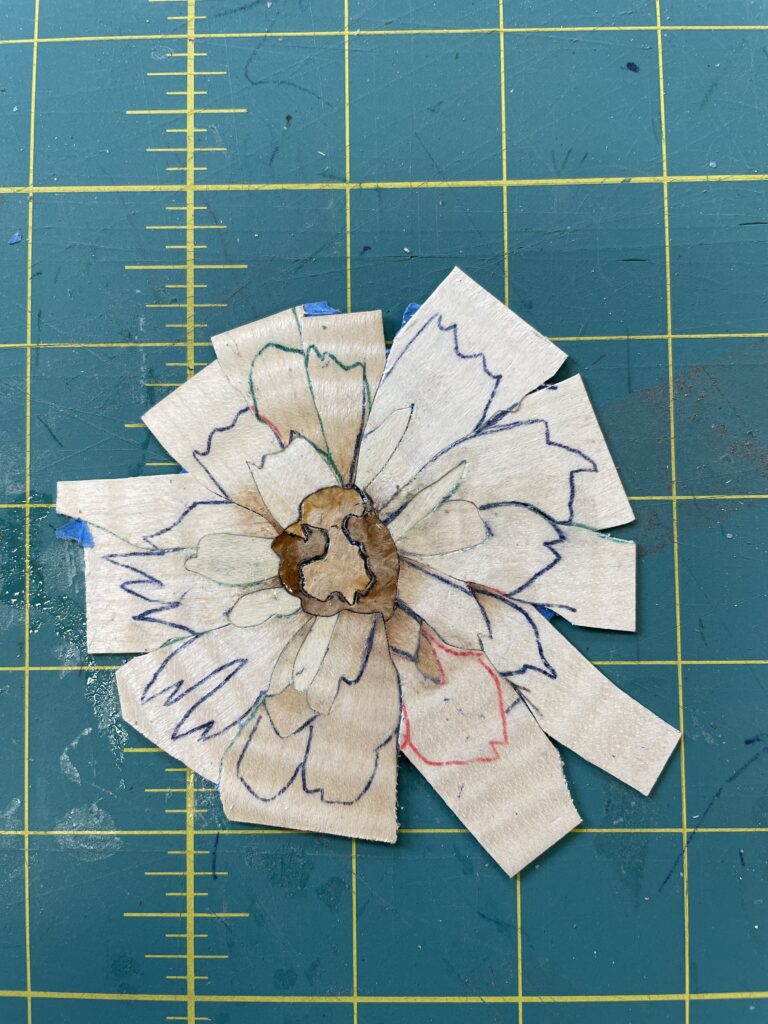
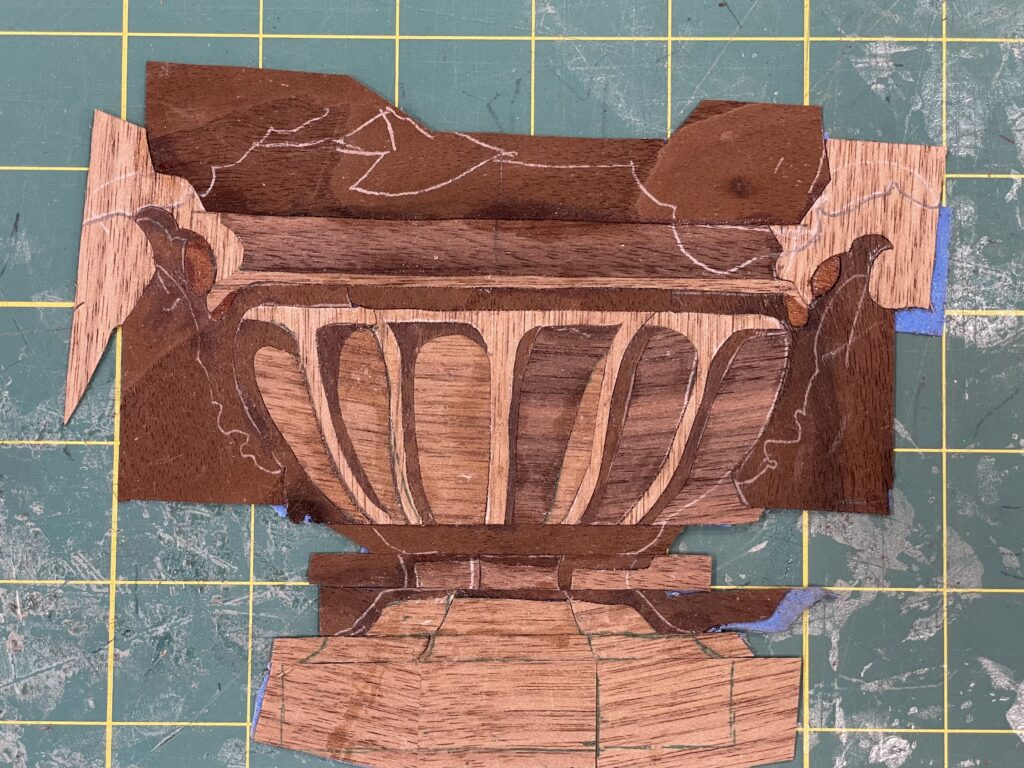
I am in the process of making a statement marquetry picture, which is also a collaboration piece with our daughter Jennifer. She is an architect and artist who makes Botanical Fine Art. She painted a floral picture, and I am making it in marquetry.
It is …… challenging. I have another whole week to get it done, so wish me luck.
See the shop during the Studio Tour
If you are in area, next weekend (November 11-12) is the Artisans Studio Tour. We are Studio 8. I will be demonstrating marquetry all weekend, and I will have items and classes for sale. Jennifer will have her botanical art, and my good buddy Steve Palmer will be displaying his funky Steampunk pottery. We’d love to have you stop by.
Art Museums worth a Visit: the VMFA
Why should you visit an art museum as a marquetarian?
One of my key inspirations for making beautiful furniture is seeing beautiful furniture. It raises the bar and shows what is possible. Although this newsletter is about marquetry rather than furniture, my preferred use of marquetry and veneering is of course to decorate furniture. Books and museums are my two primary sources. Museums have the advantage of letting you see three sides of the pieces. Some Historic Houses don’t allow photos but nearly all museums do, without a flash.
The Virginia Museum of Fine Arts (or VMFA)

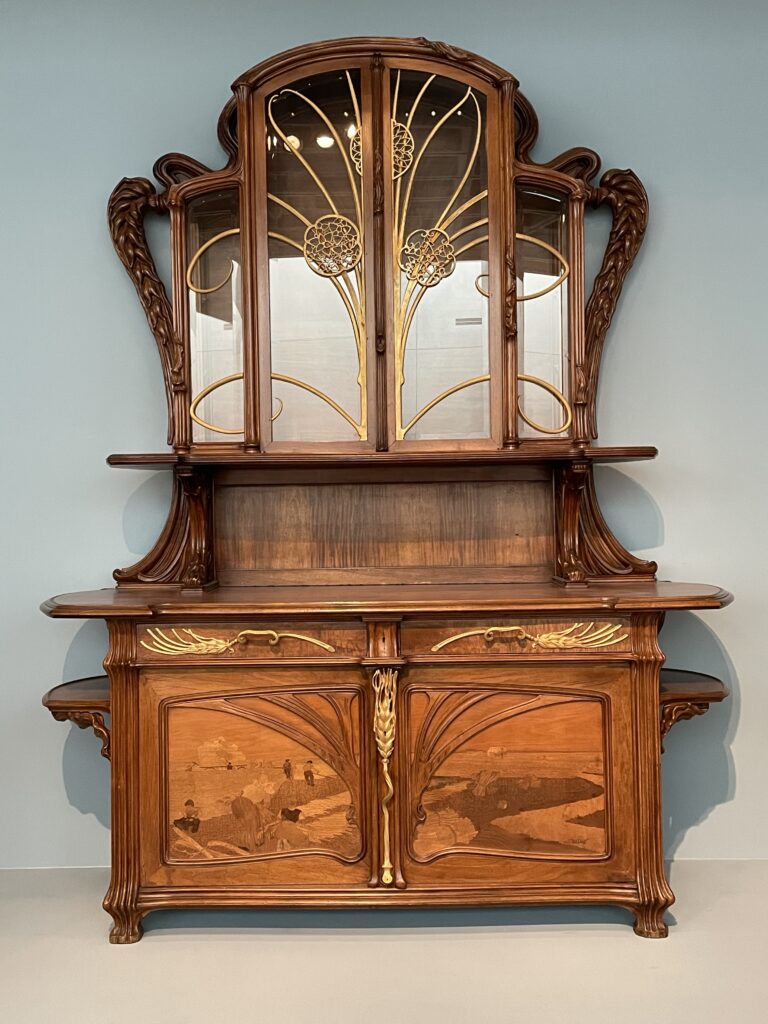
The Virginia Museum of Fine Arts is our local museum, located in Richmond VA. Generous donors have funded a large airy space with an eclectic mix of items. It has a large collection of Art Deco furniture, including several Ruhlmann pieces, rare for the US. It also has several Majorelle and Galle Art Nouveau suites. The Galle pieces have intense marquetry. There is also a substantial amount of Art Nouveau and Art Deco jewelry and silverware, for additional examples of design motifs. The collection of older furniture is perfunctory, which is reasonable given the extraordinary collection at the DeWitt Wallace in nearby Williamsburg, which I will cover in the next newsletter.
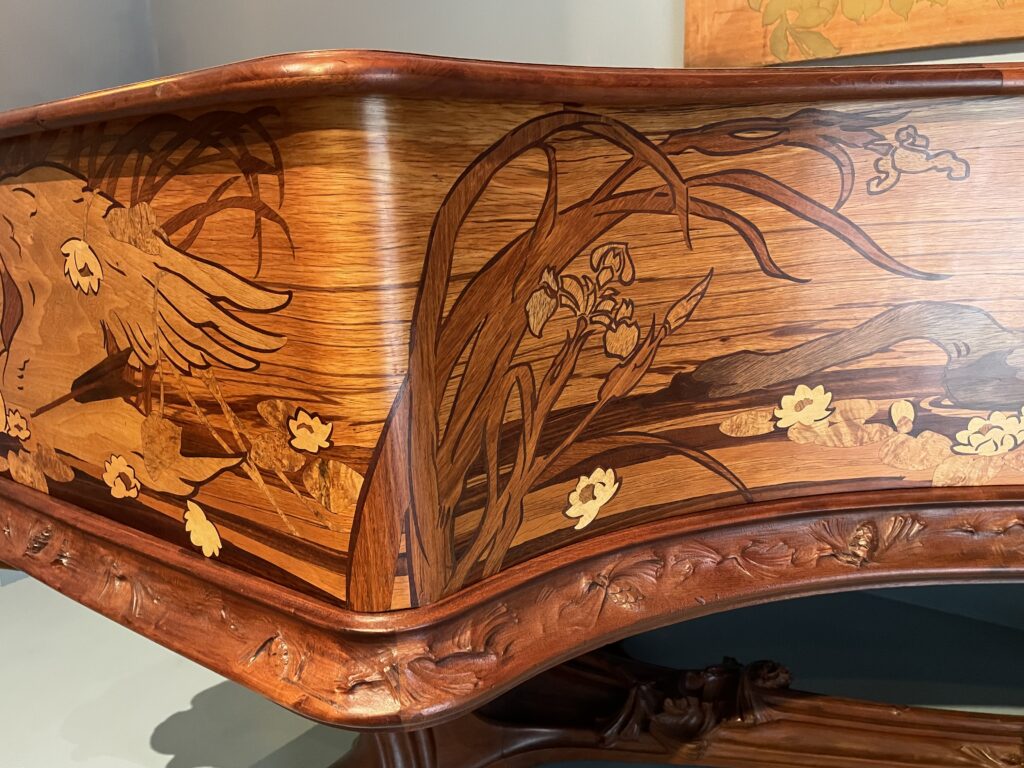
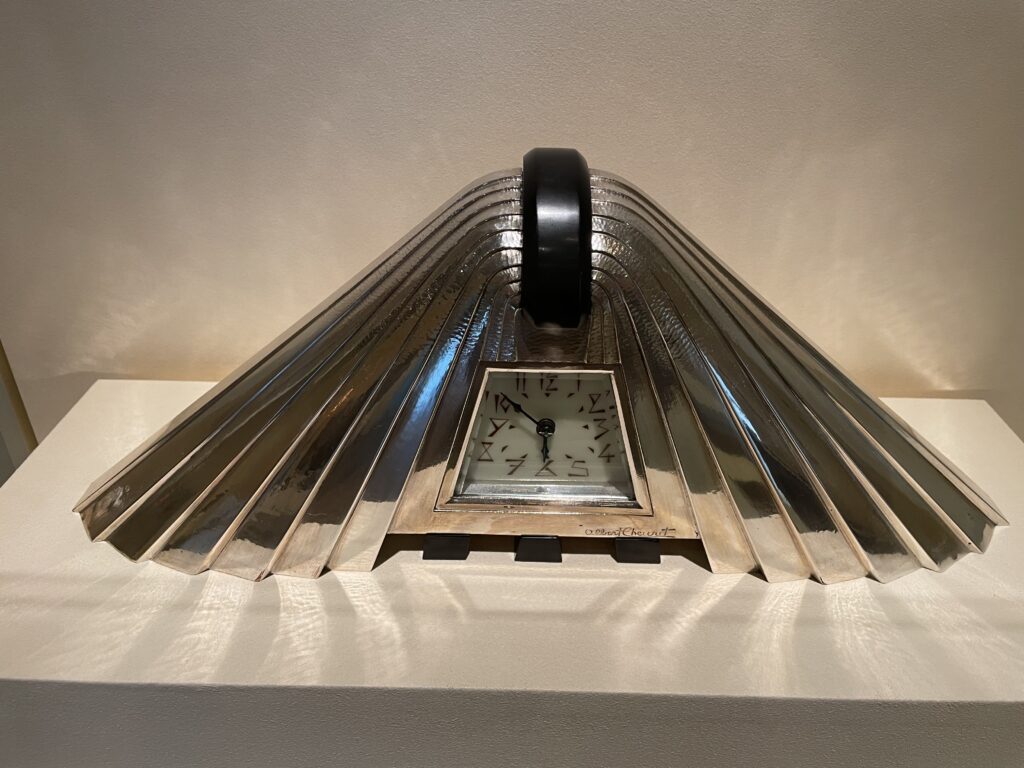
My beef with the VMFA is that the furniture is too far from the viewers, and lights are dim. It is challenging to take great photos to use for your reference. If you want to see the details of Ruhlmann pieces specifically the Musee des Arts Decoratif in Paris is the place to go – dozens of pieces, and so long as you don’t touch them you can get as close as you’d like
return to the running with chisels archive
return to top
©️ 2025 Heller & Heller Furniture | Privacy Policy | Terms